Wider Still And Wider
This chapter discusses using very wide (and very tall) scrolling images in QLab. The examples and scripts in the text are from the QLab 5 version; downloadable example workspaces are provided for QLab 4 and QLab 5. If you are using QLab 4 and wish to adapt the scripts at all, use the scripts in the example workspaces instead of the ones shown here.
One of the limitations of Video cues in QLab and many other applications is a hard texture map limit of 16384 pixels. This means no images or videos with a width or height greater than 16384 pixels can be rendered. Although most videos and images are much smaller than this, very wide images can be useful for creating scrolling panoramas. It’s fairly easy to hit the pixel limit with Text cues, particularly those used for long, scrolling lower thirds titles. At a font size of 100 points, you can only fit about fifty words within the pixel limit.
In QLab 4, cues which exceed the limit render as a solid white block. In QLab 5, these cues break and are therefore listed in Workspace Status → Warnings as having an invalid video size.
Scrolling Signs
The first example we will look at is a workspace that uses an AppleScript to ingests text from a standard text file and splits it into a number of individual Text cues, each within the maximum pixel width limit. The script then calculates X axis translation offsets for all the cues and puts them in a Group cue. The Group can be treated as one super-wide image and scrolled by using a relative Fade cue targeting the Group and fading the translation parameters.
As a bonus, the example workspace shows how to render the text as either a plain lower third-style crawl and as simulated scrolling LED sign mapped onto two movie theatre marquees.
Here it is in action:
How It Works
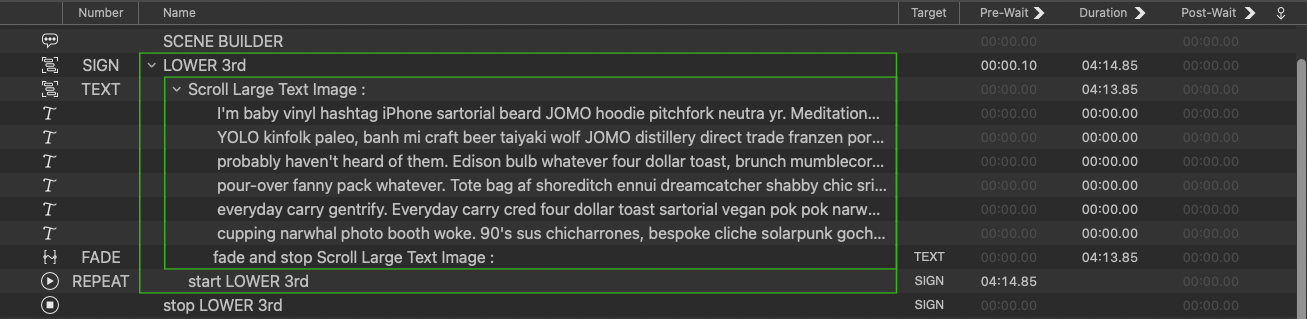
The Scrolling Sign Scene Builder consists of a Timeline Group containing a Timeline Group numbered “TEXT”. This Group contains the Text cues which form the super wide text image (the example in the screenshot is over 100,000 pixels wide.) Each Text cue has a different X translation, which results in all the Text cues being arranged along the X axis in order. This Group also contains a Fade cue targeting the TEXT Group cue, which fades its X translation by the combined pixel width of all the Text cues in the Group.
It would be very tedious to type the contents of each Text cue, calculate the offsets, and set up the Fade cue, so this is automated with a Script cue, triggered by a hotkey (1 in the demo.) The script is as follows:
-- Script to convert a text file to multiple QLab text cues within permitted pixel dimensions of a texture.
--set up font and  font size in settings/cue templates/text
--set screen width of text scroll surface or stage
set theYOffset to 20 --required for QLab 5 to recentre scrolling text
--initialise
set oldTIDs to AppleScript's text item delimiters
set AppleScript's text item delimiters to {" ", (ASCII character 10), (ASCII character 13)}
set theOutputWidths to {} --a list of the width of each line of the sign

set thePixels to 15000
--convert text file to cues
tell application id "com.figure53.QLab.5" to tell front workspace
	stop cue "SIGN"
	set the selected to cue "SCRIPT"
	set theFile to choose file of type "txt" with prompt "Convert a text file to multiple QLab text cues, within permitted pixel dimensions of  texture map. " & return & return & "Select a text file:"
	set theFileContents to read theFile
	set theCueIndex to 1
	make type "text"
	set thetextcue to last item of (selected as list)
	set the q number of thetextcue to "temp" & theCueIndex
	set the text of thetextcue to ""
	set thelinelength to 0
	--get the stage width for the stage the text cue is patched to
	make type "network"
	set theselected to last item of (selected as list)
	set the q number of theselected to "ERASEME"
	set the custom message of theselected to "/cue/ERASEME/notes \"#/cue/temp1/stage/size/width#\""
	delay 0.1
	set the selected to thetextcue
	delay 0.1
	start cue "ERASEME"
	delay 0.1
	set thenotes to notes of cue "ERASEME"
	set theScreenWidth to thenotes as integer
	delete cue "ERASEME" of parent of cue "ERASEME"
	repeat with theword from 1 to count of text items of theFileContents
		set the text of thetextcue to text of thetextcue & " " & text item theword of theFileContents
		set thelinelength to item 1 of (text output size of thetextcue as list) as integer
		if thelinelength is greater than thePixels then
			make type "text"
			set thetextcue to last item of (selected as list)
			set theCueIndex to theCueIndex + 1
			set q number of thetextcue to "temp " & theCueIndex
			set the text of thetextcue to ""
			set linelength to 0
			set text of thetextcue to ""
		end if
	end repeat
end tell

tell application id "com.figure53.QLab.5" to tell front workspace
	try
		delete cue "TEXT" of parent of cue "TEXT"
	end try
	set thecues to cues of front cue list whose q number begins with "Temp"
	repeat with thecue in thecues
		set theoldcuenumber to q number of thecue
		set the q number of thecue to "tempx"
		set the text of thecue to (text of thecue & "\\") --pad the text cue so some whitespace is  is added to the lines before 	their widths are calculated

		--get the image size for the file the cue targets or the size of the text image
		set theOutputSize to text output size of cue "tempx"

		--erase text padding after gap between text cues has been calculated
		set thetext to text of thecue as string
		set thetids to AppleScript's text item delimiters
		set AppleScript's text item delimiters to "\\"
		set the text of thecue to text item 1 of thetext
		set AppleScript's text item delimiters to thetids

		--clean up
		set q number of thecue to theoldcuenumber
		--set video properties for the cue
		set the full screen of thecue to false
		set scale x of thecue to 1
		set scale y of thecue to 1
		set the translation y of thecue to theYOffset
		set end of theOutputWidths to item 1 of theOutputSize
	end repeat

	--initialise accumulators fro running image width and height to enable image offsets to be calculated
	set widthAccumulator to 0

	--set the translations for each cue
	repeat with eachcue from 1 to the count of thecues
		set outputImageWidth to item eachcue of theOutputWidths
		set thisCue to item eachcue of thecues
		set the translation x of thisCue to ((widthAccumulator - (theScreenWidth / 2 - outputImageWidth / 2))) + (theScreenWidth)
		set widthAccumulator to widthAccumulator + outputImageWidth
	end repeat

	--make a relative fade cue to move all the images together and set its duration to a suitable value to test it
	make type "fade"
	set thefadecue to last item of (selected as list)
	set the do translation of thefadecue to true
	set the q number of thefadecue to "FADE"
	set the translation x of thefadecue to -((widthAccumulator - theScreenWidth)) - (theScreenWidth * 2)
	set stop target when done of thefadecue to true
	set the duration of thefadecue to (translation x of thefadecue) / -350
	--make a timeline group and move  all the cues  all the cues into it
	make type "group"
	set thegroupcue to last item of (selected as list)
	set the autoload of thegroupcue to true
	set the mode of thegroupcue to timeline
	set the q number of thegroupcue to "TEXT"
	set the q name of thegroupcue to "Scroll Large Text Image : "
	set the cue target of thefadecue to thegroupcue
	repeat with eachcue in thecues
		move cue id (uniqueID of eachcue) of parent of eachcue to end of thegroupcue
		set q number of eachcue to ""
	end repeat
	move cue id (uniqueID of thefadecue) of parent of thefadecue to end of thegroupcue
	move cue id (uniqueID of cue "TEXT") of parent of cue "TEXT" to beginning of cue "SIGN"
	set the pre wait of cue "REPEAT" to (duration of cue "TEXT") + 1
	delay 1
	--start the cue to test it
	load (cue "SIGN")
	delay 1
	start cue "SIGN"
end tell

--clean up
set AppleScript's text item delimiters to oldTIDs
The script assumes that all the parameters of the Text cues, like text formatting and stage routing, have been set up in Workspace Settings → Templates → Cue Templates → Text. You must also set the Fade cue’s template to use a linear fade curve; since the text will start and end off screen, no ramps are required.
At the top of the script is a variable that can be set by the user, theYOffset. This variable (used only in the QLab 5 version of this script) is used to vertically center a single line of text, as the text will generally look slightly lower than the center. A value of about 15% of the font size should be used. The value can generally be set to 0 for QLab 4.
AppleScript’s text item delimiters are then set to separate any text by whitespace, carriage returns, or linefeeds.
A variable, thePixels, is set to 15000; this will be the minimum line length in pixels for each line of text. This allows for 1384 pixels worth of overflow to complete the final word on each line, which of course will vary.
An empty list is created, named theOutputWidths, to store the pixel width of each line of text.
The cue numbered “SIGN” is stopped, in case it is currently running, and the cue numbered “SCRIPT” is selected so any newly created cues are made under the Script cue.
A choose file dialog is provided for the user to select a text file for ingest into a variable named theFileContents.
A Text cue is created and given a temporary cue number.
This Text cue is used in an OSC query to set theScreenWidth variable used for the calculation of offsets later.
Often, when using OSC in scripts, we can send the OSC message to QLab port 53535 using a shell script. In this instance, we need to get a reply we can read. To enable this, we have to use actual Network cues with OSC messages, which the script will create, start, and delete as needed.
e.g to get the width of the stage that a cue is patched to:
--get the stage width for the stage the text cue is patched to
make type "network"
set theselected to last item of (selected as list)
set the q number of theselected to "ERASEME"
set the custom message of theselected to "/cue/ERASEME/notes \"#/cue/temp1/stage/size/width#\""
delay 0.1
set the selected to thetextcue
delay 0.1
start cue "ERASEME"
delay 0.1
set thenotes to notes of cue "ERASEME"
set theScreenWidth to thenotes as integer
delete cue "ERASEME" of parent of cue "ERASEME"
A repeat loop reads each word (text item) in theFileContents and adds it to the new cue. After each word, it checks that the pixel width of the line is less than thePixels (15000 in this example.) If it’s greater, then a new line is created, and the process is repeated on the new line, and so on, until all the words in theFileContents have been read.
The current Group cue numbered “TEXT” is then deleted.
A repeat loop processes all the cues in the workspace whose numbers begin with “temp”, i.e., the Text cues we have just created.
The end of the text of each cue is padded with a space, so each line is separated when all the cues appear as a single line of text.
The width of the text (with the padding we just added) is obtained from item 1 of the text output size property of the Text cue.
The padding is now no longer needed because the cues’ X axis offsets have been calculated. So, the padding is removed.
The geometry of the cue is set, and its output width is added to the variable containing the list of output widths.
A variable named widthAccumulator is set to 0.
A repeat loop goes through the newly created cues again. It sets the X axis translation of each cue to follow on from the previous line using the list of output widths and the widthAccumulator variable, which is incremented after each cue with that cue’s width.
A Fade cue is made with an X axis translation calculated from the widthAccumulator variable, which is currently set to the width of all the Text cues. Its duration is calculated from the X axis translation to give a consistent speed regardless of the total width of all the Text cues. The speed of the scroll can be altered by changing this duration.
A new Group cue is created and numbered “TEXT”, and all the new cues that the script has created are moved into that Group.
That new Group cue is moved to the original position of the cue numbered “TEXT”, which we deleted at the beginning of the script.
The Cue numbered “REPEAT” is a Start cue targeting the TEXT Group cue. Its pre-wait is set to the duration of that Group plus one second, so the text scroll will repeat continuously. If you alter the duration of the Fade cue in that Group to change the scroll speed, you will have to manually edit the pre-wait of this cue as well.
Finally, the cue is automatically reset and played to ensure everything is set correctly.
Here it is in action:
Once a scrolling lower third has been built, you can cut and paste the entire Group numbered “SIGN” (or just the Group numbered “TEXT” if you only want to change the text in an existing set of cues) to somewhere else in the cue list.
You can then edit the Group cue to change the text crawl from a boring lower third to a more interesting graphic, like the movie theater marquees in the example workspaces.
The first example is a straight rectangular warp.
Which is achieved with these cues
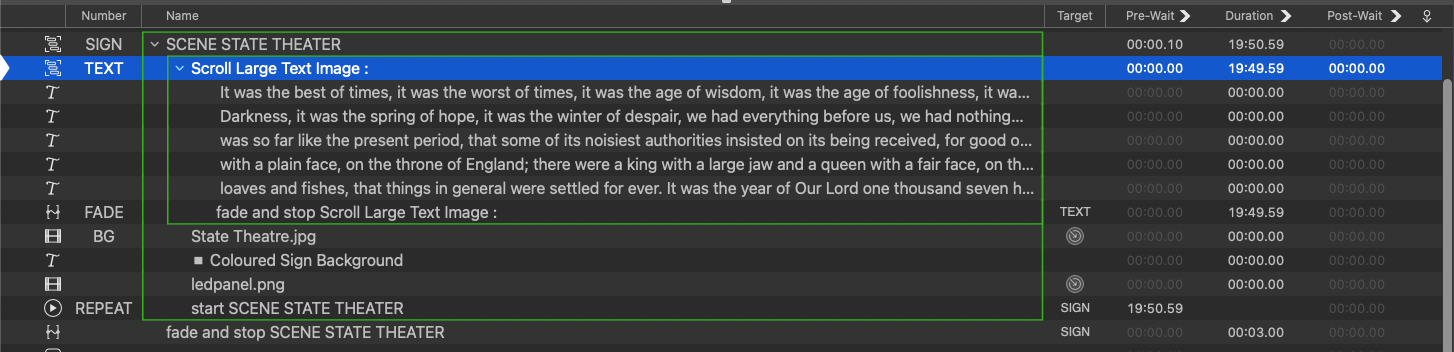
In addition to the text cues and fades, a few other cues have been added:
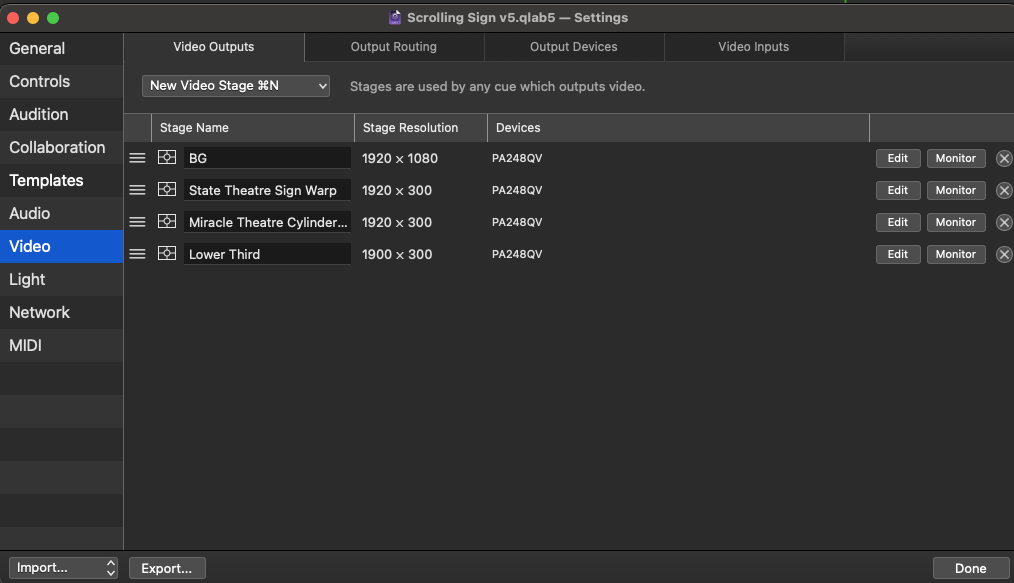
A full screen image of State Theater in Traverse City, Michigan. This needs to be assigned to a separate stage. In the example workspace, this stage is named BG. Here’s a screenshot of all the stages this workspace uses:
All the Text cues must be assigned to a new stage. (State Theater Sign Warp in this example.) You can select all the Text cues and batch-edit their stage assignment in the I/O tab of the inspector, so it’s pretty quickly done.

There are two additional cues which are also routed to this stage.
The colored sign background is a Text cue with a white square character, whose color is changed using the white point video effect in the Video FX tab. It is set to the bottom layer to sit behind the Text cues and provide a colored glow.
A Video cue targeting the image ledpanel.png, which is a black grid on a transparent background, is set to the top layer to give an impression of the scrolling sign being formed of square pixels. If you want to go further with, try using a Pixellate video effect on all the Text cues as well.
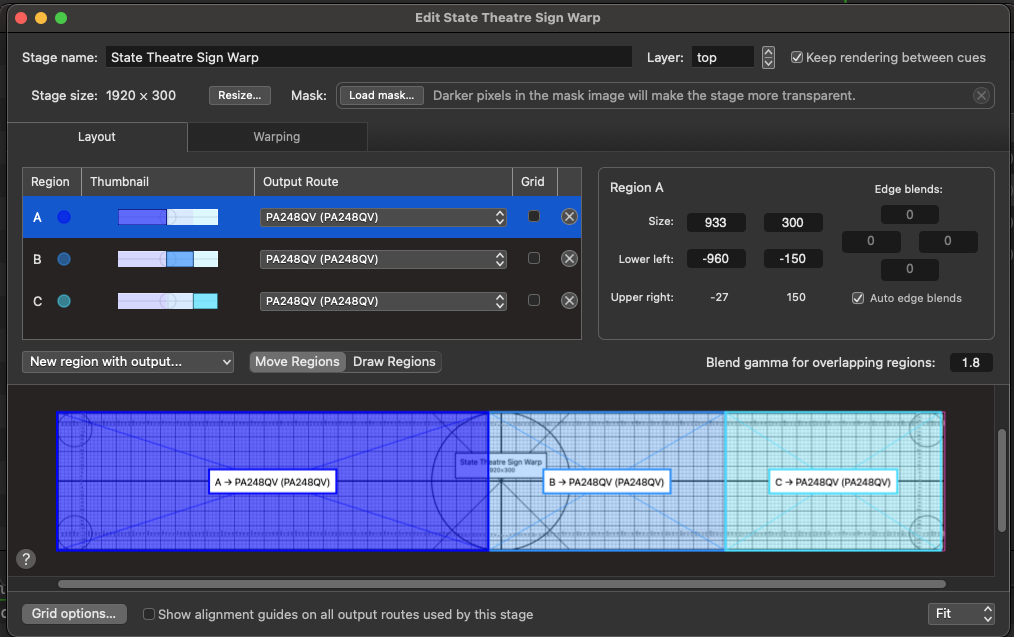
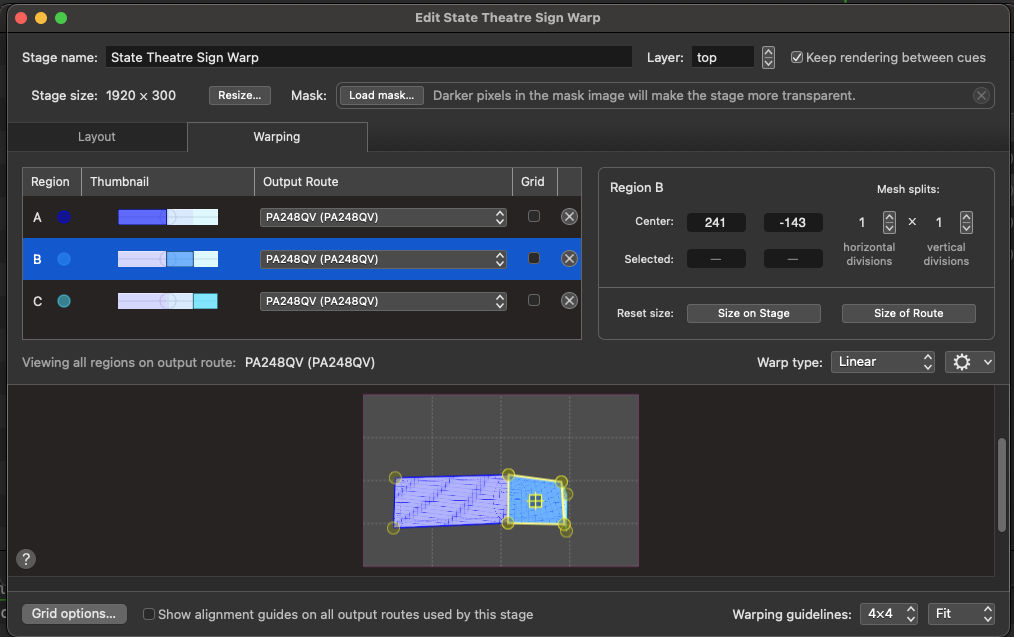
To fit the scrolling text to the sign in the photograph, the State Theatre Sign Warp stage is warped using three regions like this:
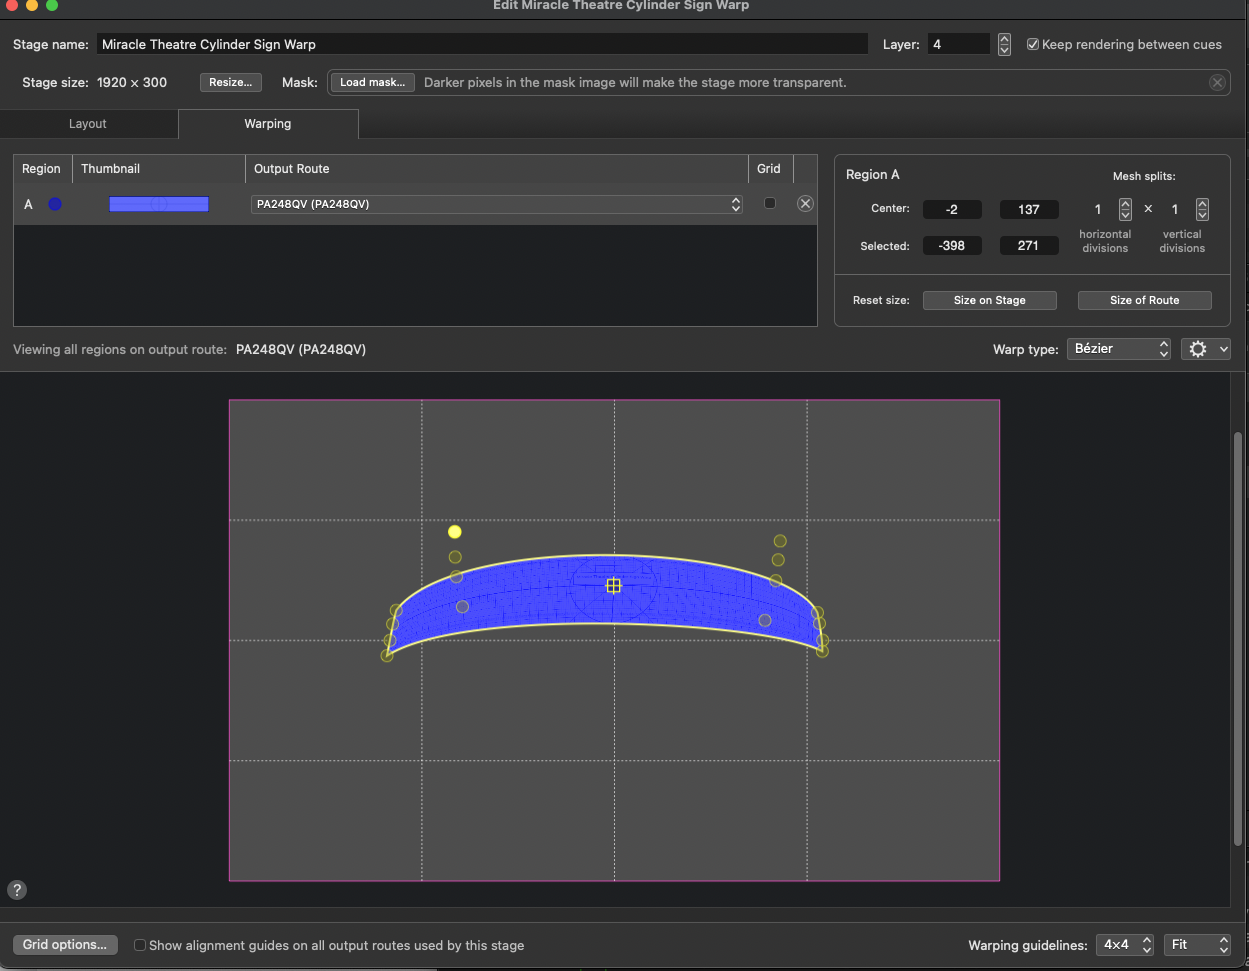
The other sign example in the workspace uses the curved marquee of the Miracle Theater in Coral Gables, Florida:
Warping text onto a complex perspective cylinder shape using Bézier meshes in QLab is challenging but can be achieved with perseverance. It’s best done with the grid on; the grid makes it easier to try to keep the geometry square across the sign as you use the Bézier warps to fit the text to the cylindrical shape of the original sign.
This cue additional finishing touches. The background was edited to make the sign a transparent area. This means that it can appear in front of the Text cue on a higher stage layer, which gives a much cleaner transition between the photograph and the sign. Stages’ layers are set in their respective video stage editors.
The Text cues were batch edited to increase their Y axis scale slightly. The text color of the first Text cue was warmed a shade, the cue copied, and then the font color ‘fancy pasted’ onto the other Text cues in the Group using Paste Cue Properties… from the Edit menu.
Scrolling Panoramas
The Scrolling Panoramas example is similar to Scrolling Signs, but can be used to scroll very large images vertically or horizontally in both directions. It can also start and finish the scrolls with the image on or off screen. It will also work with Text cues when more versatility is required than in the sign example.
The images used in the examples are between 20,000 and 50,000 pixels on their longest side. Images this large can be generated from the output of 2D graphics or 3D modeling programs, made from collages of photographs, made with slit scans of video footage, or sourced from gigapixel photographs. Gigapixel photography generally involves taking many overlapping photographs of landscapes, paintings, or objects and then stitching them together to form a seamless giant photograph. Often these photographs are viewed in web browsers, where the whole photo can be seen at once and then a tiny detail, like a single person a mile away from the camera, can be zoomed in upon. Some of these enormous stitched photographs are available for download on the web. Because of the expense and time involved in preparing these images, most have restrictive copyright and licensing terms, but some are available under Creative Commons licenses, and a few are in the public domain in many territories.
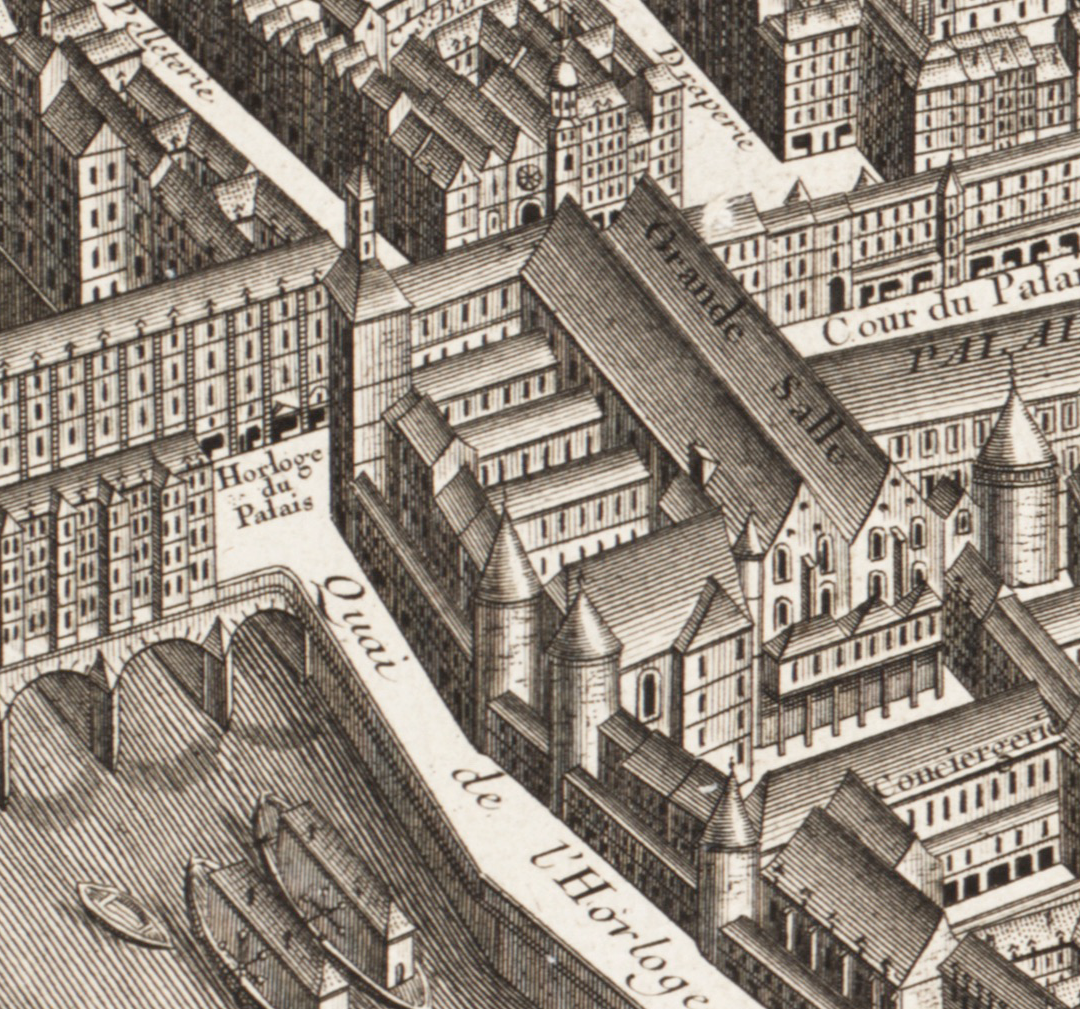
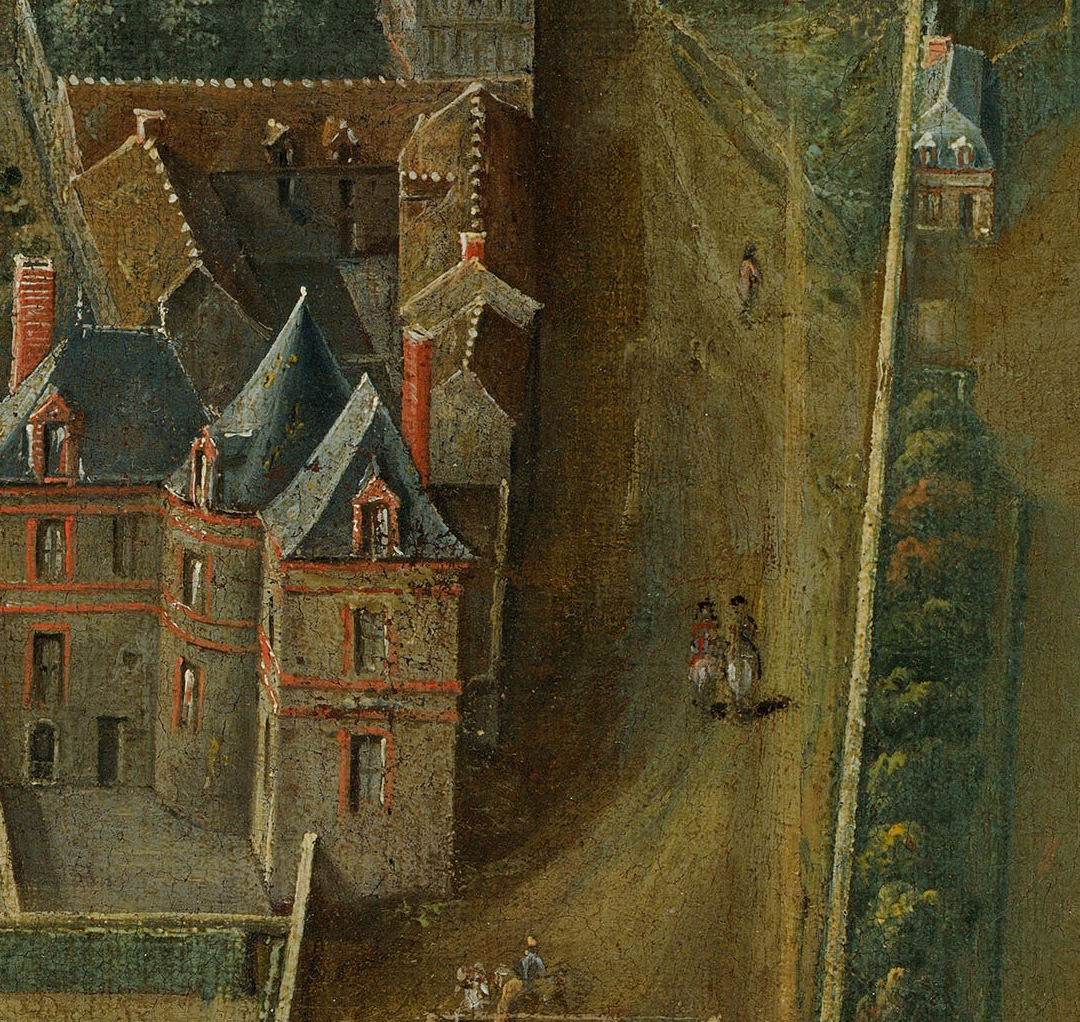
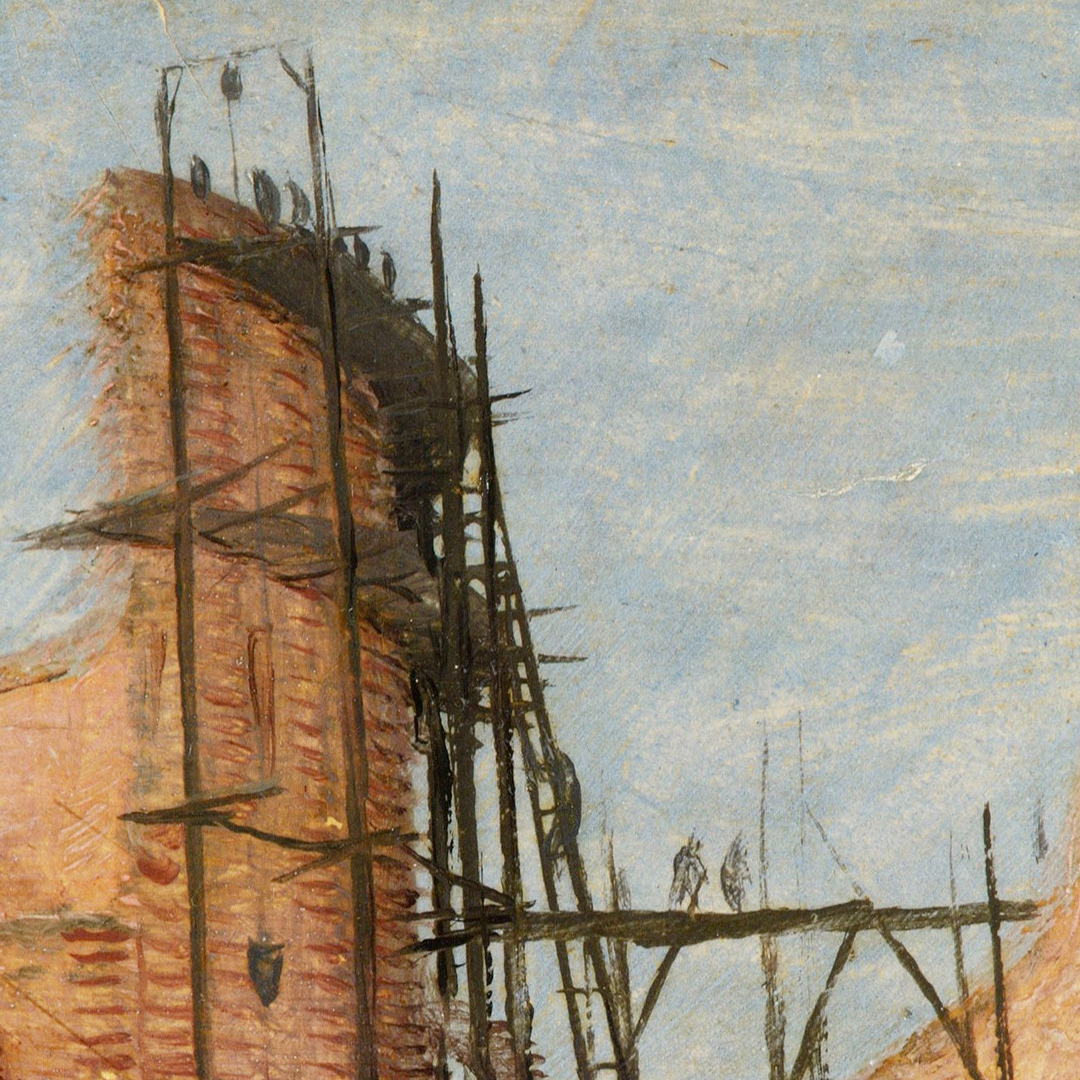
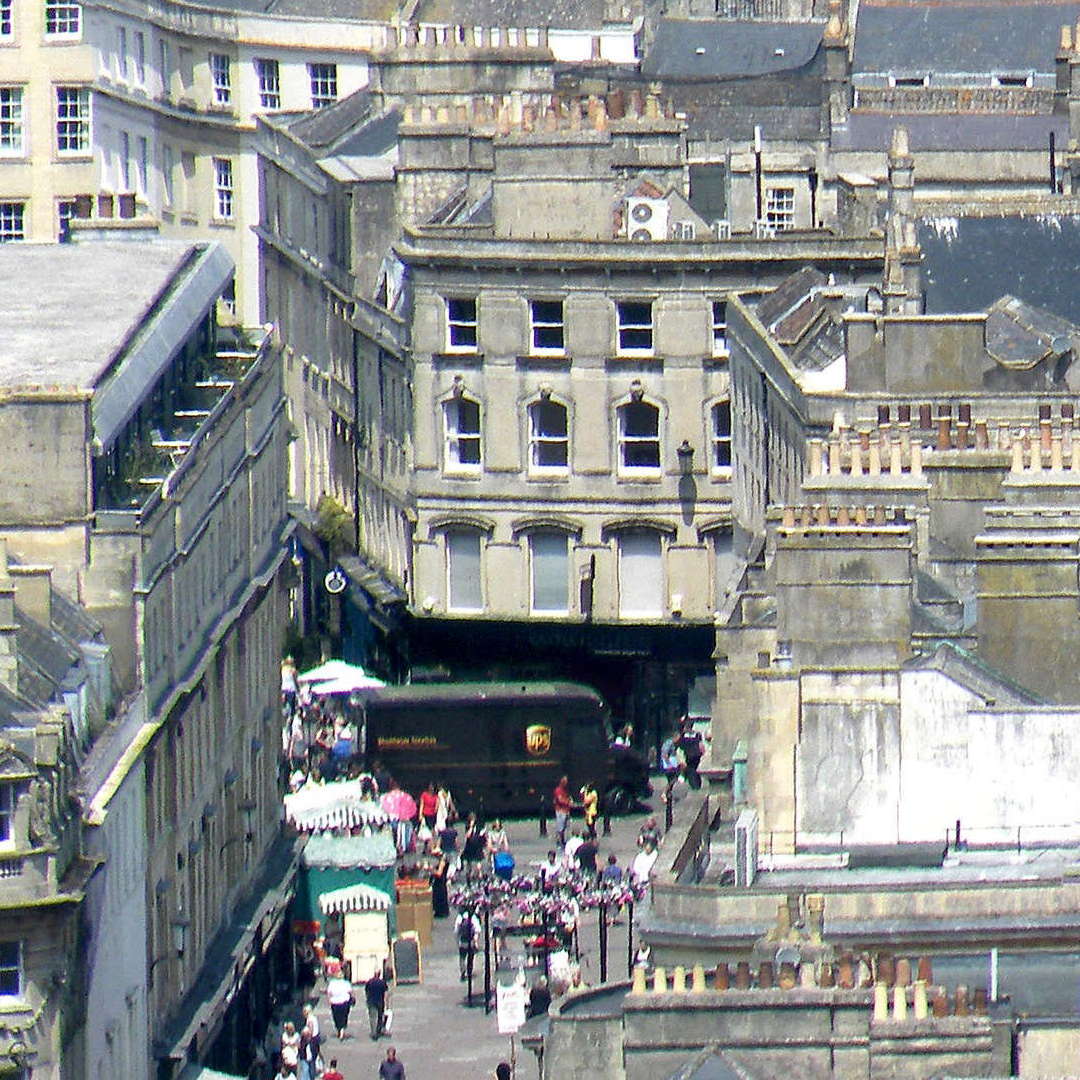
All the images used in the downloadable examples are, as of the writing of this chapter, legal to use and adapt in the United States and the United Kingdom. Outside these territories, they may be subject to different laws and regulations. The current copyright status of all images should be checked carefully for any reuse. In particular, the legal status of photographs of 2D artworks is regularly tested in the courts and can vary from country to country. This example workspace uses thin slices taken from much larger images. Here are reduced versions of the complete photos and a 1080 x 1080 portion of the full-resolution image used in the workspace.
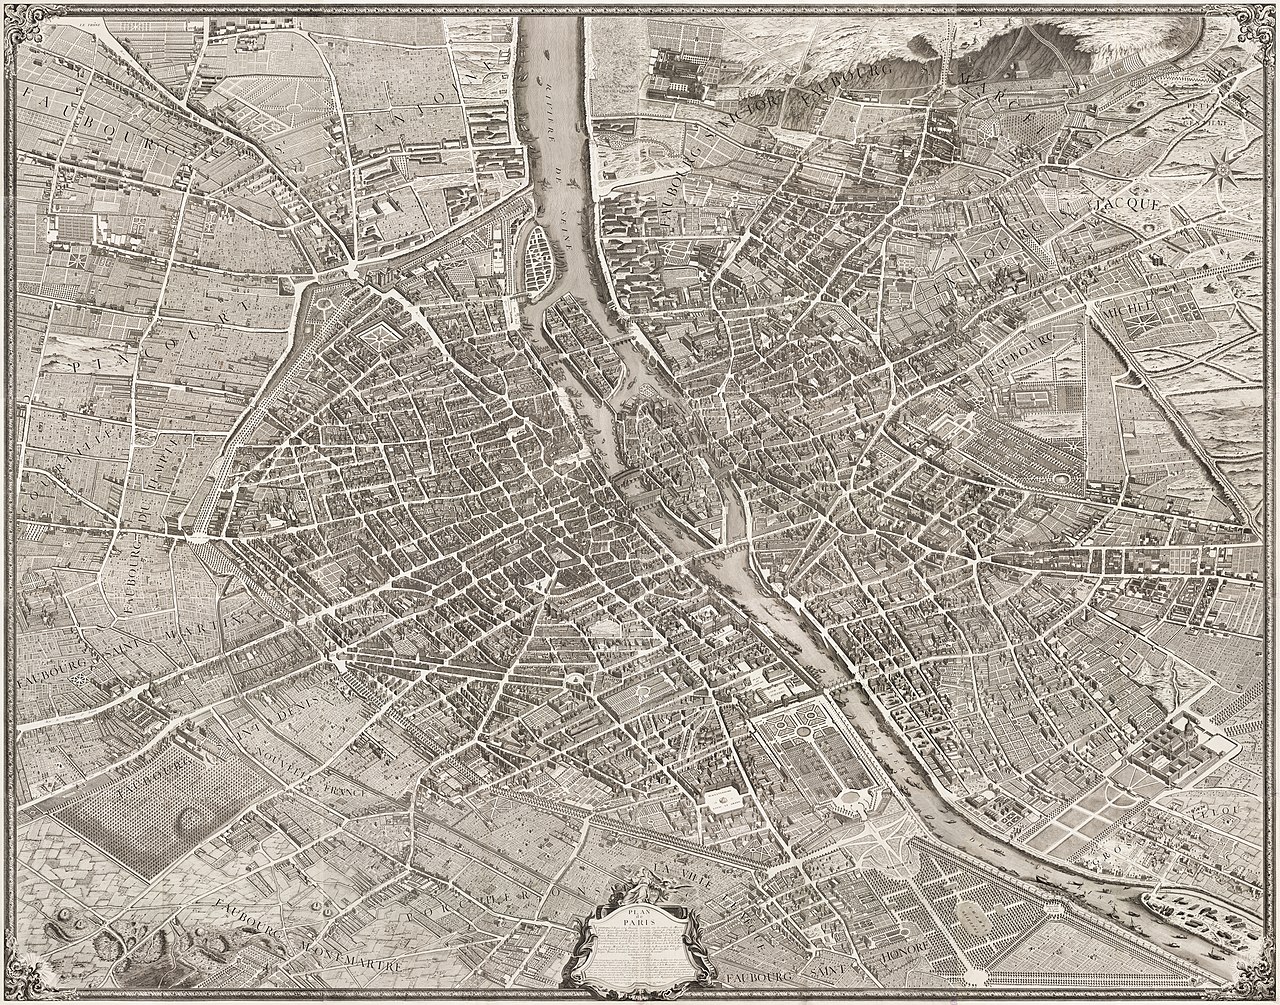
Turgot - Map of Paris 1734
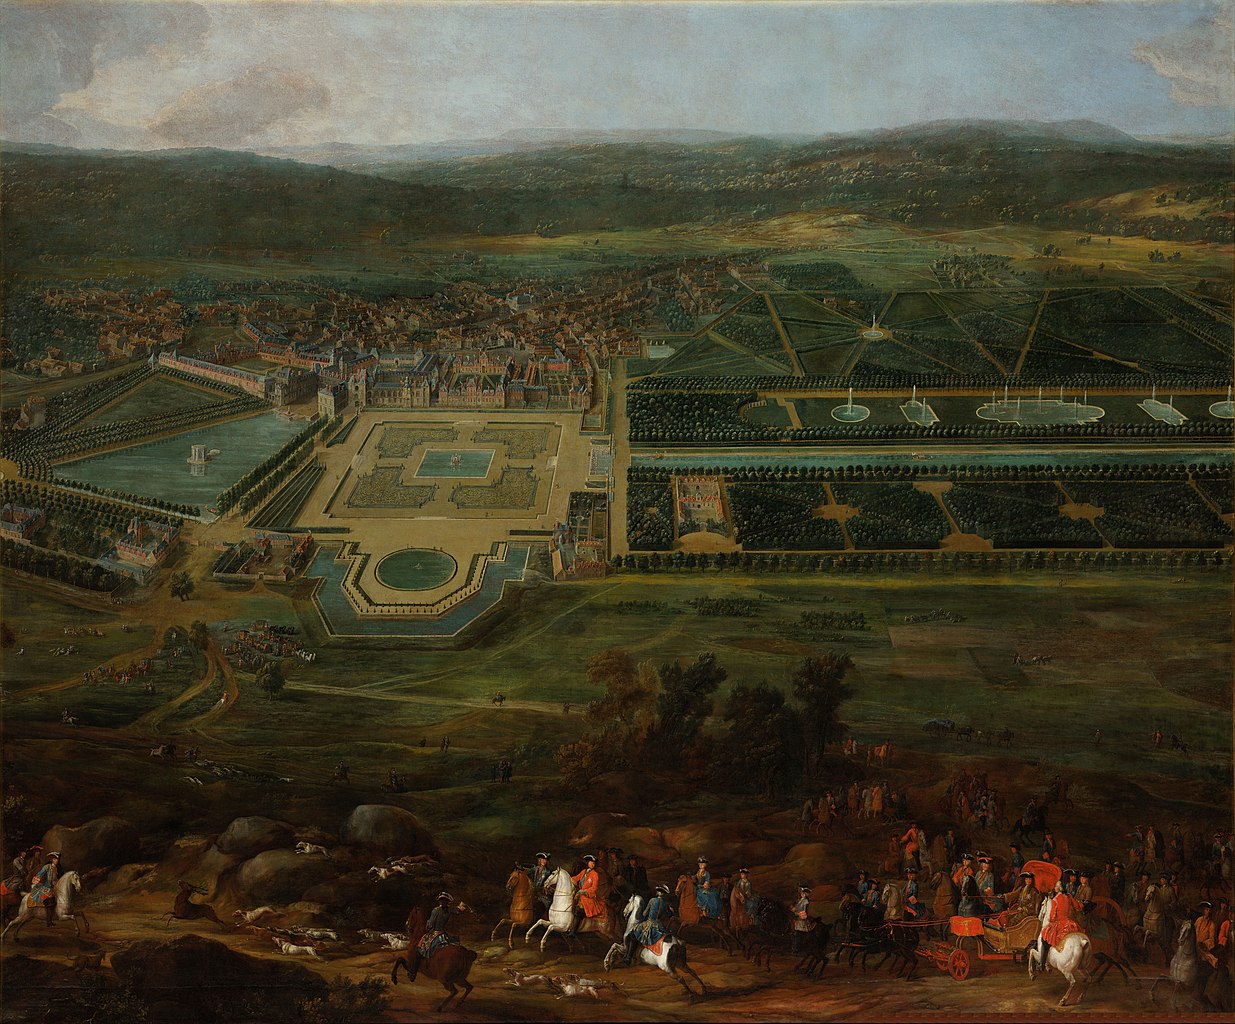
Pierre-Denis Martin - View of the Château de Fontainebleau 1718
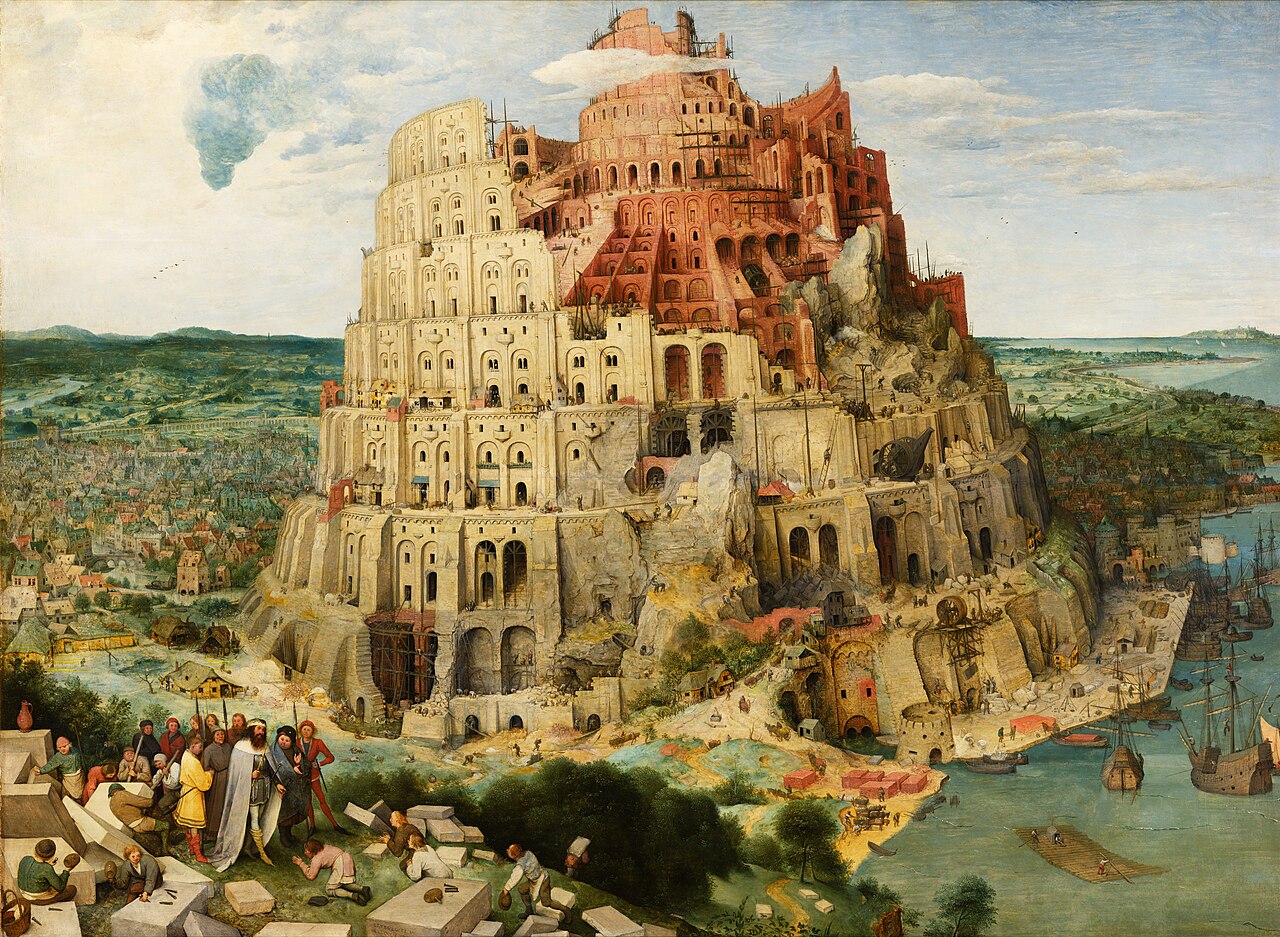
Pieter Bruegel the Elder - The Tower of Babel 1563
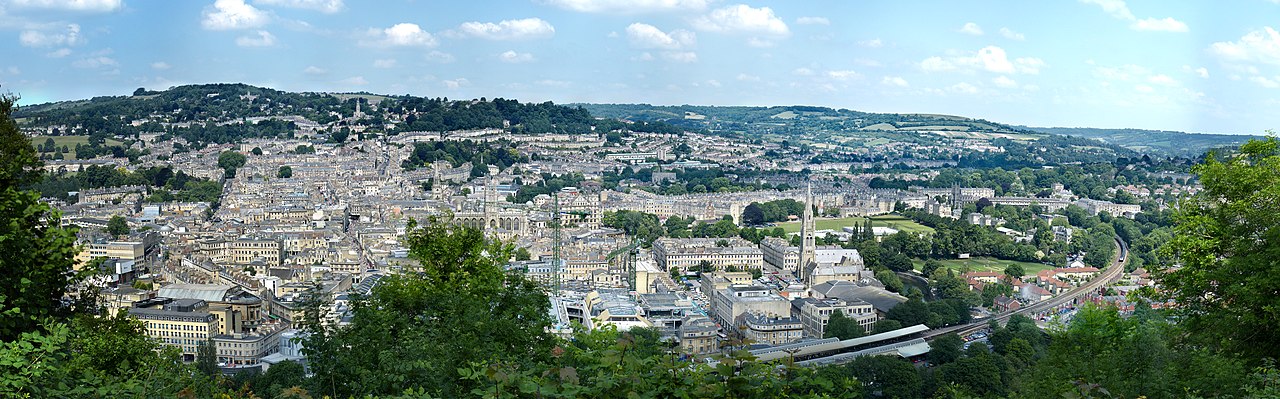
Photograph of Bath from Alexandra Park by Wjh31
Preparing the Artwork
Gigapixel images can be opened in Preview, Photoshop, and many other apps since they are simply images. To use them in this example, they must be sliced into multiple images that each fit within the 16384 pixel limit.
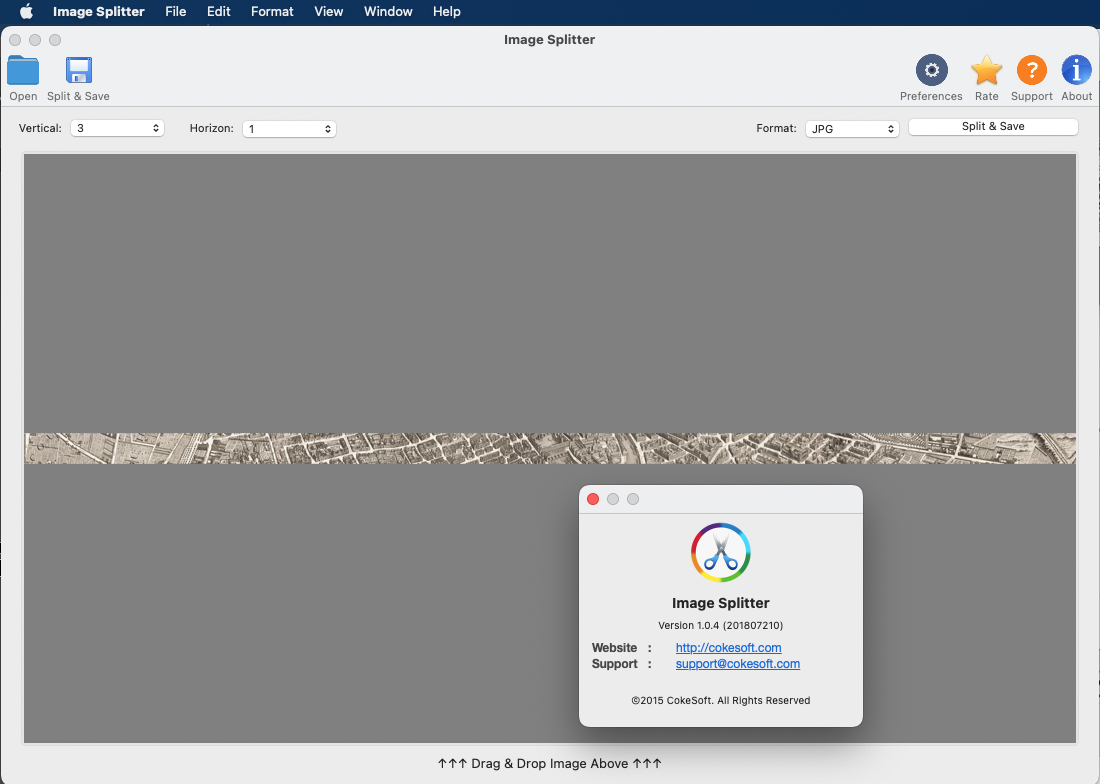
Many photo editing applications offer slicing features, but these are very particular about what images they will export as slices and you may get frustrated trying to use these features. The examples in this demo were sliced using an app from the Apple App Store, called Image Slicer from CokeSoft. This is a very inexpensive app which works really well for this niche usage.
Here’s a screenshot of Image Splitter about to ‘Split and Save’ a crop of the map image (which is 34732 x 1010) into three smaller images within the pixel limit, ready for use in QLab.
Once you have the images correctly sized, drag them into QLab to create Video cues. Select these cues and then trigger this script with a hotkey (key 1 in the demo):
--Settings
set theSpeed to 3.5 --Number between 1 (slow) and 10 (fast)
--initialise
set theSpeed to theSpeed * 100
set oldTIDs to AppleScript's text item delimiters
set theScaledWidths to {}
set theScaledHeights to {}
set cueListFlag to false
set onScreenFlag to false

tell application id "com.figure53.QLab.5" to tell front workspace
	set thecues to (selected as list)
	--check the selection contains is either all  text , or all video cues, and  is not empty.
	if the (count of thecues) < 1 then
		display dialog "No text or video Cues Selected!"
		return
	end if
	if the q type of item 1 of thecues is "Text" then
		set thecueType to "Text"
	else
		set thecueType to "Video"
	end if
	set theparent to parent of item 1 of thecues

	repeat with thecue in thecues
		if the q type of thecue is not in {"Video", "Text"} or (q type of thecue is not thecueType) then
			display dialog "Selection contains cues that are not  all text or all video cues."
			return
		end if

		if the parent of thecue is not theparent then
			display dialog "Selection contains cues that are in a different groups or cue lists "
			return
		end if
	end repeat

	if the q type of theparent is "cue list" then set the cueListFlag to true

	set theDirection to choose from list {"Left to Right", "Right to Left", "Top to Bottom", "Bottom to Top"} with prompt "IMAGE SCROLL  BUILDER" & return & return & "Check that the " & (count of thecues) & " cues selected are video or text cues, ordered L to R, or top to bottom." & return & return & "Please check carefully that the cues selected are assigned to the same surface (This is not checked automatically!)" & return & return & "Select direction below to make a scrolling  image or text sequence from the selected cues." & return & return & "Choose image start and end points l" default items {"Left to Right"} without multiple selections allowed

	if theDirection is {"Left to Right"} then
		set theXfactor to 1
		set theYfactor to 0
		set thereverse to 0
	else if theDirection is {"Right to Left"} then
		set theXfactor to -1
		set theYfactor to 0
		set thereverse to 1

	else if theDirection is {"Top to Bottom"} then
		set theXfactor to 0
		set theYfactor to -1
		set thereverse to 0
	else if theDirection is {"Bottom to Top"} then
		set theXfactor to 0
		set theYfactor to 1
		set thereverse to 1
	else
		return
	end if

	set thebutton to button returned of (display dialog "Choose if Start and End points of scroll are on or off screen" buttons {"ON", "OFF", "Cancel"} default button 1)

	if thebutton is "Cancel" then return
	if thebutton is "ON" then set onScreenFlag to true

	if thereverse is 1 then set thecues to reverse of thecues --R to L, or Down motion directions

	repeat with thecue in thecues
		--store the cue number and temporarily change it for use in the OSC query
		set theoldcuenumber to q number of thecue
		set the q number of thecue to "tempx"

		--pad the line if horizontal text
		if q type of thecue is "Text" and theXfactor is not 0 then
			set the text of thecue to (text of thecue & "\\")
		end if

		--to make OSC queries work correctly, create a network cue that will be deleted after use
		make type "network"
		set theselected to last item of (selected as list)
		set the q number of theselected to "ERASEME"

		--get the surface size for the surface the cue is patched to
		set the custom message of theselected to "/cue/ERASEME/notes \"#/cue/tempx/stage/size/height#\""
		set the selected to thecue
		delay 0.1
		start cue "ERASEME"
		delay 0.1
		set thenotes to notes of cue "ERASEME"
		set theScreenHeight to thenotes as integer

		set the custom message of theselected to "/cue/ERASEME/notes \"#/cue/tempx/stage/size/width#\""
		set the selected to thecue
		delay 0.1
		start cue "ERASEME"
		delay 0.1
		set thenotes to notes of cue "ERASEME"
		set theScreenWidth to thenotes as integer

		--get the image size for the file the cue targets or the size of the text image
		set the custom message of theselected to "/cue/ERASEME/notes \"#/cue/tempx/cueSize/height#\""
		set the selected to thecue
		delay 0.1
		start cue "ERASEME"
		delay 0.1
		set thenotes to notes of cue "ERASEME"
		set theImageheight to thenotes as integer
		set the custom message of theselected to "/cue/ERASEME/notes \"#/cue/tempx/cueSize/width#\""
		set the selected to thecue
		delay 0.1
		start cue "ERASEME"
		delay 0.1
		set thenotes to notes of cue "ERASEME"
		set theImagewidth to thenotes as integer

		--set the scaling to fit the images or text on screen.
		if thecueType is not "Text" then
			if theXfactor is not 0 then
				set thescale to theScreenHeight / theImageheight
			else
				set thescale to theScreenWidth / theImagewidth
			end if
		else
			set thescale to 1
		end if
		set thescaledW to theImagewidth * thescale
		set thescaledH to theImageheight * thescale

		--erase text padding after gap between text cues has been calculated

		if thecueType is "Text" and theXfactor is not 0 then
			set thetext to text of thecue as string
			set thetids to AppleScript's text item delimiters
			set AppleScript's text item delimiters to "\\"
			set the text of thecue to text item 1 of thetext
			set AppleScript's text item delimiters to thetids
		end if

		--clean up
		set q number of thecue to theoldcuenumber
		delete cue "ERASEME" of parent of cue "ERASEME"

		--set video properties for the cue
		set the full screen of thecue to false
		set scale x of thecue to thescale
		set scale y of thecue to thescale
		set end of theScaledWidths to thescaledW
		set end of theScaledHeights to thescaledH
	end repeat

	--initialise accumulators fro running image width and height to enable image offsets to be calculated
	set the widthAccumulator to 0
	set the heightAccumulator to 0

	--set the translations for each cue
	repeat with eachcue from 1 to the count of thecues
		set scaledImageWidth to item eachcue of theScaledWidths
		set scaledImageHeight to item eachcue of theScaledHeights
		set thisCue to item eachcue of thecues
		-- if the cues are  text cues then start and end the scroll off screen
		if onScreenFlag is true then
			set the translation x of thisCue to (widthAccumulator - (theScreenWidth / 2 - scaledImageWidth / 2)) * theXfactor

			set the translation y of thisCue to (heightAccumulator - (theScreenHeight / 2 - scaledImageHeight / 2)) * theYfactor
		else
			set the translation x of thisCue to ((widthAccumulator - (theScreenWidth / 2 - scaledImageWidth / 2)) * theXfactor) + (theScreenWidth * theXfactor)


			set the translation y of thisCue to ((heightAccumulator - (theScreenHeight / 2 - scaledImageHeight / 2)) * theYfactor) + (theScreenHeight * theYfactor)
		end if

		set widthAccumulator to widthAccumulator + scaledImageWidth
		set heightAccumulator to heightAccumulator + scaledImageHeight
	end repeat

	--make a relative fade cue to move all the images together and set its duration to a suitable value to test it
	make type "fade"
	set thefadecue to last item of (selected as list)
	set the do translation of thefadecue to true

	if onScreenFlag is true then
		set the translation x of thefadecue to -(widthAccumulator - theScreenWidth) * theXfactor
		set the translation y of thefadecue to -(heightAccumulator - theScreenHeight) * theYfactor
	else
		set the translation x of thefadecue to -((widthAccumulator - theScreenWidth) * theXfactor) - (theScreenWidth * theXfactor * 2)
		set the translation y of thefadecue to -((heightAccumulator - theScreenHeight) * theYfactor) - (theScreenHeight * theYfactor * 2)
		set stop target when done of thefadecue to true
	end if

	if widthAccumulator is greater than heightAccumulator then
		set the duration of thefadecue to widthAccumulator / theSpeed
	else
		set the duration of thefadecue to heightAccumulator / theSpeed * 2
	end if

	--make a timeline group ad move  all the cues  all the cues into it
	make type "group"
	set thegroupcue to last item of (selected as list)
	set the autoload of thegroupcue to true
	set the mode of thegroupcue to timeline
	set the q number of thegroupcue to ""
	set the q name of thegroupcue to "Scroll Image Group: " & q list name of item 1 of thecues
	set the cue target of thefadecue to thegroupcue

	repeat with eachcue in thecues
		move cue id (uniqueID of eachcue) of parent of eachcue to end of thegroupcue
	end repeat
	move cue id (uniqueID of thefadecue) of parent of thefadecue to end of thegroupcue

	-- if end of cue leaves image on screen create a fade cue to fade and stop it

	set the selected to thegroupcue
	make type "fade"
	set thefadecue to last item of (selected as list)
	set the do opacity of thefadecue to true
	set the opacity of thefadecue to 0
	set the stop target when done of thefadecue to true
	set the cue target of thefadecue to thegroupcue

	delay 1
	--start the cue to test it
	load thegroupcue
	start thegroupcue

end tell

--clean up
set AppleScript's text item delimiters to oldTIDs
The script begins with a speed variable that can be set by the user. This sets the initial duration of the Fade cue which scrolls the Group, taking into account the size of the image.
It then initializes some variables and counters.
It checks the selected cues to ensure they are all either Video or Text cues and are in the same Group cue or cue list.
A flag is set if the parent of the selected cues is a cue list, i.e., all cues are at the root level of the cue list and not inside a Group.
A dialog asks the user to choose which direction the image will scroll and sets boolean variables accordingly.
A second dialog asks the user to select if the images should start on or off-screen.
If the scroll is to be reversed, then the order of the list of selected cues is reversed.
If the image to be scrolled is horizontal text, the end of the text of each cue is padded with a space before the calculation of the X axis offset for each cue.
For Text cues, the script assumes that they have been set to the required size. For Video cues, the images are automatically scaled to fit the stage. To do this, the script needs to know the height and width of the stage (in QLab 5) or surface (in QLab 4) that the cue is patched to, and the height and width of the cue itself. There are no commands in the AppleScript dictionary to do this, but the OSC dictionary does have methods.
Often, when using OSC in scripts, we can send the OSC message to QLab port 53535 using a shell script. In this instance, we need to get a reply we can read. To enable this, we have to use actual Network cues with OSC messages, which the script will create, start, and delete as needed.
e.g to get the height of the stage a cue is patched to:
make type "network"
set theselected to last item of (selected as list)
set the q number of theselected to "ERASEME"

--get the surface size for the surface the cue is patched to
set the custom message of theselected to "/cue/ERASEME/notes \"#/cue/tempx/stage/size/height#\""
set the selected to thecue
delay 0.1
start cue "ERASEME"
delay 0.1
set thenotes to notes of cue "ERASEME"
set theScreenHeight to thenotes as integer
With this information, the script can then perform the calculations necessary to scale the Video cues’ geometry to match the stage dimensions. If the scroll is horizontal, the image will be scaled to the height of the stage. If vertical, it will be scaled to the stage’s width.
The end-of-line padding is removed if the cue is a Text cue.
The program then calculates all the offsets required so that the images in the selected cues are abutted consecutively in the correct order, taking into account whether the image starts and ends on or off-screen.
A Fade cue is created which will fade either the X axis or Y axis translation, dependent on the required scroll being horizontal or vertical, by an amount which is the total width or height of all the selected images. The duration of the fade is calculated from the speed variable set at the top of the script and the number of pixels to be traveled.
If your cue template for Fade cues is set to use anything other than a linear curve, e.g., an S curve, then for cues which start and end off-stage, you will probably want to set the curve of this Fade cue to linear. As there is no way to do this with a script, so you must do this manually.
The selected cues and the Fade cue are moved into a newly created Timeline Group cue, and the Group is started to allow the user to check that everything is in the correct order.
Finally, a Fade cue set to fade out and stop the Group cue is created.
Here it is in action:
In the screen recording below, you can see two scrolling images, a photographic panorama and a lower-third text crawl, being created, batch-edited into position, and run. Then additional Fade cues are added to scroll the image backwards.
The downloadable examples have all these cues prebuilt, followed by Video cues for each image sequence to practice building new versions.
You can add your own new Video or Text cues anywhere in the workspace, select them, and run the script from the hotkey to make them into scrolling panoramas.
CREDITS:
Photo of the State Theater (Traverse City, Michigan) by Corey Seeman, used with permission and distributed under a Creative Commons CC BY-NC-SA 2.0 DEED Attribution-NonCommercial-ShareAlike 2.0 generic license. Adapted to blank out original signage.
Photo of the Miracle Theater (Coral Gables, Florida) by Rob Olivera, distributed under a Creative Commons CC BY 2.0 DEED Attribution 2.0 generic license. Adapted to blank out original signage.
Photo of Turgot map of Paris - Norman B. Leventhal Map Center, public domain.
Photo of View of the Château de Fontainebleau by Pierre-Denis Martin, public domain.
Photo of The Tower of Babel by Pieter Bruegel the Elder, public domain.
_-_Google_Art_Project_-_edited.jpg)
Photo of Bath from Alexandra Park by wjh31, public domain.
Text Excerpt: A Tale of Two Cities by Charles Dickens, public domain.
Text: Hipster Ipsum Generated Text, public domain.
All other texts generated by ChatGPT 3.5, public domain.