Real-time Clock
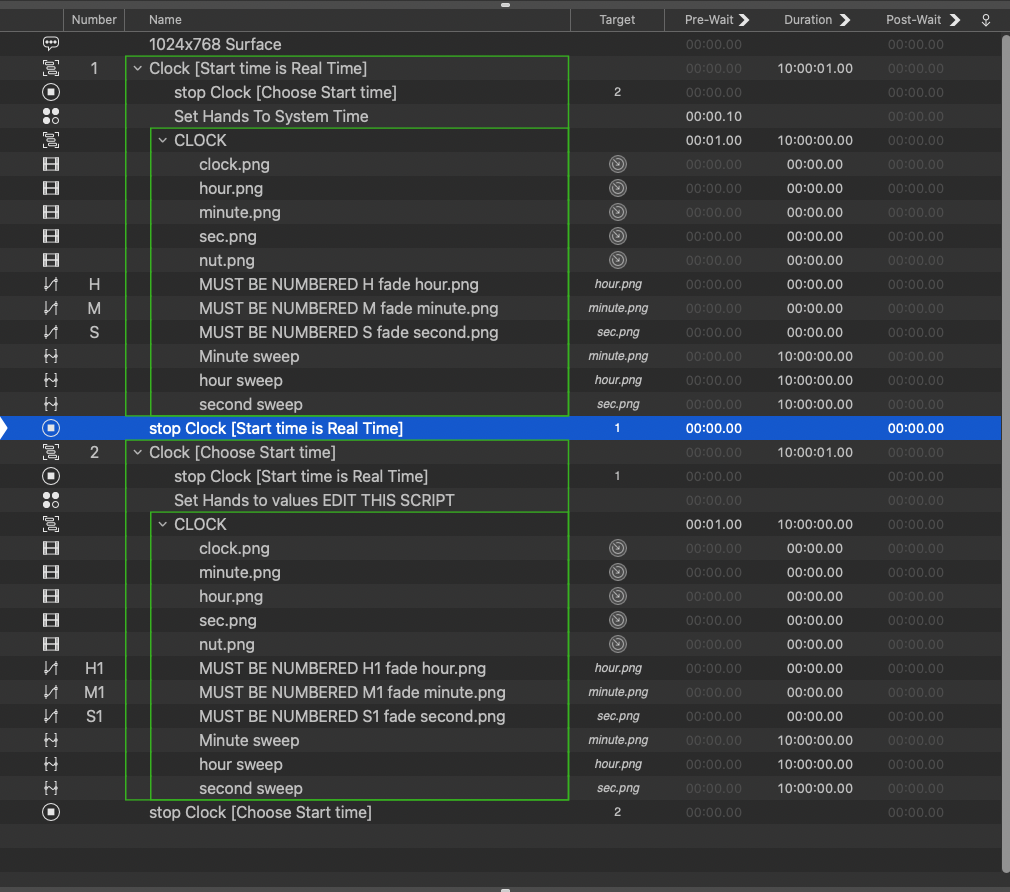
This example workspace renders a real-time clock which can either use the system time, to show the actual time, or a start time which you select. The example is programmed to start at 0:00:00 which is convenient for use as a simple timer.
How It Works

The Script cue reads the system time and calculates the angular rotation required to set the hands to the correct time. Rather than use AppleScript to directly move the images, which requires some very heady, graduate-level quaternion mathematics, we’ll instead put the calculated angles into single-axis Z rotations of some Fade cues (called H, M, and S) and move the hands by triggering these cues.
set hourstring to hours of (current date)
if hourstring > 11 then
  set hourstring to hourstring - 12
end if
set minutestring to minutes of (current date)
set secondstring to (seconds of (current date)) + 1

tell application id "com.figure53.QLab.5" to tell front workspace
  set rotation of cue "H" to -((hourstring * 30) + (minutestring * 0.5))
  set rotation of cue "M" to -((minutestring * 6) + (secondstring * 0.1))
  set rotation of cue "S" to -(secondstring * 6)
end tell
In cue 2, the hands are set to the time in the script rather than the system time.
set hourstring to 0
set minutestring to 0
set secondstring to 0

--Do Not edit anything below this line

set secondstring to secondstring + 1
if hourstring > 11 then
  set hourstring to hourstring - 12
end if

tell application id "com.figure53.QLab.5" to tell front workspace
  set rotation of cue "H1" to -((hourstring * 30) + (minutestring * 0.5))
  set rotation of cue "M1" to -((minutestring * 6) + (secondstring * 0.1))
  set rotation of cue "S1" to -(secondstring * 6)
end tell
The hands then rotate for ten hours using Fade cues; the hour hand rotates 300 degrees, the minute hand rotates 3600 degrees, and the second hand rotates 216,000 degrees.
The graphic elements of the hour, minute, and second hands are pictures of the hands on a transparent background. You can customize the appearance of the clock by editing the individual graphic elements in the video folder using a graphics editor. For best results, it might be ideal to retain the size of the original elements. Make sure you retain the transparency when saving your new elements.
Graphics for watch elements: Bell and Ross from Wiki Commons. Licensed under a Creative Commons Attribution-ShareAlike 3.0 Unported License](http://creativecommons.org/licenses/by-sa/3.0/). Modified image redistributed under the same license.
