Crew to Listening Stations
When using wireless microphones in a show it is handy to provide a listening station for the backstage sound person, often called the A2, so that they can listen to each microphone individually to be sure that the mics are sounding good. Doing this independently of the main mixing console is ideal. There are a few ways to do this, and this chapter is an exploration of the QLab way. You will need to split the audio output of the wireless receivers to feed both the mixing console and the Mac running this workspace; some discussion of ways to do that are at the end of this chapter.
The example workspace is a listening station that lets you monitor 24 individual inputs and six configurable groups of inputs, set up for a production of The Sound of Music. You use the workspace by clicking on cues in a cart. The inputs currently being monitored are highlighted in red.
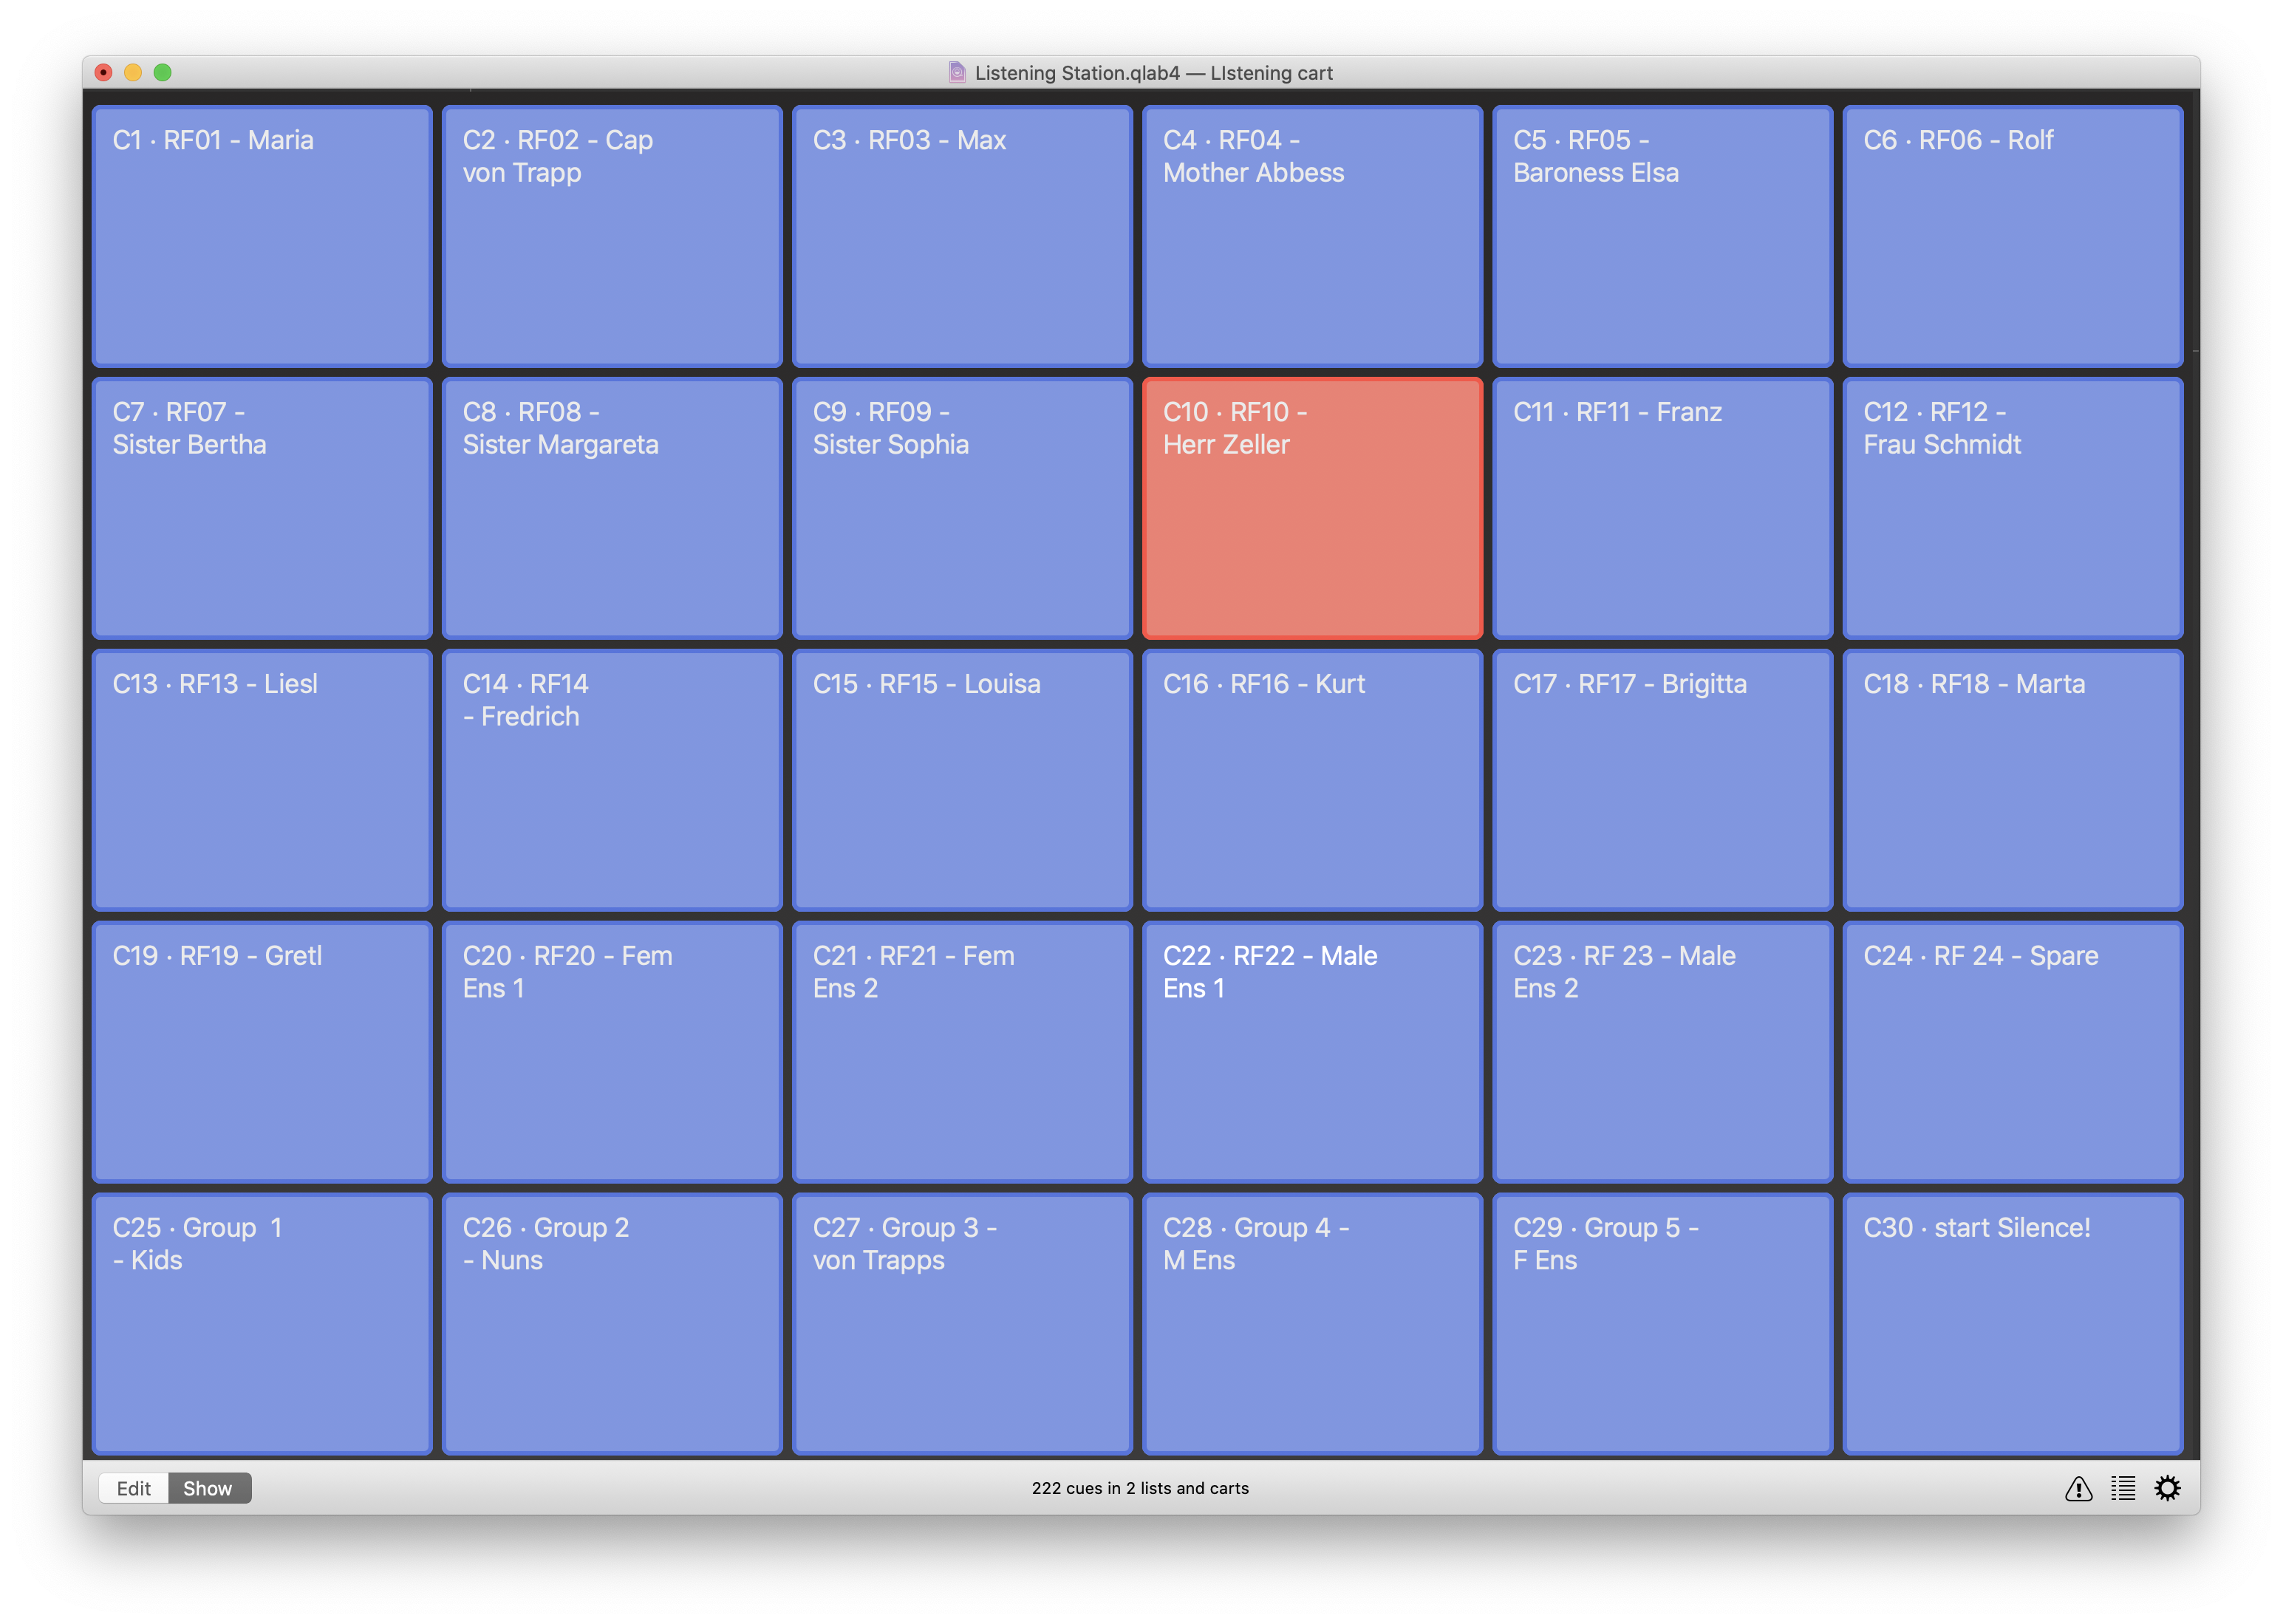
The cues in the cart are Start cues which trigger cues in the Mechanics cue list, where the real work is done.
The Mechanics List
At the top of the Mechanics list is a single Mic cue set to accept 24 inputs. The Fade cues in the groups below all target this Mic cue, and turn individual inputs on or off as needed.

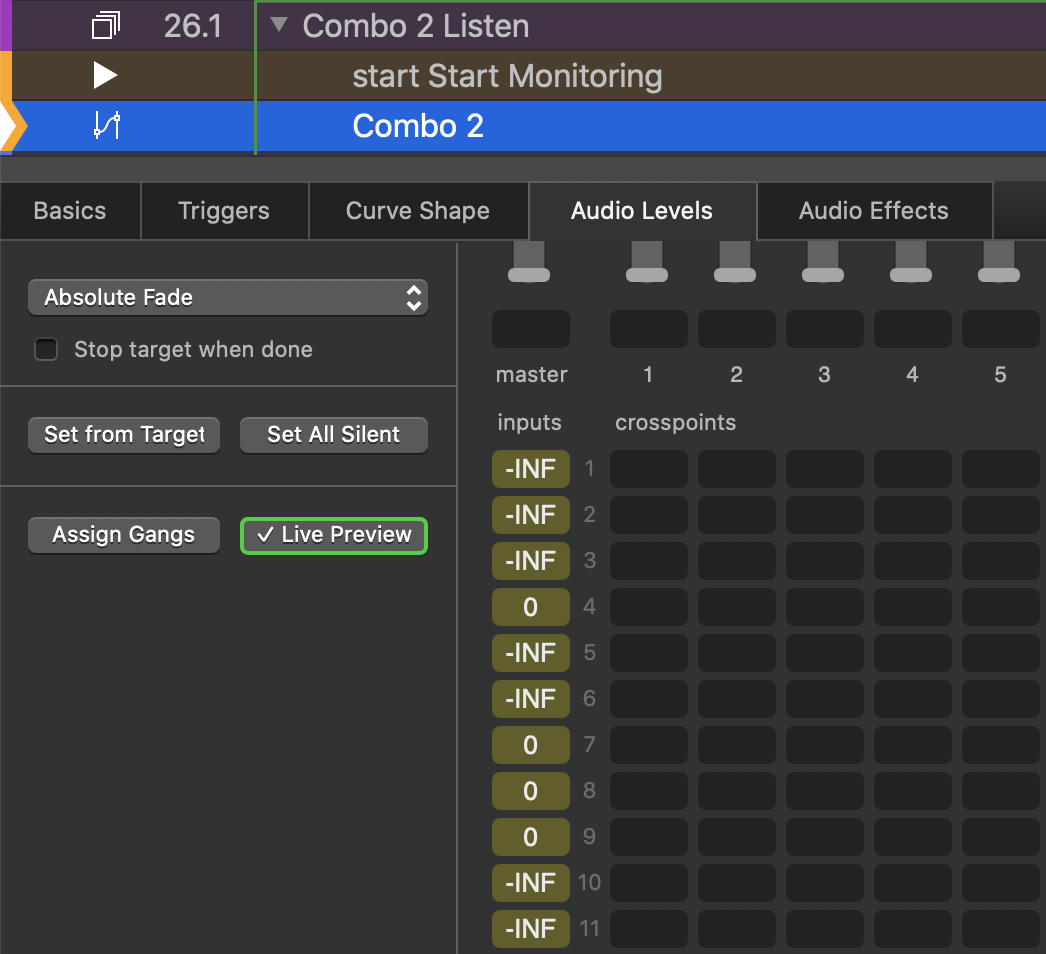
Each Group begins with a Start cue to be sure that the master Mic cue is running. Next is a Fade cue targeting the Mic cue. This Fade only adjusts the inputs to the Mic cue, turning every input down to -INF other than the input or inputs being monitored.
The rest of the cues in each Group change the colors of the Start cues in the Cart to give the operator some visual feedback about which inputs are up and which are at -INF. These are Network cues sent to the default network destination in QLab, localhost. This is a very easy way to have QLab send OSC messages back to itself. The first cue uses an OSC wildcard to change the color of all cues whose cue number begins with “C” to blue. That message is:
/cue/C*/colorName blue
Since each of the cues in the cart is numbered C1 through C30, this will change the color of all of the cues in the cart. Once they’re all blue, which is sort of a blank slate, the next cue changes the color of the specific cue which corresponds to the input that’s been brought up. For example, the Group that fades up mic input 1 has the message /cue/C1/colorName red to set the color of cue C1, for Maria, to red.
The difference between the Groups which bring up a single input and the Groups which bring up a combination of inputs is twofold:
First, the Fade cue in combination Groups brings up more than one input channel on the Mic cue:
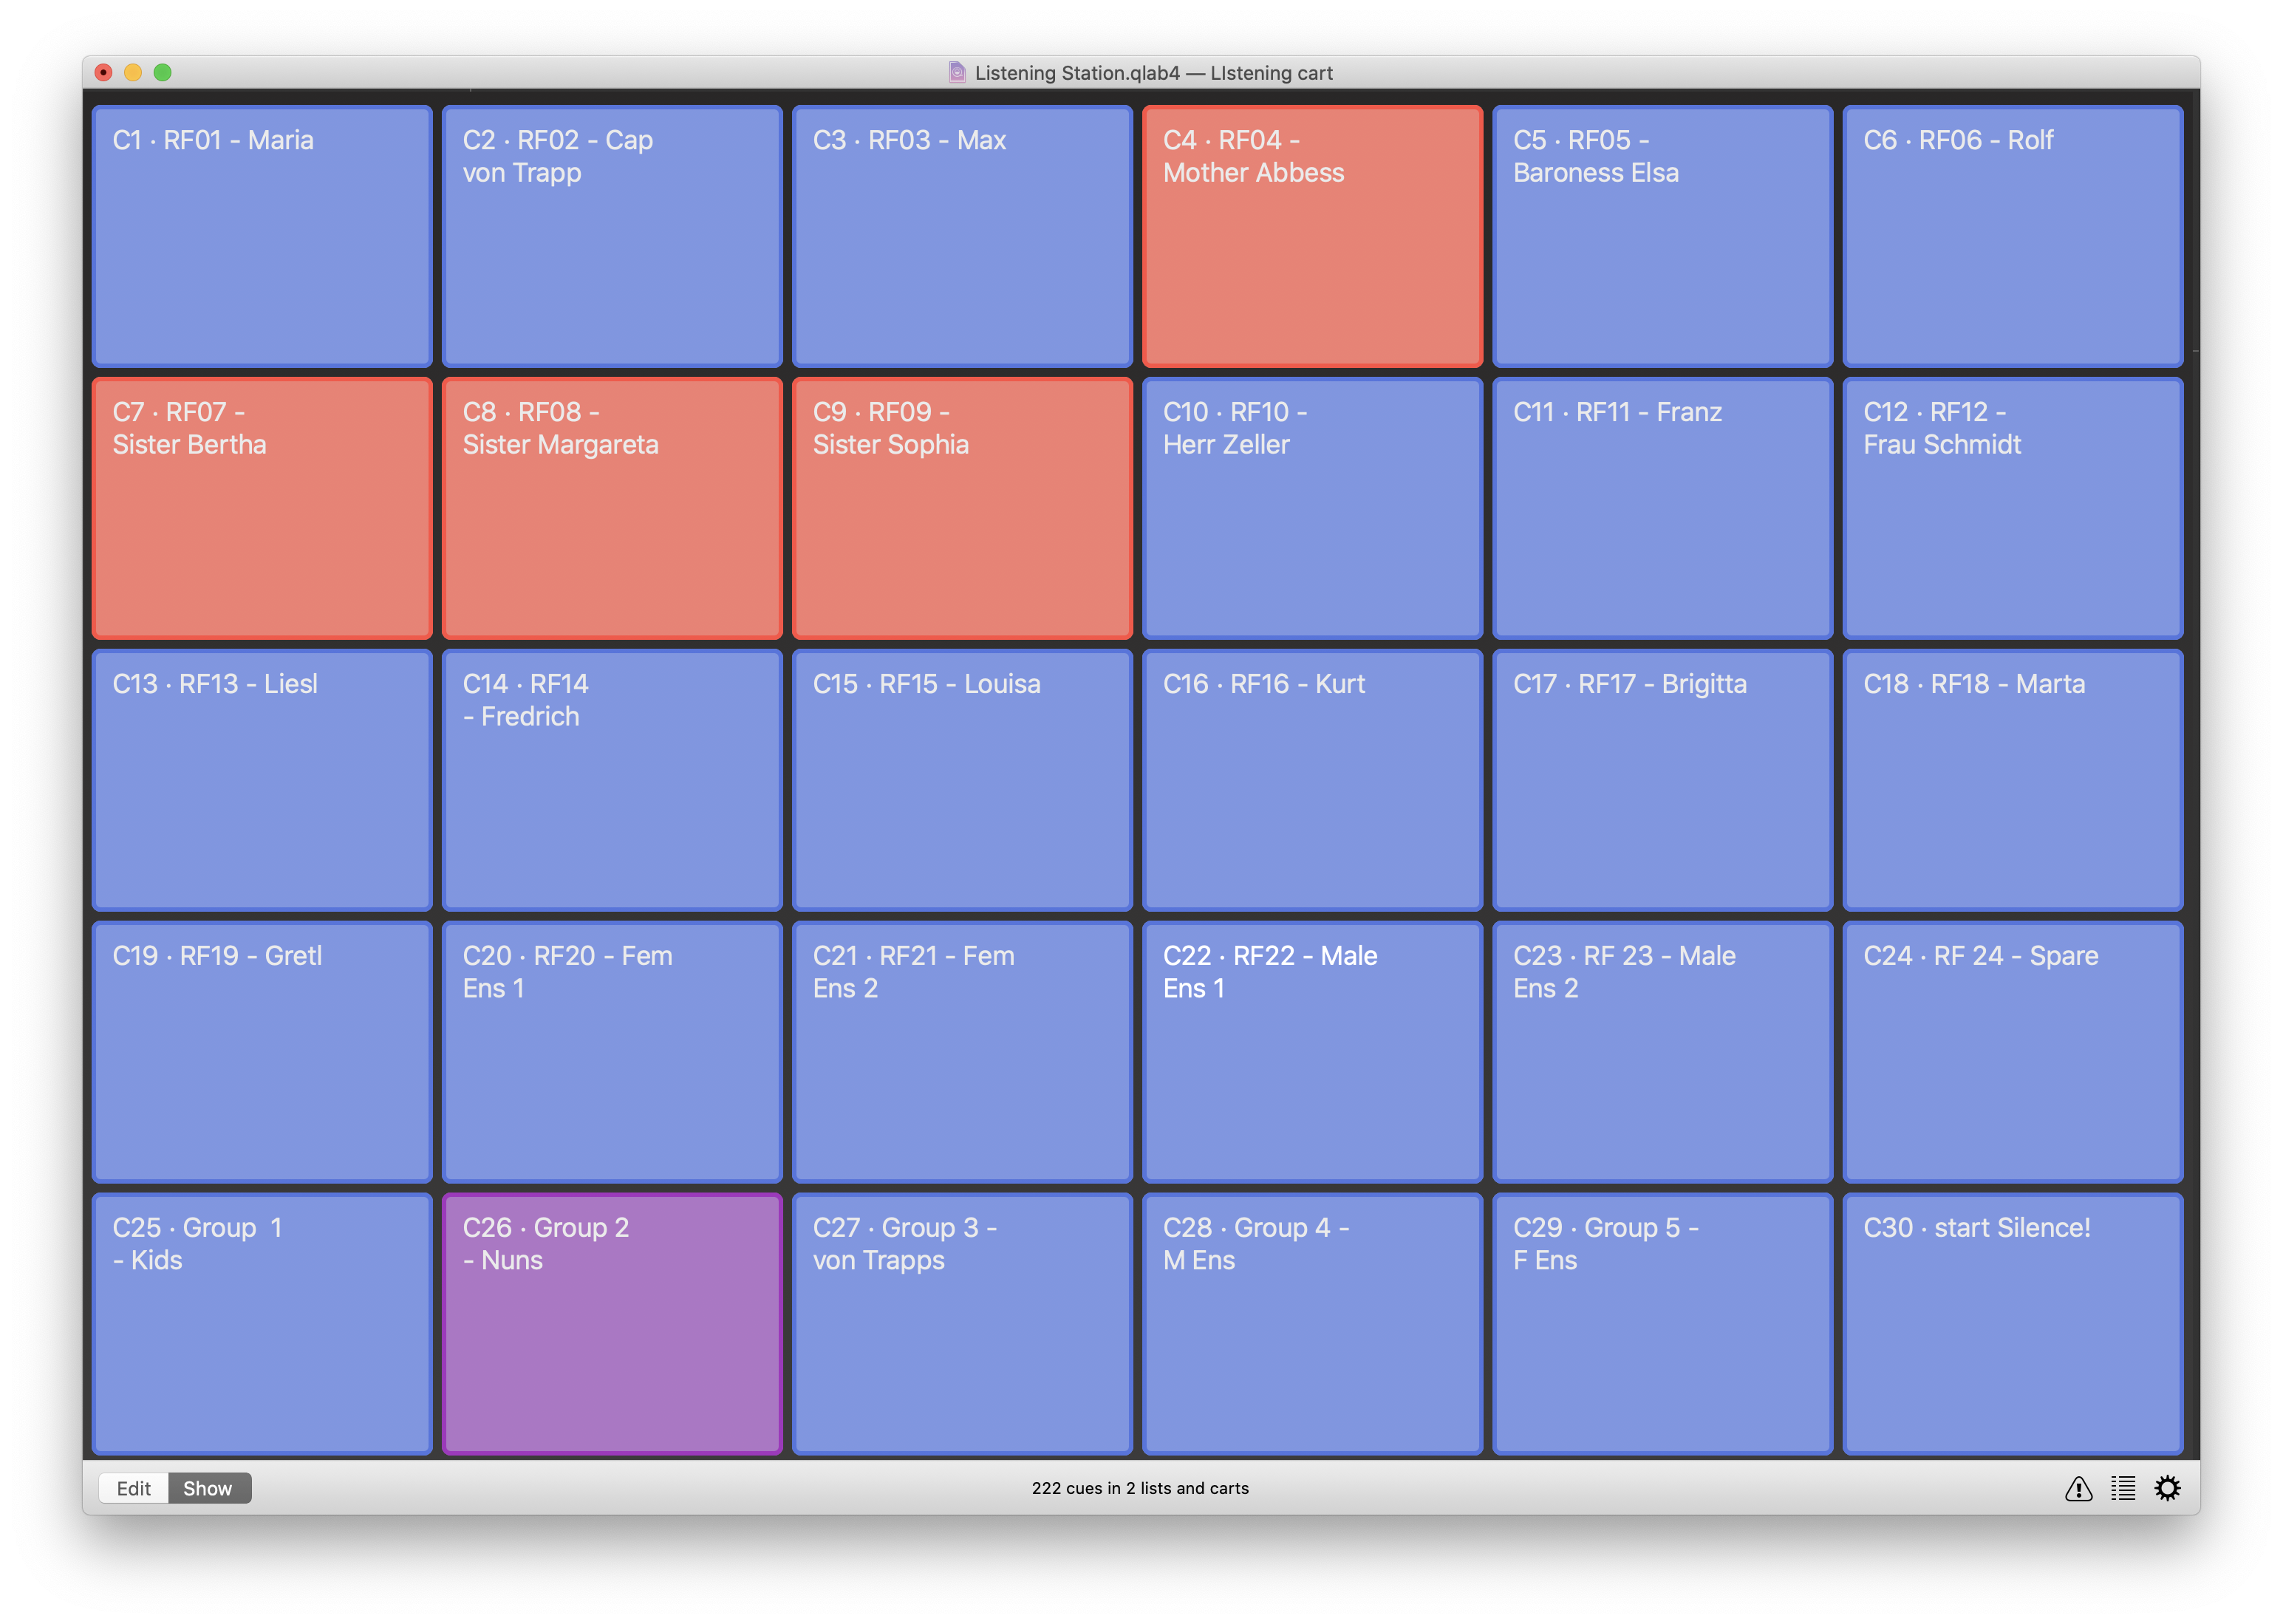
Second, these Groups have a few more Network cues, since we want them to change the colors of every cart cue that’s part of the combination. For example, “Combo 2” lets you monitor the mics of all of the nuns simultaneously. There are four nuns (Mother Abbess, Sister Bertha, Sister Margareta, and Sister Sophia) so this Group has a six Network cues: The first one resets all cues to blue with /cue/C*/colorName blue. Then, there are four Networks cues to turn cues C4, C7, C8 and C9 red, and finally the sixth Network cue turns cue C26, which represents the combination, purple.
Getting Audio into QLab from Wireless Mics
Many wireless receivers, like the Shure Axient D, QLXD or ULXD, and the Sennheiser 6000 series offer Dante network connections. Dante allows one input to be routed to several outputs easily, so the outputs of the receivers can be sent to both the mixing console and to a Mac running Dante Virtual Soundcard. Getting audio into QLab, therefore, is as simple as setting your Mic cue patch to use Dante Virtual Soundcard. To get audio out of QLab and into your headphones, you can use a Dante-capable headphone amplifier like those made by Aviom, the Focusrite Rednet Series or several others. Back in Dante Controller, you’d route the output of the Mac’s Virtual Soundcard to the inputs of your headphone amplifier.
A side perk of this setup which is quite nice is that you can have several headphone locations around the theater for the A2 to listen from. Just route the output of QLab to the inputs of each device, and place them wherever you need. The A2 can then walk up to any station and use QLab Remote running on an iPad to choose what they want to hear.
If your mixing console uses MADI, you can use a MADI router, such as the DirectOut MADIBridge to split the output of the stage input rack and send that to a MADI audio interface for QLab, like a Digico UB-MADI or RME MADIFace to get the mic signals into QLab. Then you’ll need to output this signal, via MADI to a MADI listening box, like the MA2CHBOX for a set of headphones.
Of course, if you are only interested in a set of headphones available at the Mac, you can create an aggregate device for the MADI or Dante stream and your headphone output and use that for the Microphone cue, simply patching your headphones into the Mac’s headphone jack.
QLab 5 Addendum
In QLab 5, you can select different audio devices for the input to and output from Mic cues, which makes this workspace even easier to use; there is no need for an aggregate device anymore. The updated QLab 5 workspace is set to use the default system input and output devices, so it will work even if all you have is your Mac’s built-in microphone and speakers. Of course, you might encounter some feedback in that case so keep the volume down and consider using headphones.
You’ll also discover that the Mic cue numbered START is set for only a single input, as this gets the workspace going on as many computers as possible quickly. If you have a more complex setup you’ll want to adjust the number of inputs for that Mic cue so you can listen to someone other than Maria. To do this, select the Mic cue and head to the I/O tab of the Inspector.
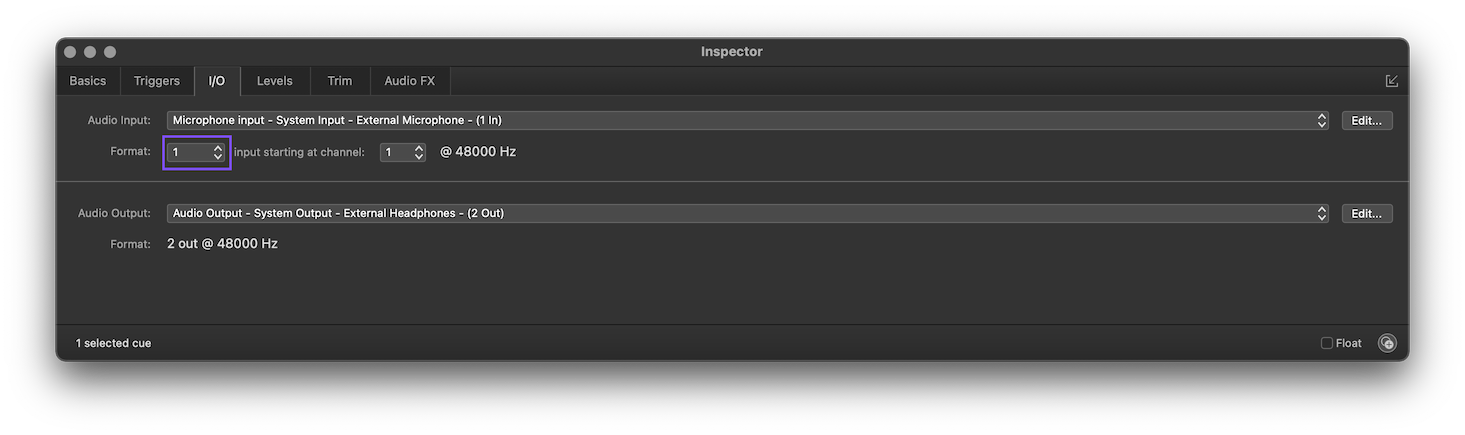
There, adjust the format from one up to 24, or the number of mic inputs you’ve got.
Chapter image: public domain via Wikimedia Commons