Mapping Complexity
This chapter describes a method for using a drawing program, such as Adobe Photoshop, to draw directly onto a QLab surface displayed on a projector. This allows you to precisely mask features in the area the projector beam is covering, and do so after QLab’s keystoning and warping have been applied.
For the basics of masking in QLab, read the chapter Masks for Sail.
Drawing A Mask
Before we draw on a QLab surface, we will examine a technique for mapping the vertices and curves of an irregularly shaped projection surface directly in Adobe Photoshop. Although this example uses Photoshop, any image editor will work equally well.
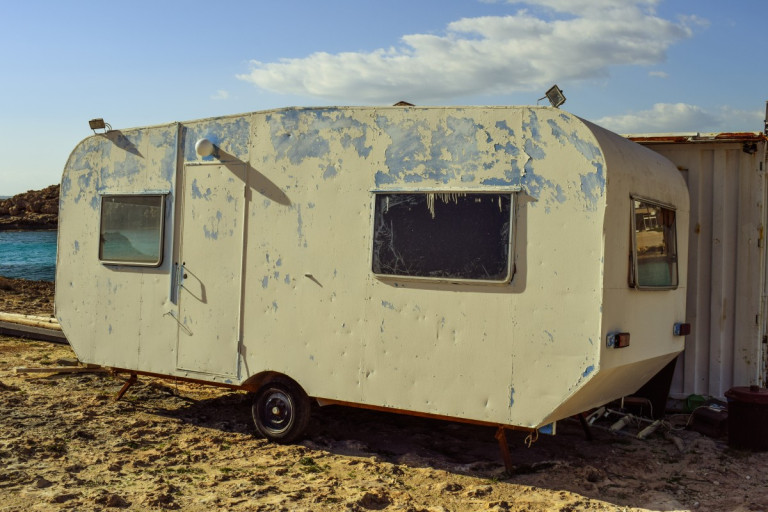
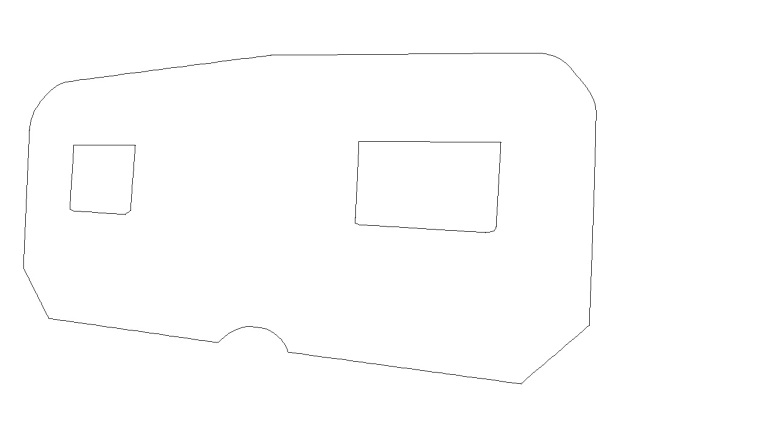
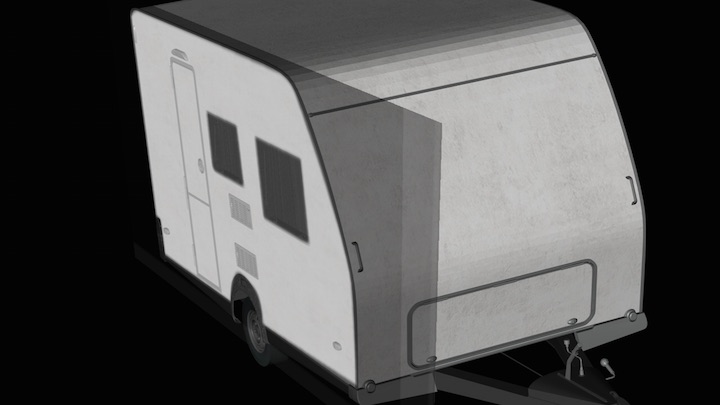
For our example, we will imagine we are doing a beach rave and have found an old camping trailer to project on. We want a surface mask that allows us to project onto only one side of the trailer, and we don’t want to project on the windows of the trailer because the DJs will be working in there.
First, et up your projector by connecting it to a video output on your Mac and focus it so that its beam covers the area you want to map.
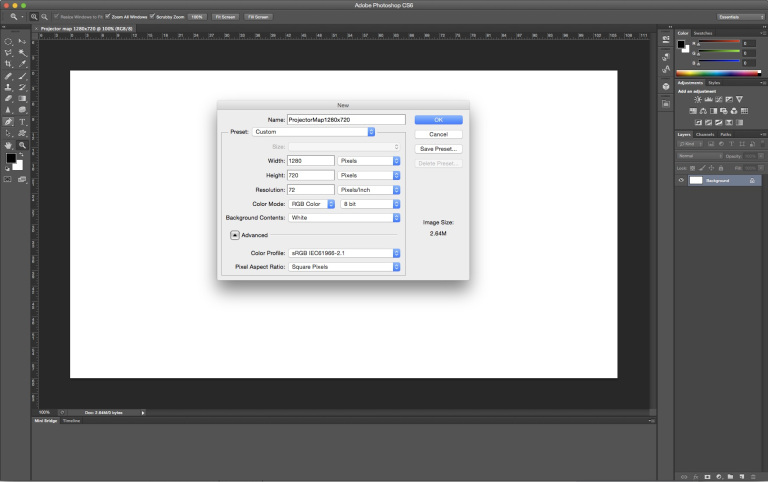
Then open Photoshop on the main monitor of your computer.
Create a new document with a white background, with dimensions identical to your projector’s resolution. In our example, we’ll use 1280x720.
Drag the tab for the new document out of the main Photoshop window and onto your projector.
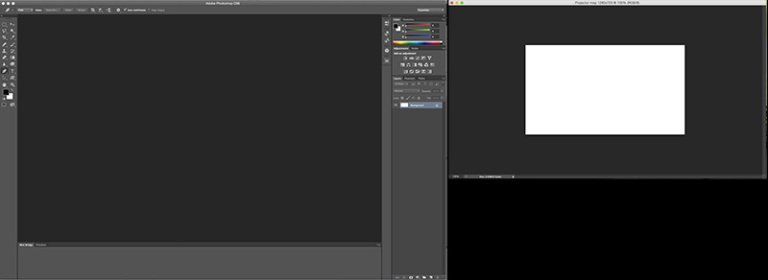
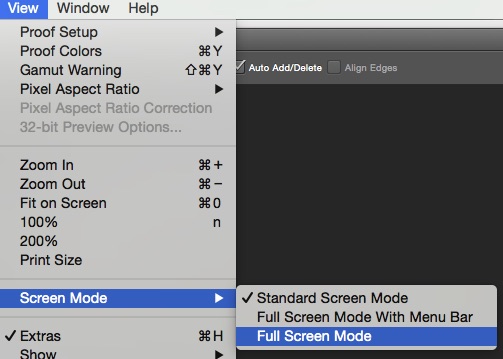
Set zoom to 100%, select the pen tool, enter Full Screen Mode (no menu bar).
Your projector should now be displaying nothing but white pixels.
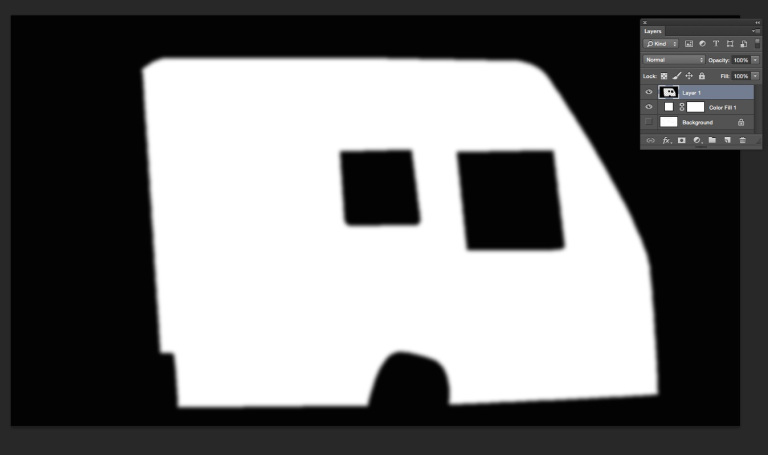
Using the pen tool, draw an outline around the structure. Depending on the complexity of the shape, you may wish to use either straight lines or Bézier curves.
Once you have the outline, trace other features like doors, windows, etc. In our case, we just outline the windows since we want to exclude them from the projection area.
Once you’re done drawing, set the foreground color to black then right-click on the path you’ve just drawn and choose Stroke Path… from the contextual menu. From the drop-down menu that appears, choose the Pencil tool
Different drawing programs, and even different versions of Photoshop, handle the process described above differently. The summary is, draw a vector line first, then rasterize it. A bit of Googling might be in order if these terms are new to you.
Once you’ve done this, you should now have an outline drawing of your projection surface.
You can repeat this as necessary, adding features as required.
Once you have all the detail mapped, it’s probably easier to exit full screen and re-dock the document window back into the main Photoshop window.
The drawing we’ve created will be useful as a reference for the rest of this project, as well as for use as a starting point when generating imagery to project. So, from here on out everything we do will happen on new layers in the Photoshop document, and the “Background” layer will remain untouched.
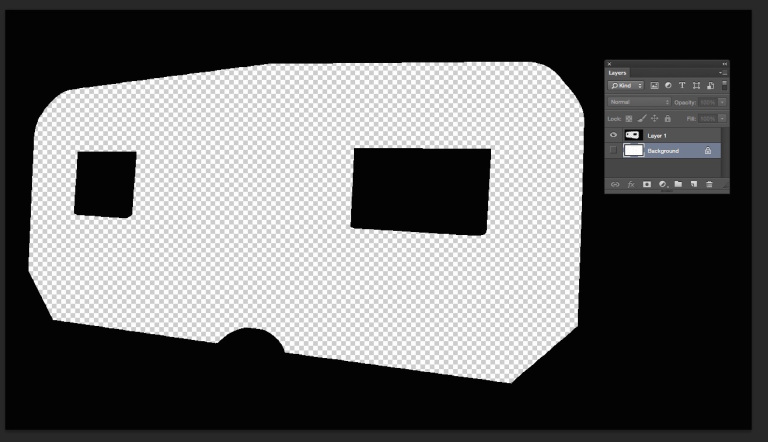
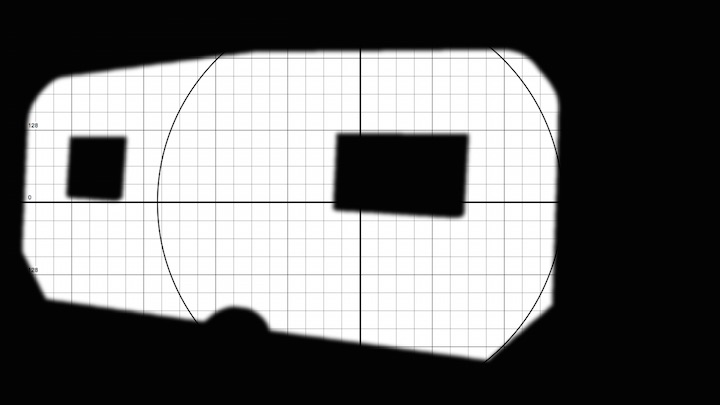
The next thing we want to do is create a mask to blank out the windows and the “overspill” where the projector is falling outside the wall of the trailer that we’re projecting onto.
Create a new Layer (Layer 1).
Using selection tools, select the areas you want to mask out (or draw a path around these areas and convert to a selection). In our case, the areas to select are the area outside the trailer side and the two window panes. We can easily select them using the magic wand tool.
Choose the Magic Wand tool, switch to the Background layer, and click in the area outside the drawing of the trailer. Then hold down the shift key and then click inside each of the two windows.
Now switch to your new layer (Layer 1), and fill this selection with black by choosing Fill… → Black from the Edit menu.
Once you have the fill, make the background layer invisible by unchecking it in the Layers pane.
QLab surface masks are greyscale images wherein black pixels are masked, white pixels show the imagery from cues assigned to the surface, 50% grey shows a 50% dimmed image, etc. Masks cannot contain transparent areas. Therefore, we need to put a solid white fill layer behind our mask.
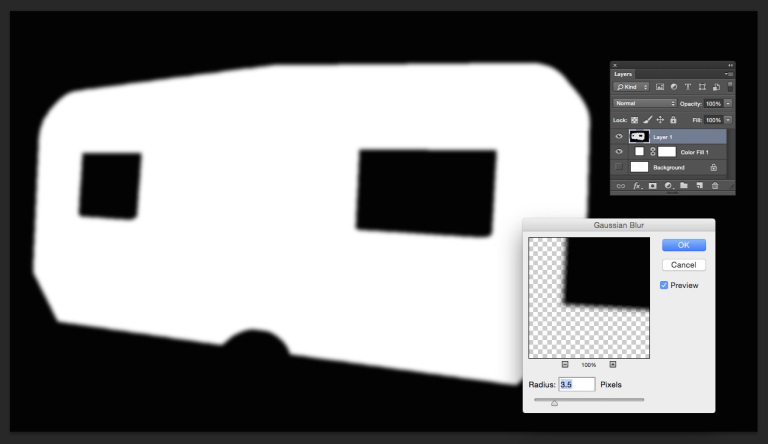
If you want to soften the edges of your mask, apply a Gaussian blur to the whole image, or to just those areas you would like to be softer.
Save (or export) this image as a JPGabbr> or PNG with a meaningful name. It can be useful to include include the pixel dimensions in the name so that you know what size surface it is meant to fit. We could call this mask something like:
trailer-side-mask-1280x720.png
If you want to make multiple masks for different surfaces using the same projector setup, you can simply switch off Layer 1 and repeat this process with a new layer for each surface. When you save each additional mask, be sure the white fill layer is visible.
Finally, save the Photoshop document as a .psd so you have the original tracing and all the layers you’ve made in one place. This way you can return and easily modify the masks or make new ones at any time.
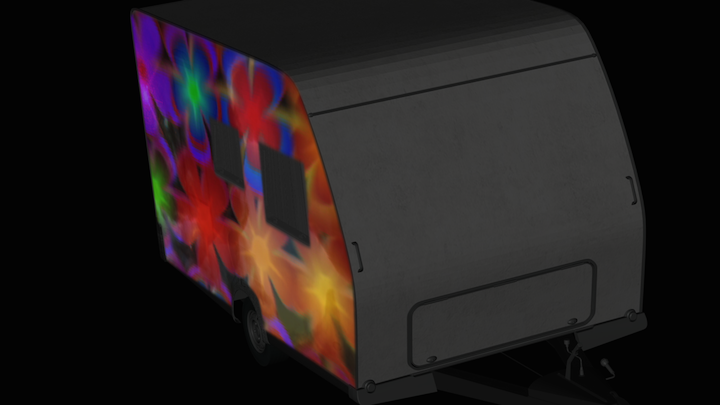
To use the mask, drag the image file into the well of the video surface editor in QLab:
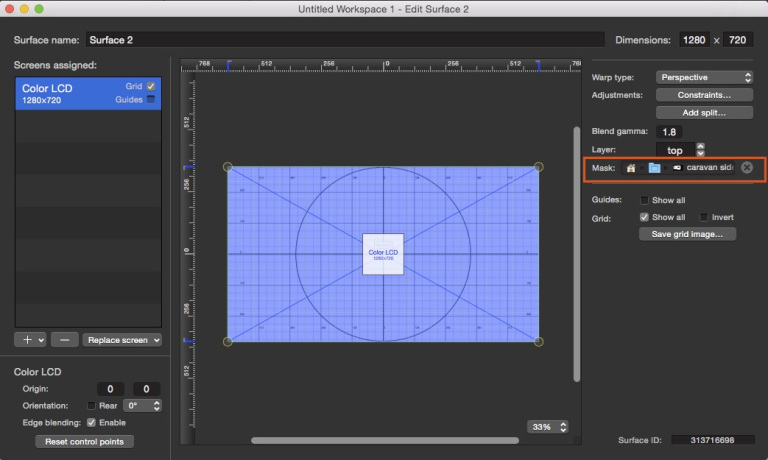
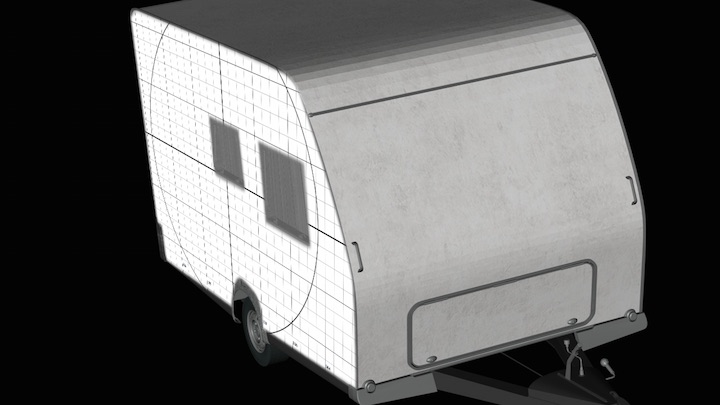
To check your work, turn on the grid:
Mask-making on a warped surface
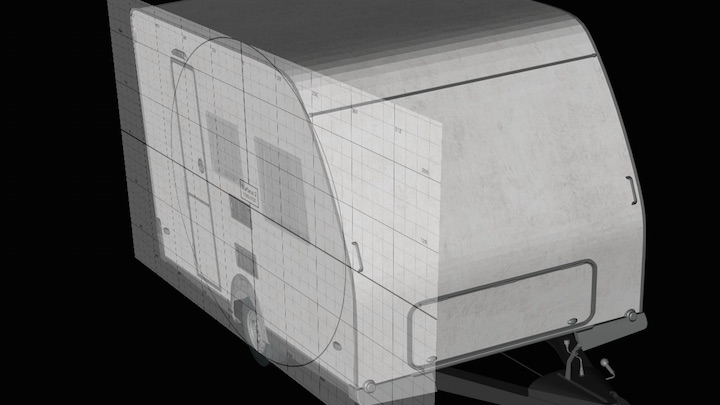
Let’s imagine that after we’ve set up our projector and made our masks, the original trailer burns down. A replacement trailer is brought in, but the fire marshall says that the only acceptable location for the projector is on top of the food concession stand, which sits to the extreme right of the replacement trailer.
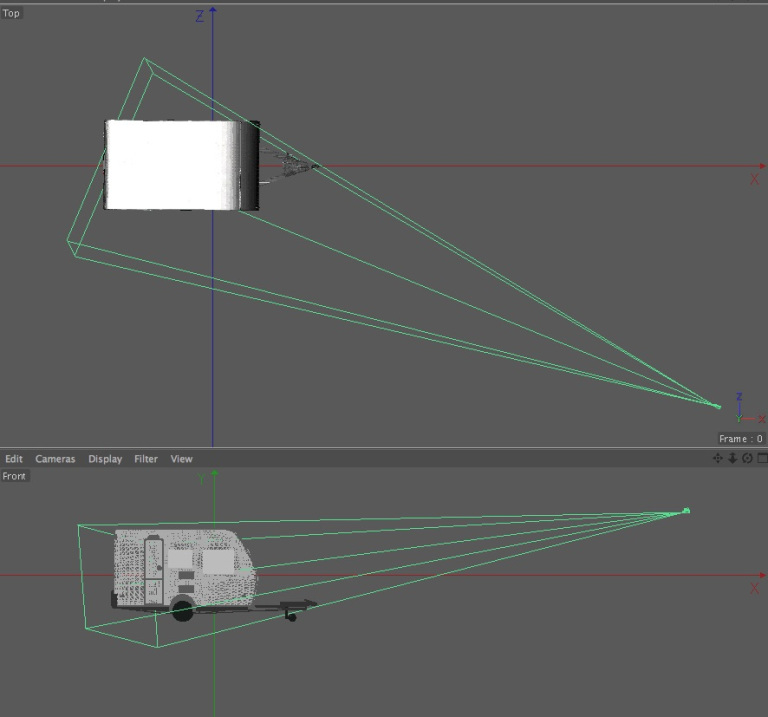
This is the view of the trailer from the projector position.
In order to retain the proportions of the original images, we are going to need an extreme perspective warp to be applied to the projector surface. We also need to keep horizontal lines in the projection truly horizontal, and verticals vertical. So, using the perspective warping tools in the video surface editor in QLab, we repeat our initial adjustment of the surface and maintain as much of the geometry of the original images as possible:
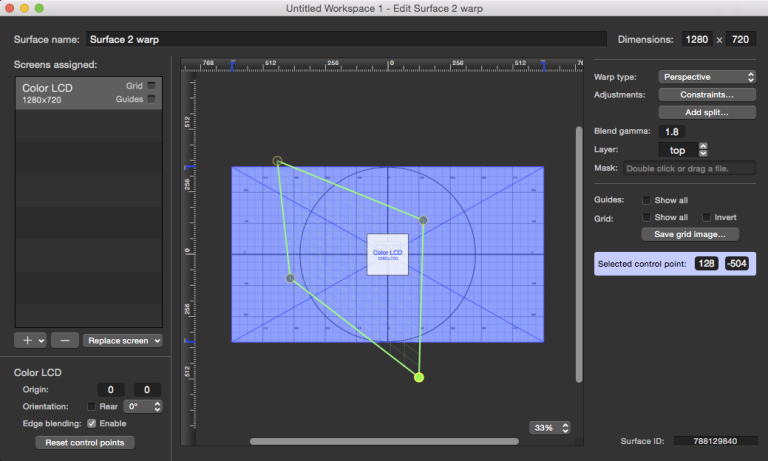
We now need to trace the shape of the trailer side and the windows to make our mask, but because of the warp on the QLab surface we no longer have a 1-to-1 relationship between any Photoshop document and the projector.
What we need to do is get our Photoshop document on the projector with the surface warp applied, and be able to see the pen tool cursor on the projector so we can draw around the areas of interest on the trailer.
To do this we are going to use a free program called CamTwist which you can download here.
Alternatively, you can use a program called Syphoner which can be downloaded here.
Both of the programs allow you to feed areas of your computer’s screen into a Syphon server, which can then be used as the source for a Camera cue in QLab.
This technique uses three programs: Photoshop, CamTwist or Syphoner, and QLab. Obviously, there are a huge number of combinations of different version numbers that can be utilized, and it is not possible to test all of them. Some users have had difficulty getting CamTwist to work correctly for this technique, but have found that Syphoner works well. This example uses CamTwist; using Syphoner is a similar process.
As above, start by creating a new Photoshop document with the same pixel dimensions as the projector, set the scale to 100 percent, but this time leave the window docked into the main Photoshop workspace.
We then open CamTwist and set it up like this:
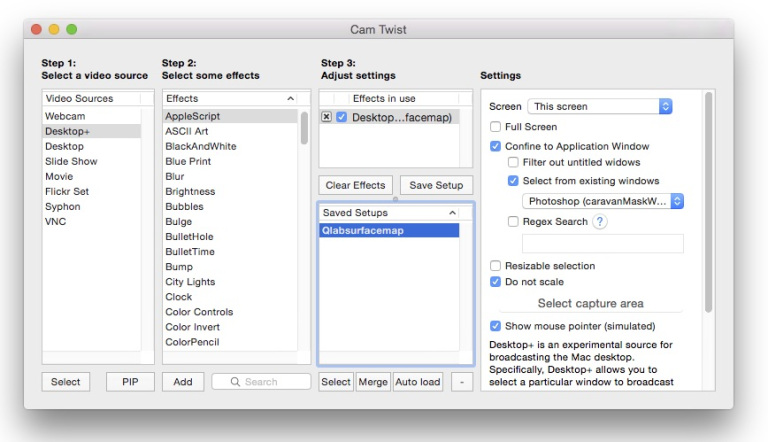
“Desktop+” as video source selects a window which doesn’t have to be visible or fully on the screen.
Under settings on the right side, check the box marked Confined to Application Window, the check the box marked Select from existing windows, and then choose the Photoshop document from the drop-down menu.
Check the box marked Do not scale so that the image stays full size when we go to full screen mode.
Finally, because the mouse pointer (cursor) is not part of that Photoshop window and therefore would be invisible on the feed from CamTwist, check the box marked Show mouse pointer (simulated).
In QLab, go to Workspace Settings → Video and set one of the camera patches to use CamTwist as a video source.
Then go to the cue list and create a Camera cue set up like this:

The Camera source is CamTwist (or Syphoner); the video surface is the surface with the perspective warp applied; Geometry is custom with no translation and a scale of 1.
Now, start the Camera cue so that the camera is live.
In Photoshop, select the pen tool, view image at 100 percent and go into Full Screen Mode as before. The projector should now just be displaying a white image.
The Photoshop document will be also visible on your main display at full screen

Check the relationship between the Photoshop document and your projected image by moving the cursor to each corner of the Photoshop document. Check that the cursor is also at the corners of your projected image.
Follow the procedure in the previous exercise to map and mask the unwanted areas. It will be slightly more difficult now since the mouse movement on the warped surface will be, well, warped.
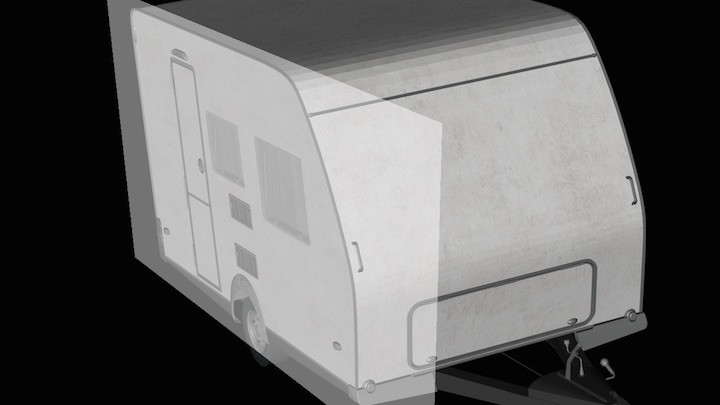
After drawing and creating a new mask, it should look something like this on the projector:
And like this in Photoshop:
Save the mask as a PNG or a JPG with a meaningful name
like trailer-pre-warp-mask-1280x720.jpg.
Put it into the mask well of the warped surface and check it out by switching on the grid:
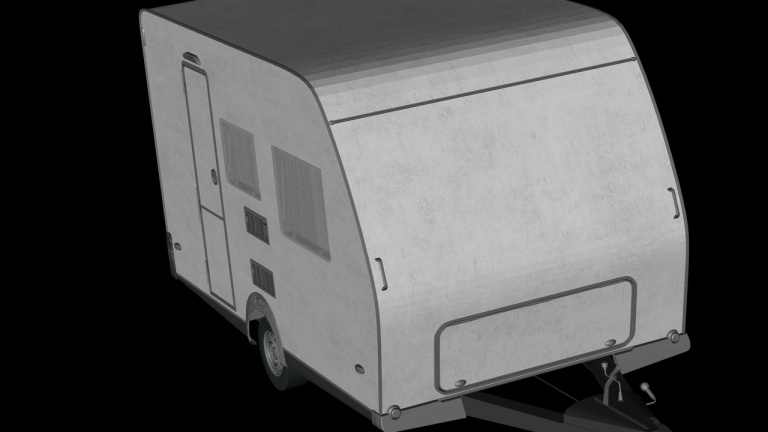
Finally, send an image to the warped projector surface to enjoy the results of your hard work.
The same method should work for video surfaces using multiple blended projectors, surfaces with splits, etc.
Photo of “hippie trailer”: Public Domain from Max Pixel.