Cue Carts
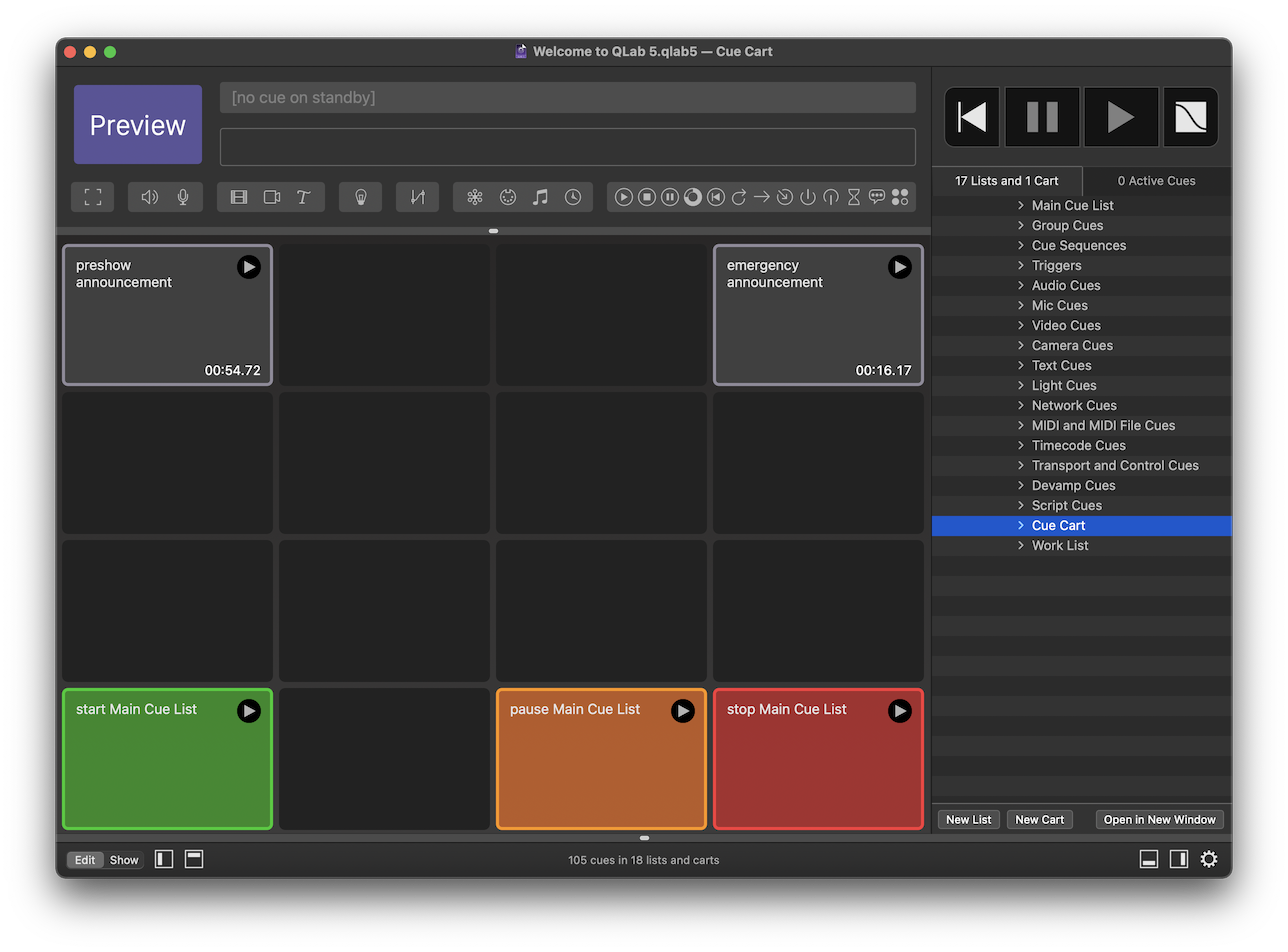
A cue cart is a grid-shaped collection of cues. Cue carts have no playhead and no concept of ordering; a cue cart is meant to make it easy to play cues in any order you like, and to play individual cues as many times as you like.
Cue carts can contain all types of cues except for Group cues. Cues in a cart behave the same way they do in a list, with one key exception: cues in a cart cannot be set to auto-continue or auto-follow. Put another way, cue carts cannot contain cue sequences. You can, of course, use a Start cue in a cart to run a cue sequence in a separate list, but the cue sequence itself cannot be inside the cart.
A workspace in QLab can contain an unlimited number of separate cue carts.
To see the cue carts in a workspace and to add or remove cue carts, open the sidebar by choosing Lists / Carts & Active Cues from the View menu, or use the keyboard shortcut ⌘L. You can also click on the button on the right side of the workspace window footer. The sidebar has two tabs; the left tab shows cue carts (and cue lists too.)

You can create a new cart by clicking on the New Cart button. You can delete a cue cart by selecting it and choosing Delete from the Edit menu or by using the keyboard shortcut ⌘⌫ (delete, sometimes labeled “backspace”).
Note: deleting a cue cart deletes all the cues within that cart too. Be careful! But also, rest easy knowing that you can Undo cue cart deletion.
You can open additional windows to view separate cue lists and carts by selecting the list or cart and clicking the Open in New Window button towards the bottom of the sidebar, or by right-clicking (or control-clicking or two-finger-clicking) on the name of the list or cart.
Cue carts have cue names and cue numbers just like cues, and they follow the same rules and can be edited in the same ways.
The minimum size of cue art cells can be set to any of three sizes. The smallest size allows the cart to be smaller overall or to show the greatest number of cues on screen at once, but of course is harder to read from a distance. You can adjust the display size in Workspace Settings → General → Display Size.
Show Mode and Edit Mode
When the workspace is in edit mode, the button in the masthead is labeled “Preview,” because cue carts do not have a playhead, so starting an individual cue does not have any of the sequential behavior that the button implies. Clicking on this Preview button starts the selected cue or cues. You can also start cues in a cart while in edit mode by clicking on the button in the upper right corner of the cue, or by selecting the cue and using the keyboard shortcuts for (space by default) or preview (V by default.)
When the workspace is in show mode, or when the cart is open in a secondary window, the masthead is not visible.
Working with Cue Carts
The cue cart whose cues are displayed in the main area of the workspace is called the active cue cart. Only one cue list or cart can be active at a time, but the other cue lists and carts in a workspace can still be used even when they’re not active.
The following things are true for the active cue list or cart only:
- Selected cues can appear in the main inspector window.
- The toolbar, Find tool, or Load to Time tool appear in the masthead.
- The commands in Workspace Settings → Controls → Workspace MIDI control playback and playhead positioning.
- The commands in Workspace Settings → Controls → OSC control playback and playhead positioning.
- Keyboard shortcuts from the View menu control the position of the playhead and the selection.
- OSC and AppleScript commands that refer to the active cue list, naturally, only have their effect on the active cue list.
The following things are true for all cue lists and carts, whether or not they are active:
- Cues’ triggers will work.
- MIDI and OSC commands that refer to “all” cues, like Panic All and Pause All will work.
- OSC and AppleScript commands that do not specifically refer to the active cue list will work.
In short, cue lists and carts that are not active can still be quite active and are fully useable.
Starting a cue cart loads all the cues in the cart.
When a cue cart is selected, the inspector shows three tabs: Basics, Triggers, and Grid Size. Please refer to the Inspector section of this manual to learn about the Basics and Triggers tabs of the inspector.
The Grid Size Tab
The grid size tab lets you set the number of rows and columns in the cart, from a minimum size of 1 × 1 up to a maximum size of 15 × 15. If there are cues in a cart, QLab will not allow you resize the cart smaller than the minimum size necessary to accommodate those cues. To make the cart smaller in that case, you’ll need to move or delete cues.
If a cart has forcibly been resized to be too small, for instance via AppleScript or OSC commands, the cart will generate a warning to make it easy for you to notice and address the issue.
Still have a question?
Our support team is always happy to help.