Workspace Settings
The Workspace Settings window can be accessed by choosing Workspace Settings from the Window menu, or by using the keyboard shortcut ⌘,
Settings in this window belong to the workspace, not to QLab, so they travel with the workspace if you bring it to another computer.
General
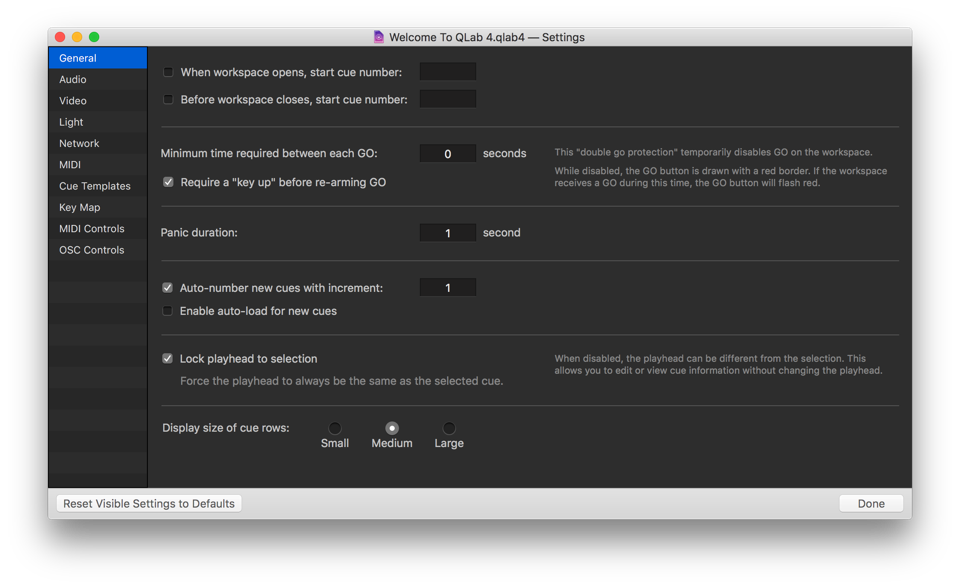
When workspace opens, start cue number. Check this box and enter a cue number in the text field to have QLab automatically start that cue when the workspace is opened. If you need to temporarily prevent this cue from starting, hold down the control and option keys (⌃⌥) while opening the workspace.
Before workspace closes, start cue number. Check this box and enter a cue number in the text field to have QLab automatically start that cue when the workspace is closed. A dialog box will appear to give you the opportunity to prevent the closing cue from running.
Minimum time required between each GO. This can be set to any duration (including 0) in order to help prevent accidental starting of cues due to a double-press of the GO button. This protection will apply to mouse clicks on the GO button, pressing space or any other key you’ve assigned to GO, and incoming MIDI, MSC, and OSC controls which directly trigger the “GO” action.
If a time is set, a red border will appear around the GO button to indicate that the GO button is temporarily disabled. If QLab receives a command to GO during this time, the area surrounding the GO button will flash red to indicate that the command was received, but disregarded.
Require a “key up” before re-arming GO. This protection applies only to the keyboard shortcut assigned to GO; it forces QLab to wait for the key to be released before accepting another command to GO.
Panic duration. This is the time over which all running cues will fade out and stop when the escape key is pressed or the cue list receives a command to panic.
Auto-number new cues with increment. Check this box and enter a number into the text field to automatically assign cue numbers that increase by the desired increment to newly created cues. Cues will be numbered with the lowest available number according to this increment.
Enable auto-load for new cues. Check this box and newly created cues will have their “auto-load” option enabled by default.
Lock playback position to selection. Check this box to make the playback position always match the selected cue. When disabled, the playback position can be different from the selection. This allows you to edit or view cue information without changing the playback position.
Display size of cue rows. Choose a size to display your cues: small, medium, or large. Small allows more information to fit on screen, and large is convenient for easier viewing from a distance.
Audio
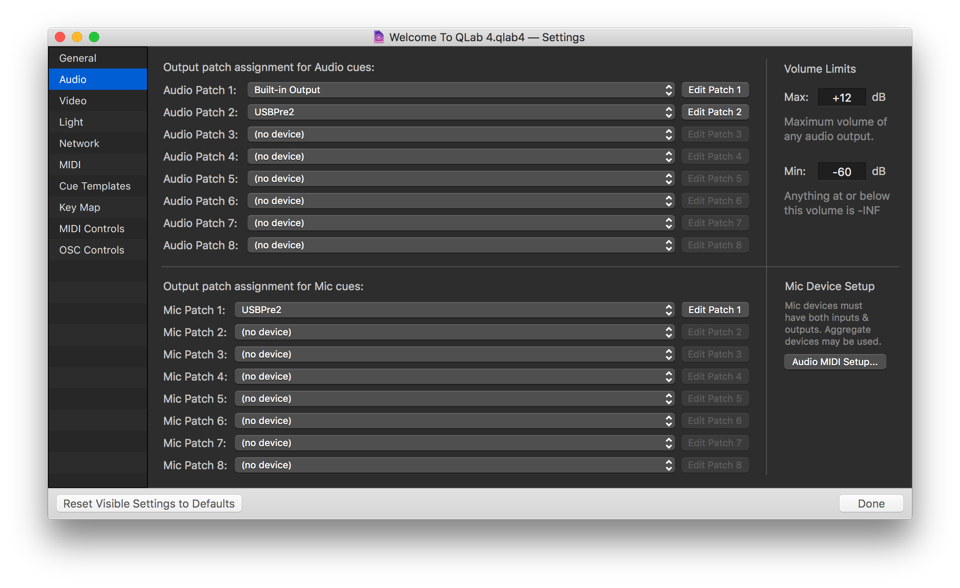
Output patch assignment for Audio cues. QLab workspaces can connect to eight individual audio devices, which are assigned to one of eight audio patches. Use the drop-down menus to assign an audio device to a patch. Click the Edit Patch buttons to the right of each drop-down menu to edit the details of that audio patch.
Output patch assignment for Mic cues. Output patches for Mic cues need to be set up separately from output patches for Audio cues. They can be the same, similar, or different from Audio cue output patches, depending upon your needs.
You can read more about editing audio patches here.
Volume Limits. Set an upper limit to prevent a sound from being played too loudly. Specify a lower limit, and QLab will treat anything at or below that level as -INF (silent).
Mic Device Setup. Output patches for Mic cues can only use audio devices which have both inputs and outputs, including aggregate audio devices. You can click the Audio MIDI Setup… button to open the Audio MIDI Setup application, which allows you to define aggregate audio devices and explore the details of the audio devices connected to your Mac.
Video
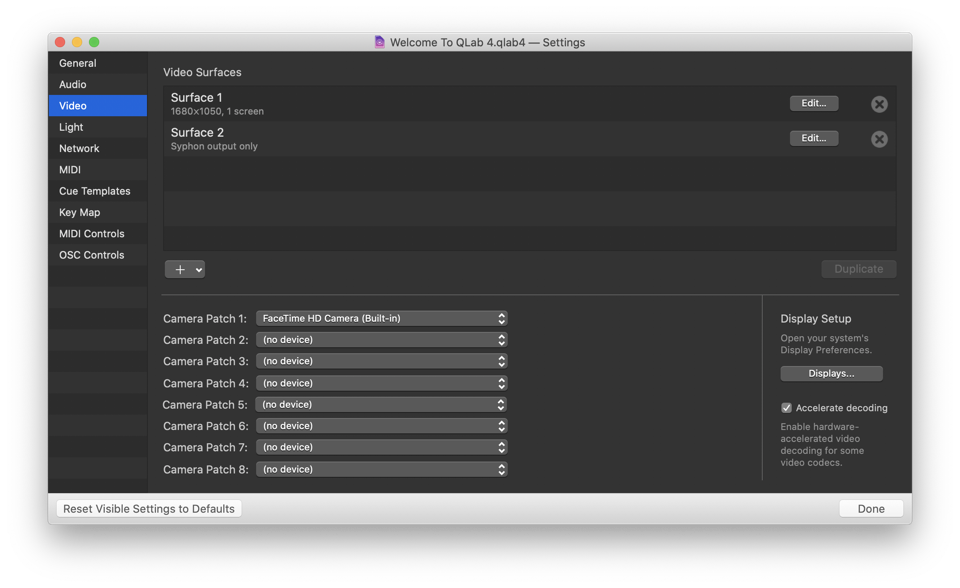
Video Surfaces. The surfaces defined for this workspace are listed here to be edited or removed. You can learn more about editing surfaces here.
By default, in a new workspace, QLab creates one surface for each display connected to your Mac.
The + button below the list of surfaces gives you three ways to create a new surface.
- New Empty Surface creates a new surface with no screens assigned to it.
- New With Display creates a new surface with the selected screen or partial screen pre-assigned, and with dimensions equal to that screen’s.
- New Multi-Screen Surface creates a new surface via a helper tool which lets you enter the resolution of each projector, the physical layout of the projectors, and the percentage overlap between each projector.
Duplicate makes a copy of the selected surface.
Camera Patches. QLab workspaces can connect to eight individual video input devices, which are assigned to one of eight Camera Patches. Use the drop-down menus to assign a device to a patch.
Camera cues in QLab can use the iSight or FaceTime camera built into many Macs, most USB- or FireWire-connected webcams, and Blackmagic video capture devices belonging to the UltraStudio, Intensity, DeckLink, and MultiBridge product lines.
Display Setup. Click this button to open the Displays section of System Preferences.
Accelerate decoding. When this box is checked, QLab uses Apple’s GPU-accelerated video decoding framework, which lets your Mac’s GPU help decode some types of video, including H.264 and H.265. Apple does not offer very much information about the intricacies of this framework, so we’re sorry to say we cannot either. If your Mac has a very fast CPU but a lackluster GPU, it’s possible that you’ll see better video performance with this box unchecked. If you’re experiencing choppy video playback, experiment with checking or unchecking this box.
Light
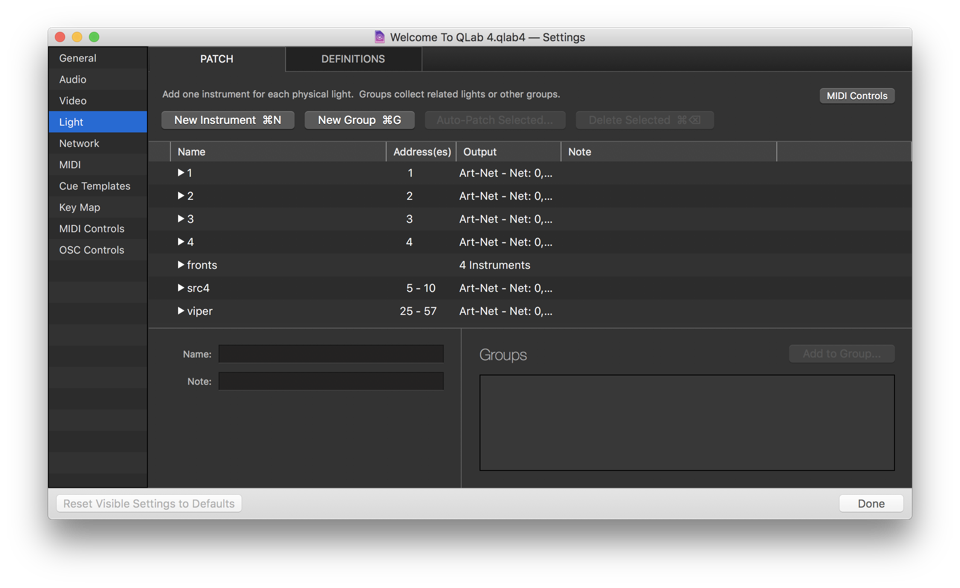
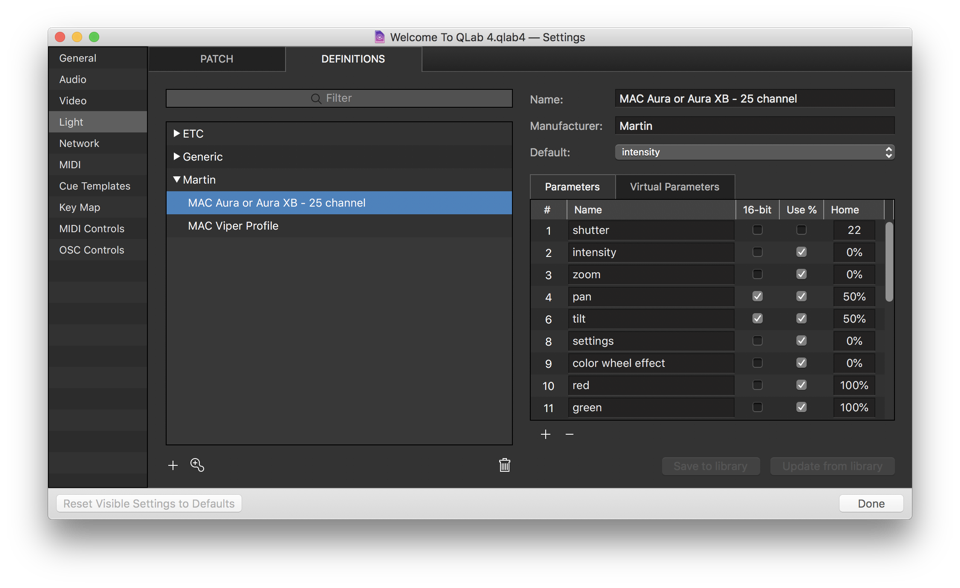
Light settings are divided into two tabs: Patch and Definitions.
The Patch Tab allows you to view and edit the instruments and light groups in the workspace.
The Definitions tab lists every light definition used by at least one instrument in the workspace.
You can learn more about the Lighting Patch Editor in its section of the documentation.
Network
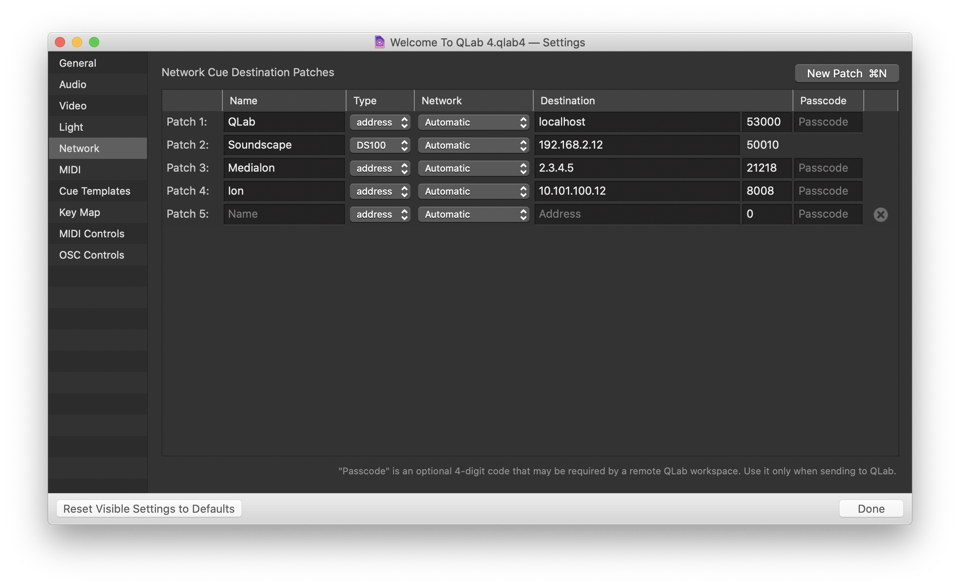
Network cues send OSC or UDP text messages to destinations which are configured in the Network section of Workspace Preferences. Starting with QLab 4.6, workspaces can have any number of destination patches. By default, new QLab workspaces start with a single patch, and you can add more by clicking the New Patch button or by using the keyboard shortcut ⌘N while this screen is frontmost.
Name. This is for setting an easy-to-read label, and has no bearing on the functionality of the patch.
Type. This drop-down menu lets you choose either address or DS100. If the network patch will be used to communicate with a d&b DS100 Soundscape processor, then choose DS100. Otherwise, choose address.
Network. You can set a patch to automatically choose the network interface that it will use, or manually select a specific network interface. By default, this is set to Automatic. Unless your Mac is connected to multiple networks interfaces all using the same IP addressing scheme and subnet, using Automatic should work properly nearly all of the time.
Destination. This is the IP address and port number of the destination. Typing localhost or 127.0.0.1 will set the destination to this computer, to allow QLab to send OSC messages to itself or to other software on the same machine. QLab listens for OSC on port 53000, and for plain text formatted as OSC on port 53535. Note that the port cannot be edited for DS100 patches; the DS100 processor has a hard-coded port number which cannot be changed.
Important: in the interest of speed, messages sent to localhost do not go through the network stack of macOS, and as such can only be used for sending messages from QLab to itself. Messages sent to 127.0.0.1 do traverse the network stack, and so can be used to send messages to other programs running on the same Mac.
Passcode. If the destination is a copy of QLab, and that copy has a passcode set (see OSC Controls, above) enter that passcode here. This code is QLab-specific and should only be set when necessary.
While there is no harm in having unused patches in your workspace, you can delete patches off the bottom of the list by clicking on the button which appears at the right edge of the window.
MIDI
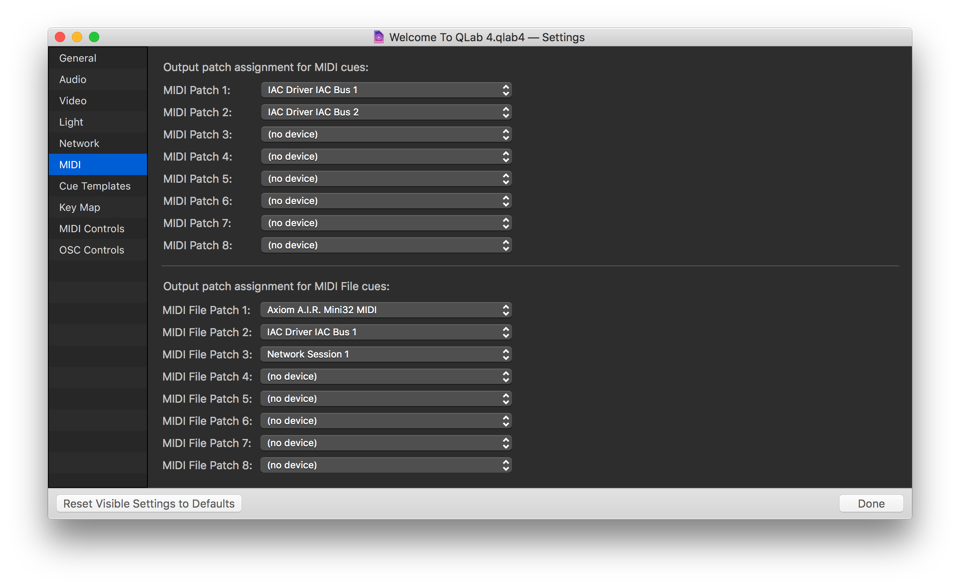
Output patch assignment for MIDI cues. MIDI cues can output to any of eight individual MIDI devices, which are assigned to one of eight MIDI Patches. Use the drop-down menus to assign a MIDI device to a patch. Note that these patches are only relevant to outgoing MIDI from MIDI cues, and have no bearing on incoming MIDI for triggers or workspace controls.
Output patch assignment for MIDI File cues. Output patches for MIDI File cues need to be set up separately from output patches for MIDI cues. They can be the same, similar, or different from MIDI cue output patches, depending upon your needs.
Cue Templates
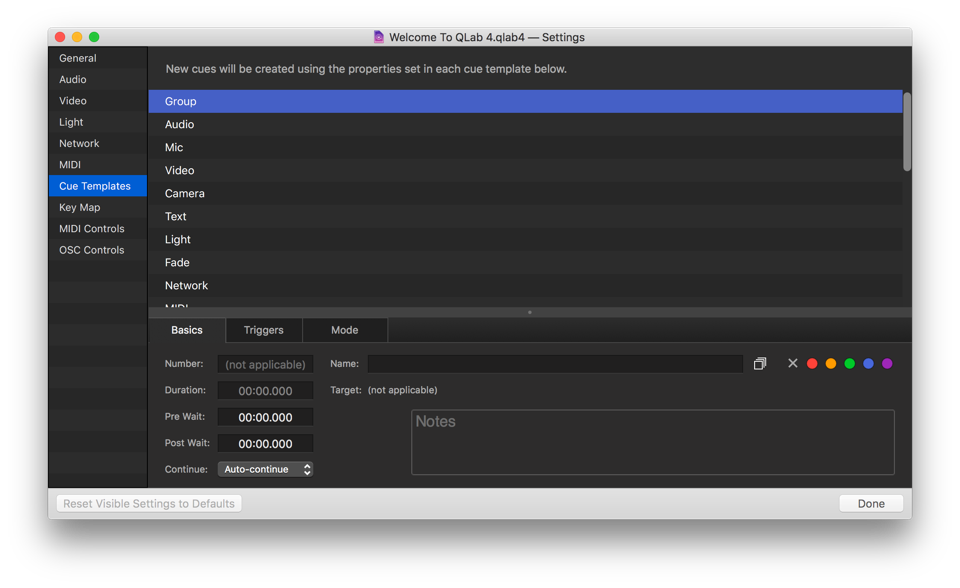
Cue Templates allow you to adjust the default settings of newly created cues. The Cue Templates section shows a list of all of the cue types in QLab and a copy of the Inspector below the list. You can select one of the cue types and use the Inspector to make any adjustments you like, including cue names, notes, targets… everything. Newly created cues will use these settings as their default.
Key Map
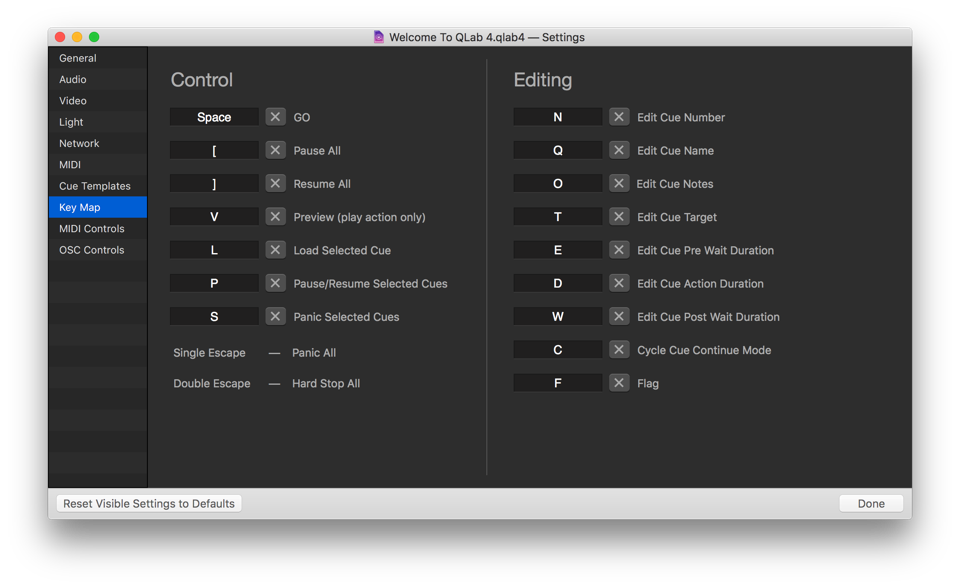
The Key Map allows you customize keyboard shortcuts, or hotkeys, for the listed commands. Simply enter the desired hotkey in the text field next to the appropriate command. To disable a hotkey, press the X button next to the command.
Note that a single press of the escape key is always assigned to panic, and a double press of the escape key is always assigned to hard stop.
MIDI Controls
MIDI Controls settings are divided into two tabs: General and Light Dashboard.
The General Tab
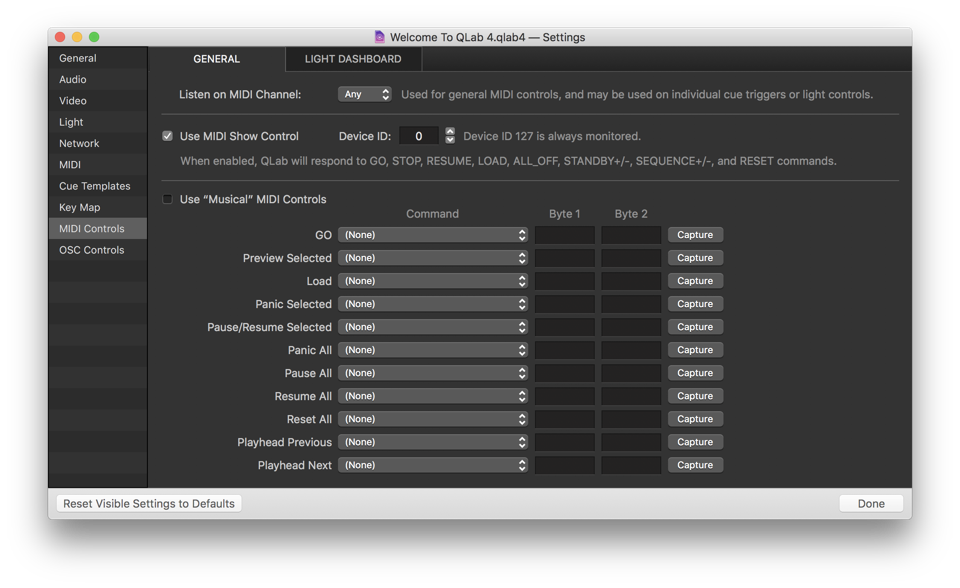
The General tab allows you to configure how your workspace responds overall to incoming MIDI messages and MIDI Show Control messages.
Listen on MIDI Channel. You can restrict incoming MIDI to a specific channel for transport commands, or set to “Any.” Individual cue triggers will default to listening on that same channel, but can be individually set to a different channel.
Use MIDI Show Control. When enabled, QLab will respond to GO, STOP, RESUME, LOAD, ALL_OFF, STANDBY+/-, and RESET commands sent via MIDI Show Control. QLab listens for commands categorized as Lighting (General), Sound (General), and Video (General).
Use Device ID. Device ID 127 is always monitored, along with whatever ID is entered here. All devices on an MSC network should have unique device IDs.
Use “Musical” MIDI Controls. When enabled, QLab listens for incoming MIDI messages which can be assigned to the transport controls listed below.
Command. For the listed transport controls, you can manually enter a MIDI command, or click “Capture” to have QLab listen for the next incoming MIDI command and assign that command to the selected control. Note that only Note On, Note Off, Control Change and Program Change messages can be used for transport controls.
The field marked “Byte 2” can contain greater-than (>) or less-than (<) signs, and can also contain the word “any.”
The Light Dashboard Tab
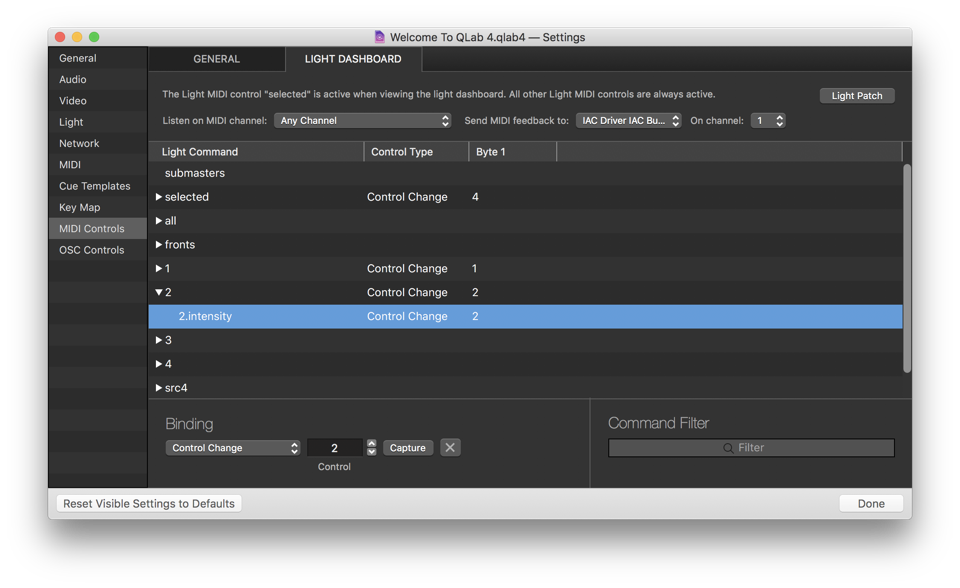
The Light Dashboard tab allows you to map MIDI controls to instrument parameters in the Light Dashboard.
You can learn more about the Light Dashboard tab in the Light Patch Editor section of this documentation.
OSC Controls
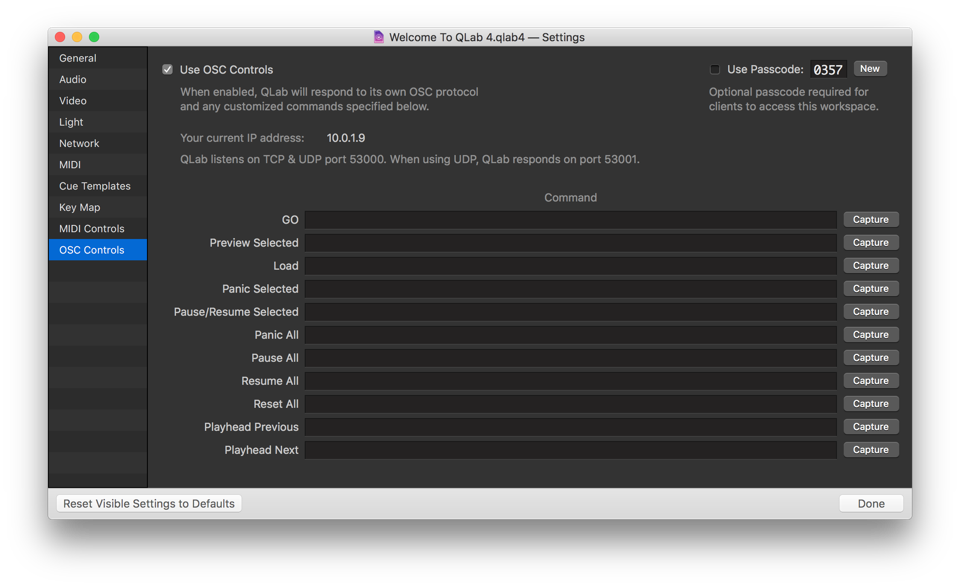
Use OSC Controls. When enabled, QLab will respond to incoming OSC (Open Sound Control) messages on all available network connections. QLab responds to messages defined in the QLab OSC dictionary, as well as any customized commands for the transport controls listed below.
Use Passcode. You can check this box to require a four-digit passcode which clients must enter in order to send OSC commands to QLab.
Command. For the listed transport controls, you can manually enter any valid OSC command, or click “Capture” to have QLab listen for the next incoming OSC command and assign that command to the selected control. Note that QLab’s own OSC commands for these controls are not overridden by entries here; they remain active in addition to them.
QLab listens for OSC on port 53000. Additionally, QLab listens for plain text formatted as OSC commands on port 53535. When incoming commands are sent to port 53000 via UDP, QLab will send replies on port 53001.
Still have a question?
Our support team is always happy to help.
