QLab 4 uses an account-based licensing system which allows you to install and remove licenses quickly and easily without having to keep track of license files. Licenses may also be installed on Mac which are not connected to the internet, and starting with QLab 4.1, licenses can also be installed onto a USB drive connected to your Mac.
You can purchase QLab licenses on our secure online store using a credit card, debit card, or PayPal. Once you've chosen the license or licenses that you wish to purchase, click Checkout. You can then log in to your QLab account if you already have one, or just enter your billing details if you don't. It's important to double-check your email address before completing your purchase.
If you do not already have an account, completing the purchase will create an account for you, log you in, and prompt you to create a password for the account. You will use this password and your email address in QLab to install your licenses.
Rent-to-own licenses can be purchased on a day-by-day basis. When you purchase one, you choose the start date and the end date, and the license will be valid for that period of time. It's important to note that a one-day rental isn't just 24 hours starting from the time of purchase; the actual calendar date matters. If you purchase a one-day rental license with a start date of today, it will remain valid until midnight tonight.
The Figure 53 shop uses your computer's clock to determine the timezone for your rental license.
You can purchase and install rental licenses ahead of time, choosing a start date in the future. On the appropriate day, the license will automatically "wake up" and unlock the appropriate features. The first time that QLab launches after the rental period is over, the license will simply stop working on its own. You do not need to "stop" or "cancel" a rental.
Every dollar that you spend on a rental license can be applied towards the purchase of a standard QLab license. Every day at midnight, you will receive store credit equal to the value of that day’s rental. This credit will be placed in your account, and whenever you go to make purchases of standard, non-rental licenses, the store will give you the option to apply your store credit. You can use the credit at any time.
If you’d like to end an ongoing rental license early and trade it in for a permanent license, you can do that in the store.
In QLab, choose Manage Your Licenses... from the QLab menu to open the License Manager:
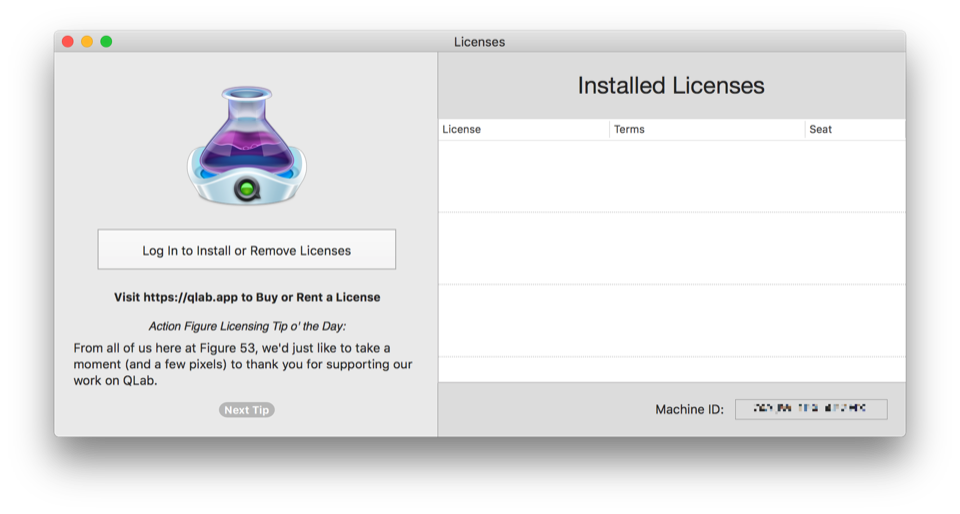
Click Log In to Install or Remove License and enter your email and password.
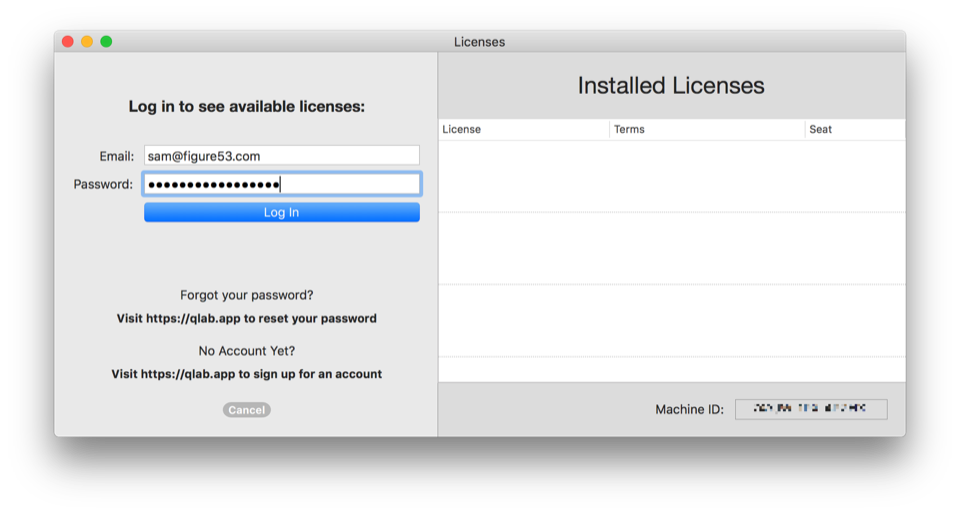
If you've forgotten your password, or if you have not set a password for your account, click Visit Figure53.com to reset your password which will open a web browser and allow you to reset your Figure 53 password.
If you do not yet have a QLab account, you'll need to create one in order to buy a license and install it.
Once you've logged in, you'll be presented with a list of the licenses in your account.
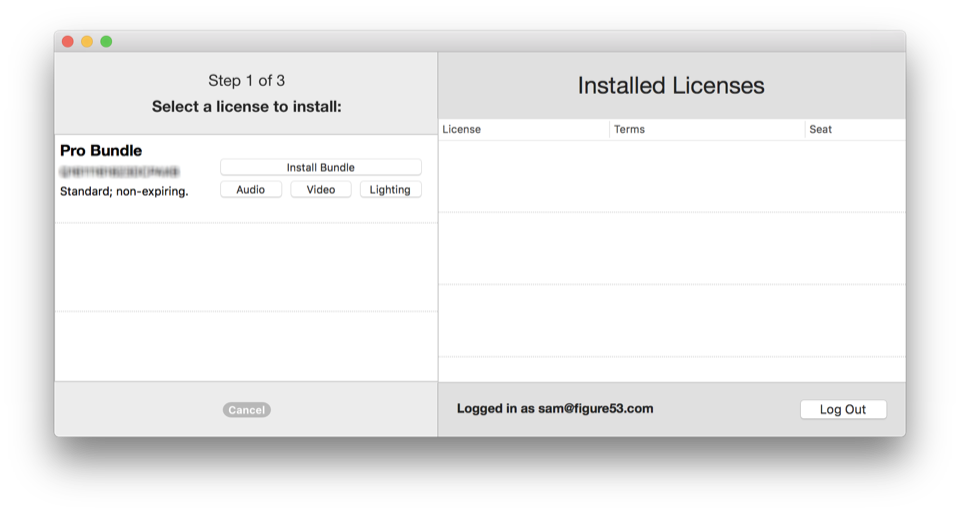
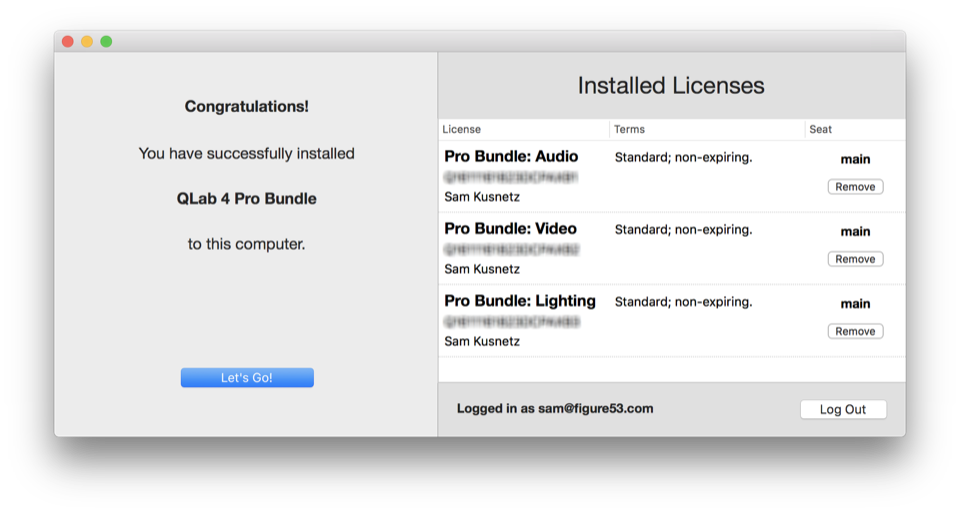
Click the Install... button to select the license for installation. Pro Bundle licenses may be installed all together, or you can individually install the Audio, Video, or Lighting portion of the license.
Once you choose a license, you'll be presented with a choice of which seat to install.
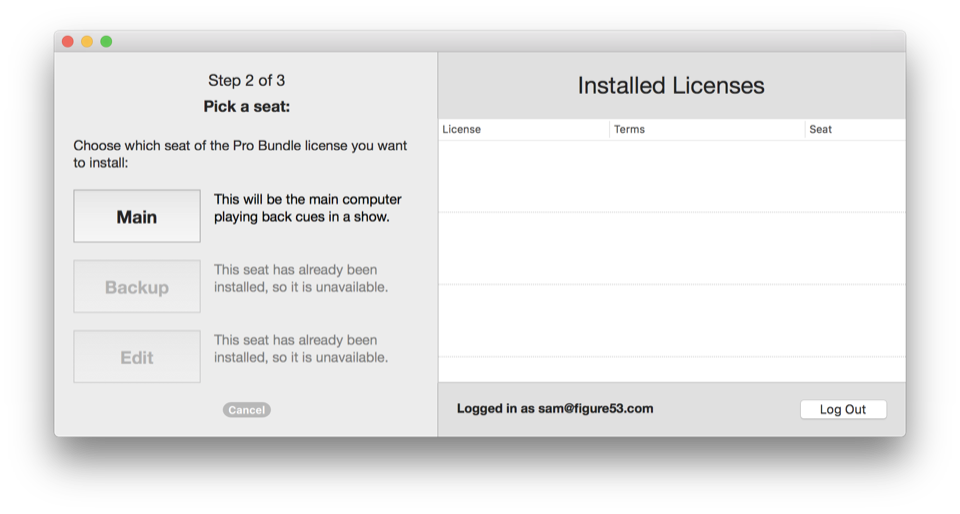
Each QLab license can be installed on up to three Macs at a time, with three specific uses:
Once you choose a seat, you'll be presented with a choice of destination:
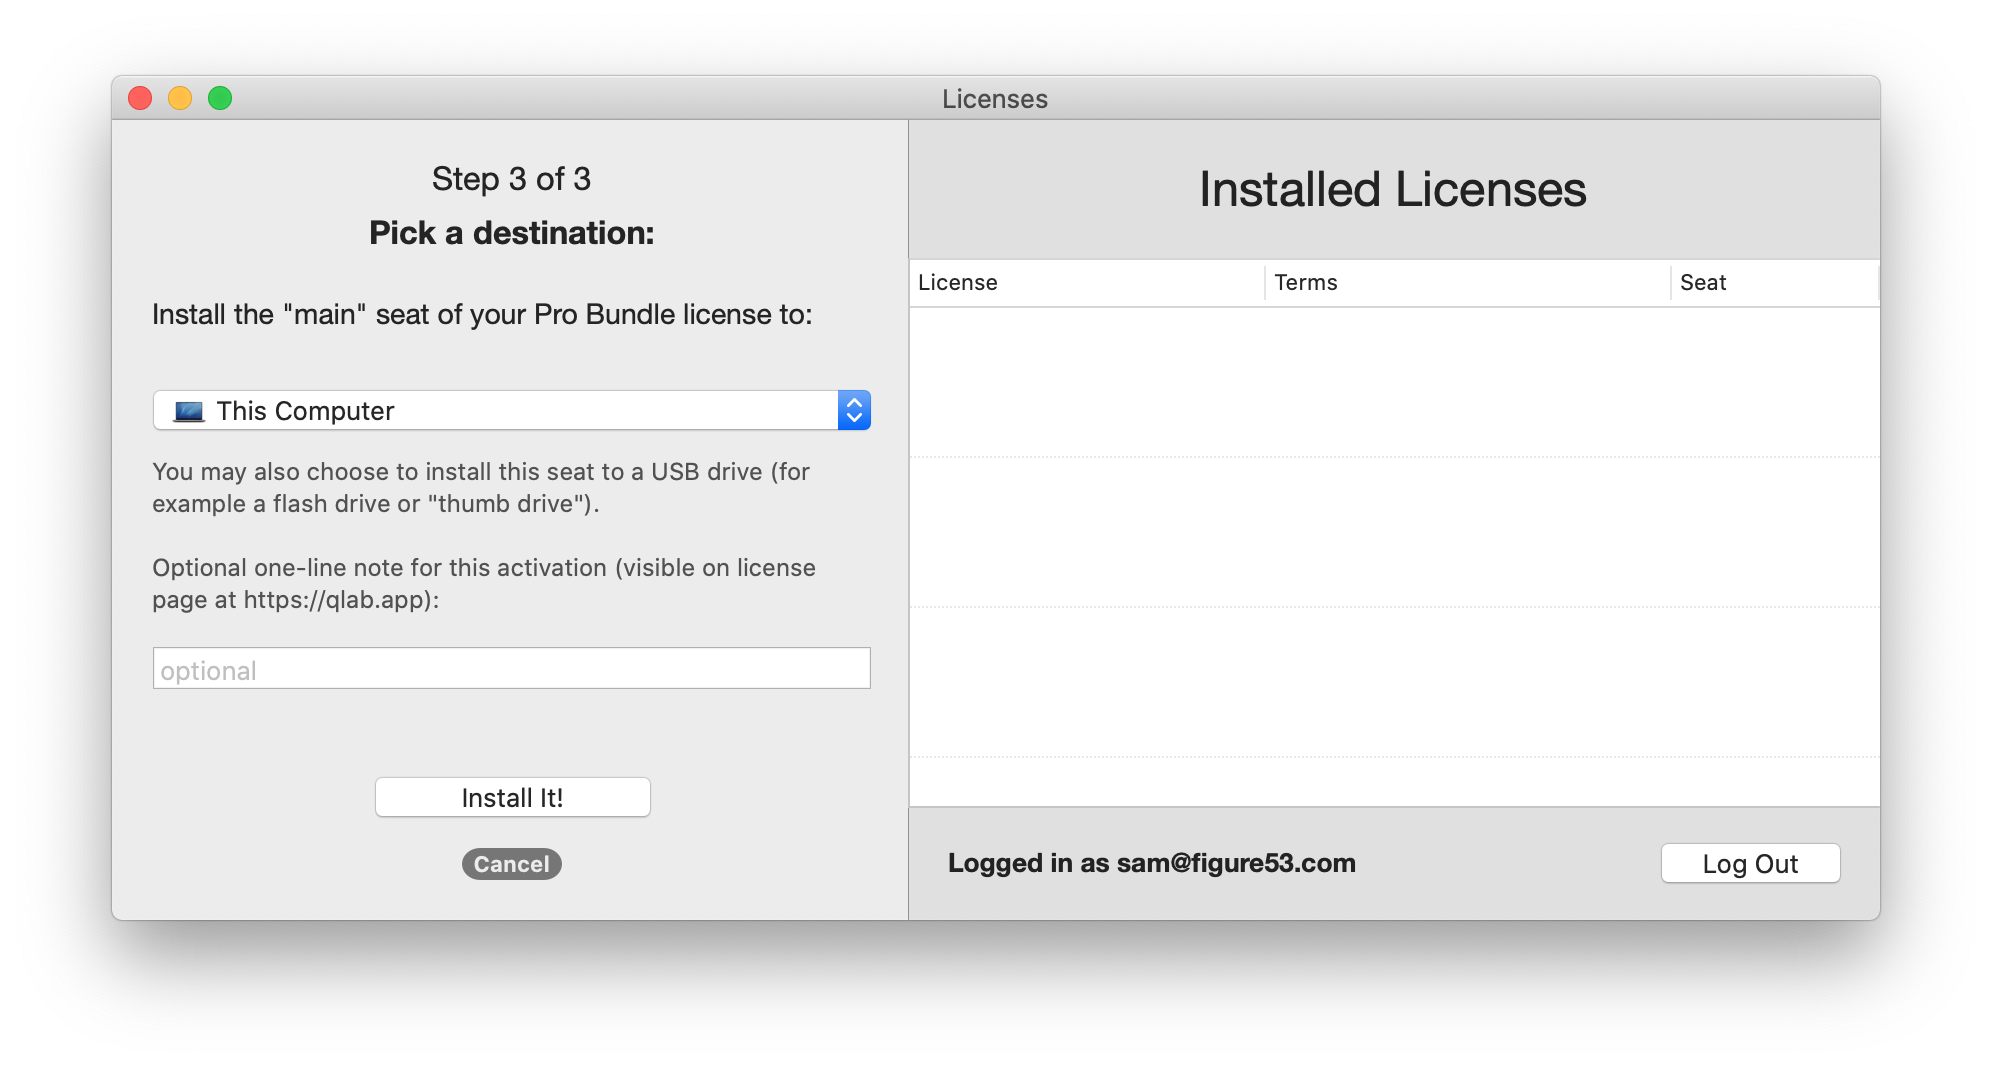
If you choose This Computer, the license seat will be installed onto your Mac, and will be accessible to all user accounts on that Mac. This is the most common way to install a license.
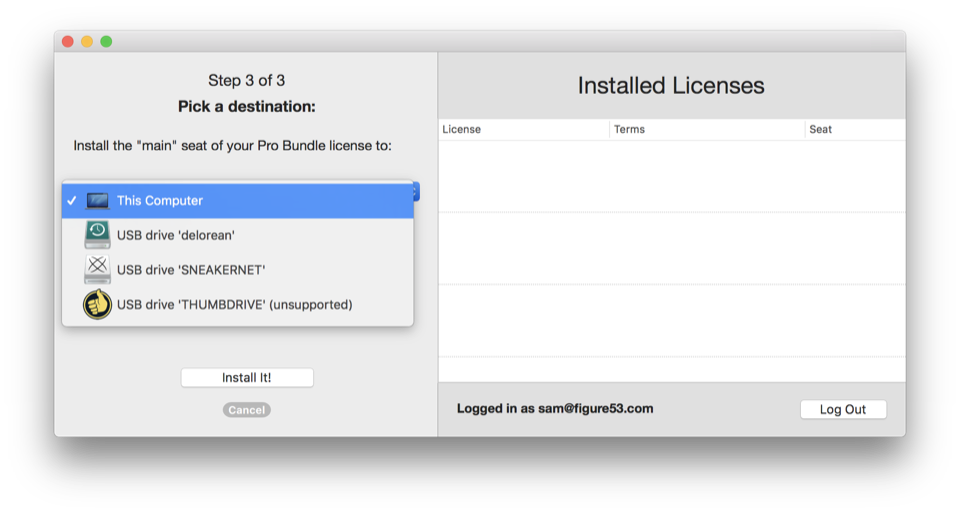
Alternately, you can install the license seat onto a connected USB drive. To learn more about this, skip down to the section entitled USB Licenses.
Starting with QLab 4.6.5, if you choose This Computer, you can optionally enter a single-line note to go along with the installation. This note can be seen when viewing the details your licenses on your account page on qlab.app.
Click Install it! to complete the installation process. The License Manager will then show you the completed installation.
Starting with QLab 4.1, license seats can be installed onto USB drives. This makes it easy to loan a QLab seat to a short-term collaborator, use licenses with Macs that aren't connected to the internet, or be ready with a license when you're not sure what Mac you'll be using.
Please note that USB licenses can only be used with QLab 4.1 and later.
Because not every USB device manufacturer adheres to the same standards, only USB drives made by the following manufacturers can be used for QLab licenses. This restriction makes it possible for us to provide the highest possible guarantee of stability for USB licenses without resorting to using something like an iLok or Sentinel key.
To install a license to a USB drive, you'll need to use a Mac that's connected to the internet and has QLab installed. Follow the first several steps above for installing a license, but when you get to the step of selecting a destination, choose an attached, compatible USB device from the drop-down menu.
Once you choose a USB device, you'll be given a choice to install the seat temporarily or permanently. Choosing a temporary installation lets you select an expiration date after which the license seat will automatically deactivate itself on the USB drive, and become available for you to install once more. Please note that this is entirely separate from the expiration date of a rental license; you cannot install a rental license onto a USB drive and set an expiration date that's after the expiration date of the license itself.
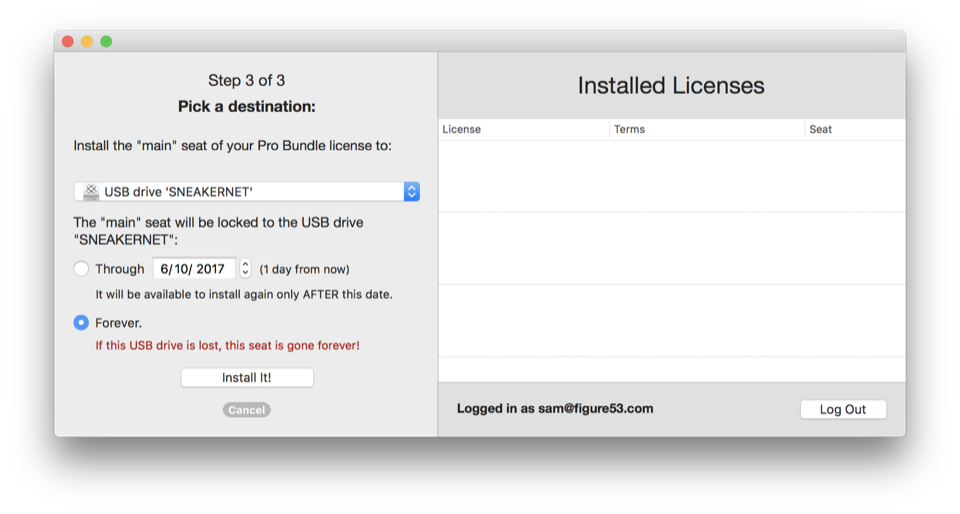
If you choose forever then your license seat will be permanently and irrevocably installed on the USB drive. This is dramatically different from installing a license seat onto a Mac, which can be un-done at any time.
If the USB drive is lost, stolen, or erased, so is the license seat installed onto it.
In the case of a damaged USB drive, please contact support@figure53.com, and we will tell you how to mail us the damaged drive and receive a replacement license.
If your Mac cannot be connected to the internet, maybe because you're on a boat, or your IT department is grouchy, and you cannot or do not wish to use USB licenses, you can install a QLab license by using remote activation. You'll need to have QLab installed on the offline Mac in order to begin.
You could use this process to install a license onto a Mac that is connected to the internet as well, if that's useful to you in any way.
To perform a remote activation, you'll need the Machine ID for the Mac that you want to use. When you open the License Manager on a Mac that's not connected to the internet, it will look like this:

You can click Copy ID to copy that code for easy copy-pasting.
The alphanumeric code near the bottom of the window is the Machine ID, which is a QLab-only identification code unique to each Mac. You can also find your Mac's Machine ID by opening a workspace, choosing Workspace Status from the Window menu, and clicking on the Info tab.
If you have access to another computer that's online, you can do a remote activation by yourself. Once you've got the Machine ID for the QLab Mac, log into your QLab account at https://qlab.app/account and find the license you want to install listed under the heading Your Licenses.
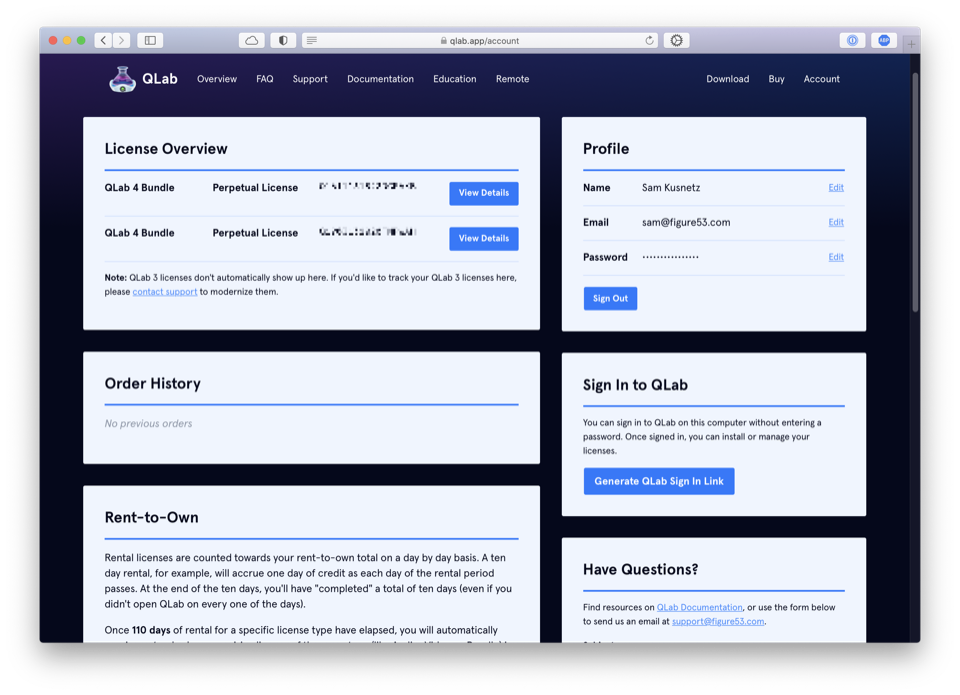
When you've found the license you want to install, click See details under that license, and you'll be taken to a page showing the details of that license.
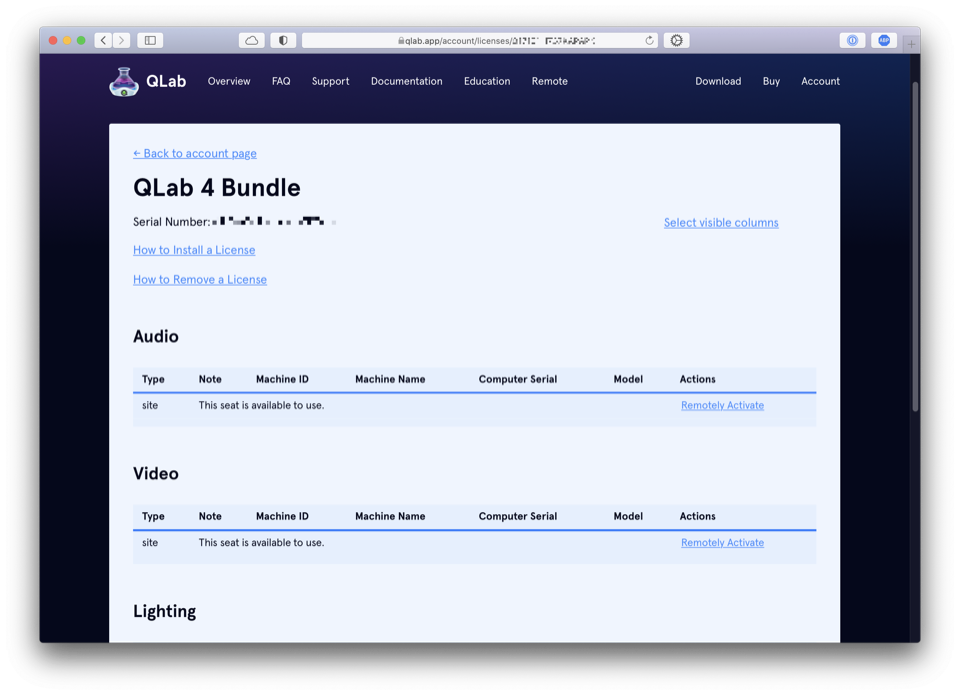
Choose the seat you wish to install, and click Activate. You'll be asked to enter the Machine ID of the Mac, then click Activate once more. The web page will refresh, and then you'll see a link next to the seat that says Download Activation File. Click to download the file, and then copy that file over to the offline Mac. You can then double-click on it or drag it onto QLab's icon to install it.
If you cannot or do not want to go through that process yourself, we are happy to do it for you. Copy the Machine ID of the Mac you want to use, send us an email at support@figure53.com. Paste in the Machine ID and tell us which license and which seat you want to install on this Mac. For example, you might say "I want to install the Main Audio seat of my Pro Bundle" or you might say "I want to install the Main Lighting and Backup Video seats of my Pro Bundle."
When we receive your message, we'll use the code to generate an offline activation file, which we will email back to you. When you receive that email, copy the file to the offline Mac using a local network or a USB key or some similar method. You can then double-click on it or drag it onto QLab's icon to install it.
To remove a license installed on your Mac, open QLab, choose Manage Your Licenses... from the QLab menu, and click the Remove button next to the license you wish to remove. If the Remove button is not visible, log in to the account that owns that license to reveal it.
If you need to remove a license from a Mac which has been broken, lost, stolen, or erased, please write to support@figure53.com and we will help you out, no problem.
If you are not able to physically access a Mac that has your license installed, you can remotely deactivate the license which makes it immediately available to install on a different Mac.
To do this, log into your QLab account at https://qlab.app/account and find the license you want to remotely deactivate listed under the heading Your Licenses.
When you've found the license you want to remotely deactivate, click See details under that license, and you'll be taken to a page showing the details of that license.
Choose the seat you wish to deactivate, and click Deactivate. You'll asked to confirm, and once you do the license seat will be deactivated and ready to install on another Mac.
The next time QLab launches on the Mac that originally had the license installed, the now-deactivated license seat will be automatically uninstalled. The Mac must have access to the internet in order to complete this uninstallation.
QLab 3.2 and later has the ability to communicate with the new account system, and you can use any QLab 4 license with QLab 3. License activation happens on a per-computer basis, so using both QLab 3.2 and QLab 4 on the same Mac only counts as a single activation. Please note that using a QLab 4 license with QLab 3.2 does not enable any of the 4.x features... you'll need to use QLab 4 to get access to those.
If you own a QLab 3 license, you can "modernize" this license and bring it into the account system if you wish. If you want to modernize a QLab 3 license, you must remove it from every computer that it's been installed on. Then, contact us at support@figure53.com and we'll take care of it.
You do not need to modernize a license in order to use it for an upgrade discount.