This workspace demonstrates a number of surfaces on a single projector display with surface masks to precisely map content onto a complex projection surface. This might be a stage set or, as in this example, a complex architectural structure. The example below is programmed in QLab 3, but downloads are provided for QLab versions 3, 4, and 5. You will have to edit the video displays to match your set up.
The Sydney Opera House was Jørn Utzon's unwitting gift to projection designers, even though when he designed it, the technology didn't exist to exploit it as such. It has been used for public projection displays many times, most notably in the Vivid Sydney, Lighting the Sails commissions, which have taken place annually since 2009.
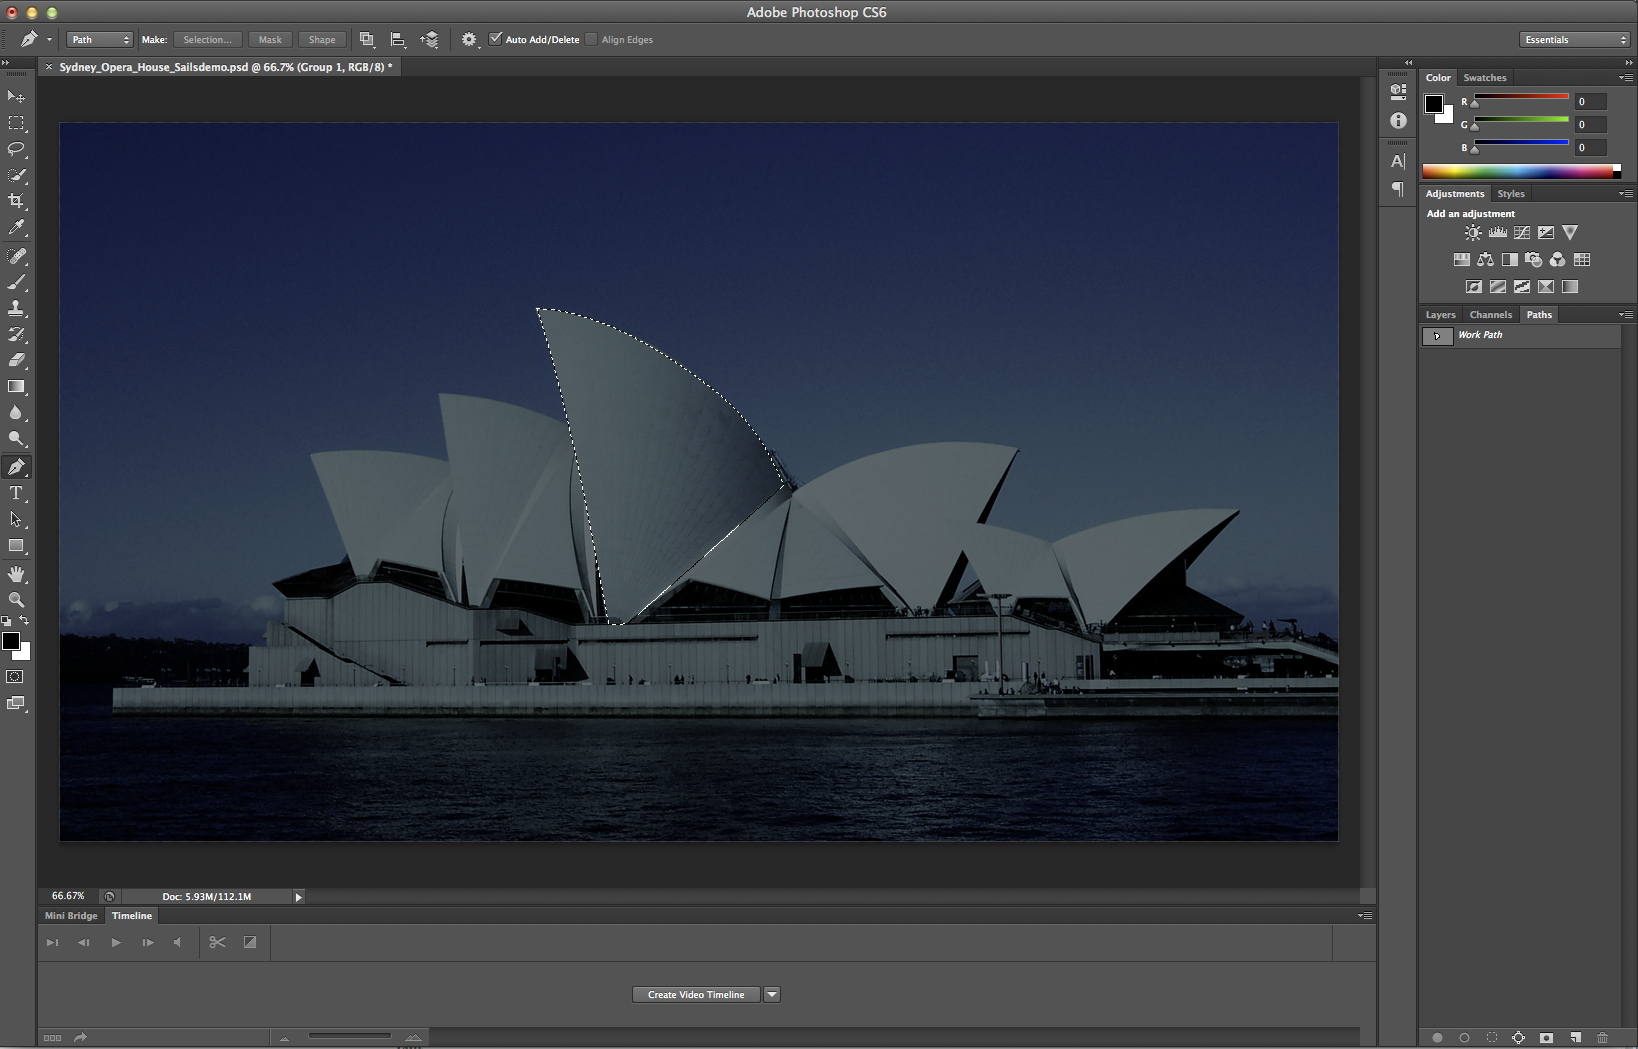
In this example, there are nine surfaces in QLab corresponding to the major architectural features of the building. In the process described, the building features have been traced from a photograph taken at the projector position, but another approach that is often used with mapping is to put a Photoshop canvas live on a projector, and trace the features directly on the actual set or building to make the map. This video shows each surface individually, both in QLab and on the structure (best viewed full screen):
Each video surface is not much bigger than the masked area. This is so that the processor load of each surface is minimized. Also, if any small tweaks are needed, the corner pins for each surface are close to the area that surface maps, for easy manipulation. All the masks are slightly softened at the edges.
This illustrates the creation of the mask and surface for sail number 3. First in Photoshop, either on a photo taken at the projector position, or live on the actual set or building structure, the outline of the mask for the surface is traced using the pen tool.
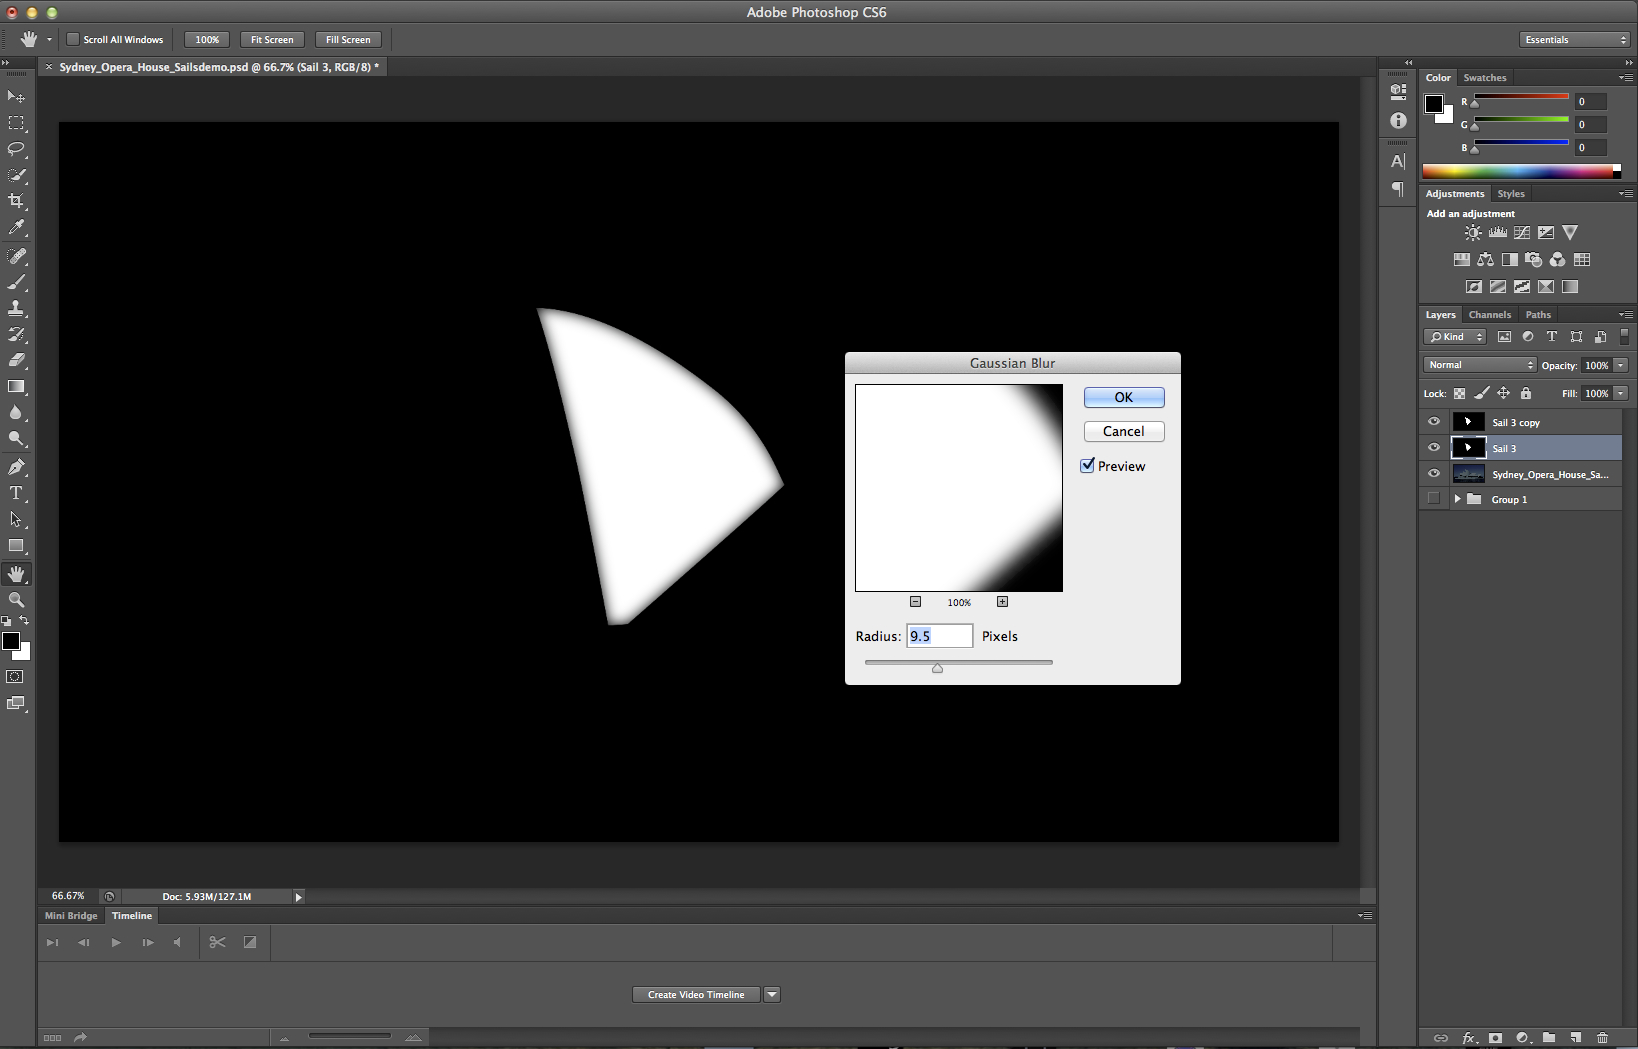
This is then converted to a selection, filled with white, and put on a black background. The layer is duplicated, the original is blurred to give a gradient at the edge of the mask, and the duplicate is set to darken mode, to retain a hard cut off at the mask boundary.
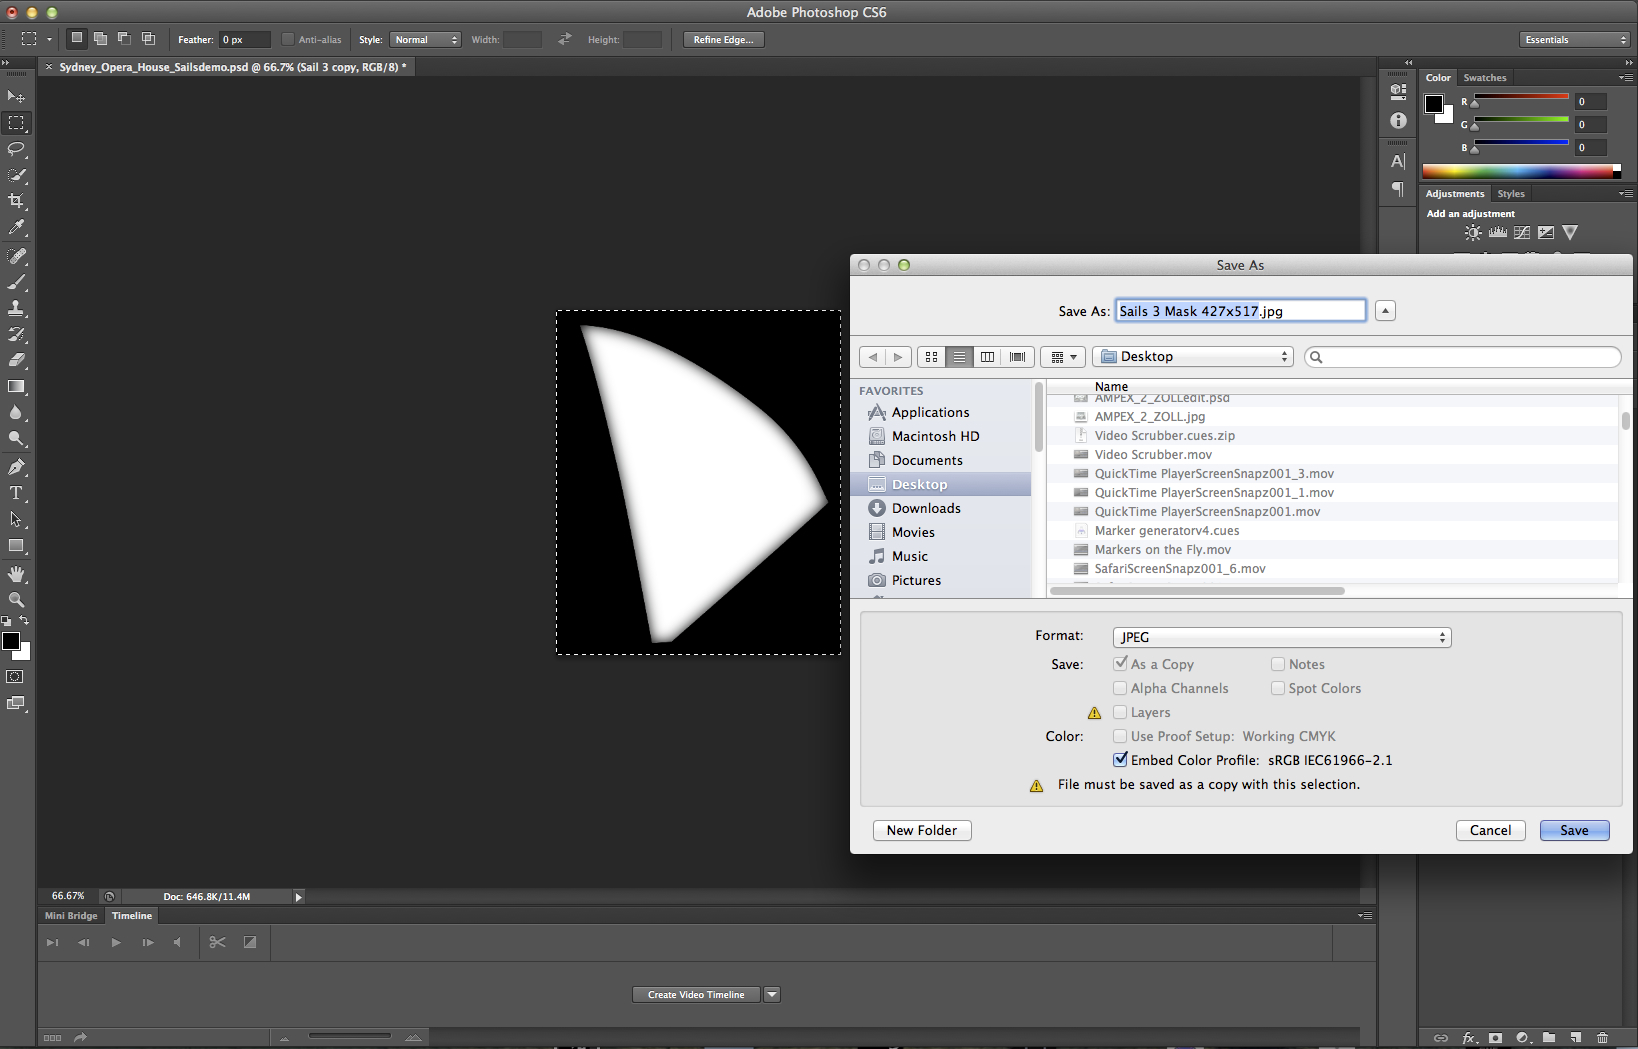
The image is then cropped to the mask, with a margin. The image is saved, as a JPG or PNG file. Because it's very important that the surface size matches the mask size exactly, I always include the mask dimensions as part of the file name.
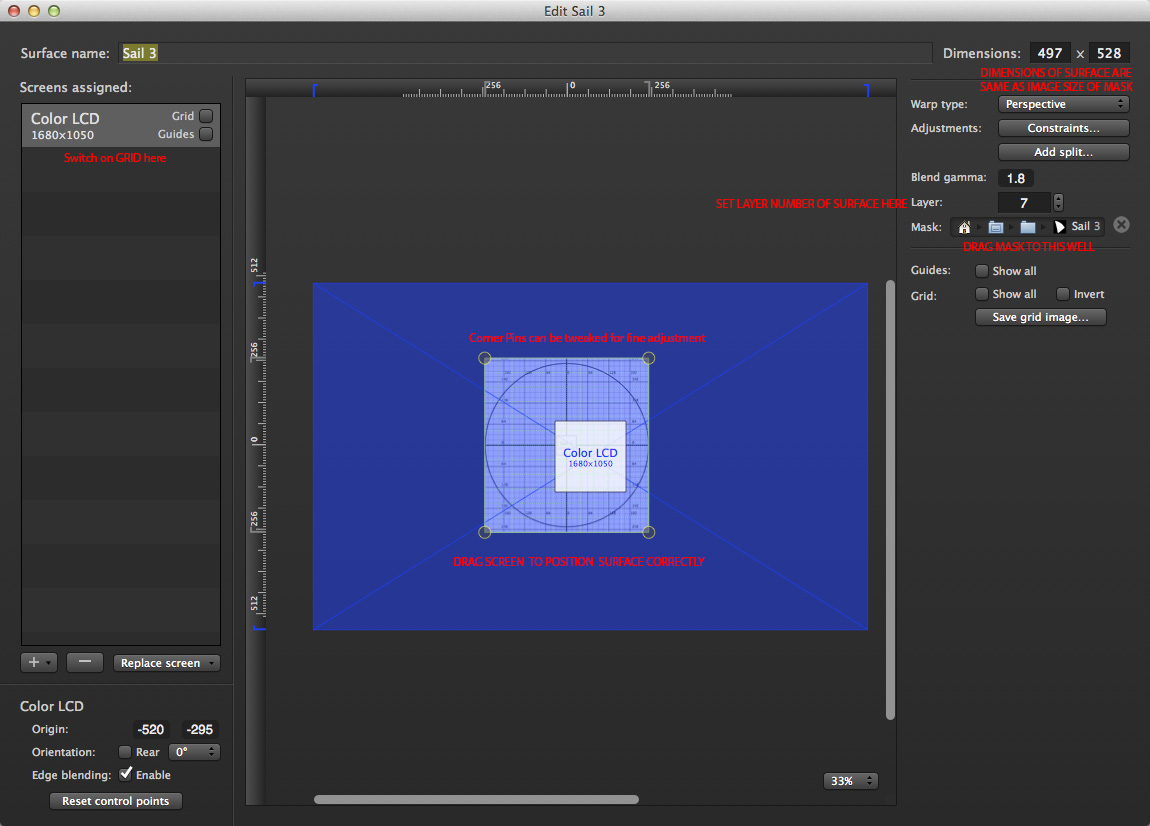
In QLab, a surface is created, named, and its dimensions set to match the relevant mask. The mask is dragged to the mask well. The grid is switched on and the display device dragged in relation to the surface to place the masked grid at its correct position within the multiple mask composition. The surface layer number is then set, so the surfaces stack correctly.
Here's a simulation of the final result:
Further reading about projection mapping, including details of how to map an already warped QLab surface, can be found in the cookbook chapter called Mapping Complexity.
Images used in the example workspace and video: "Sydney Opera House Sails". Licensed under CC BY-SA 3.0 via Wikimedia Commons. Modified images distributed under the same license.
