Better By Default
The default cue level and crosspoint settings for Audio cues are really only useful and appropriate for a 24-channel audio file, matrixed one-to-one to the outputs of a 24 channel audio interface.
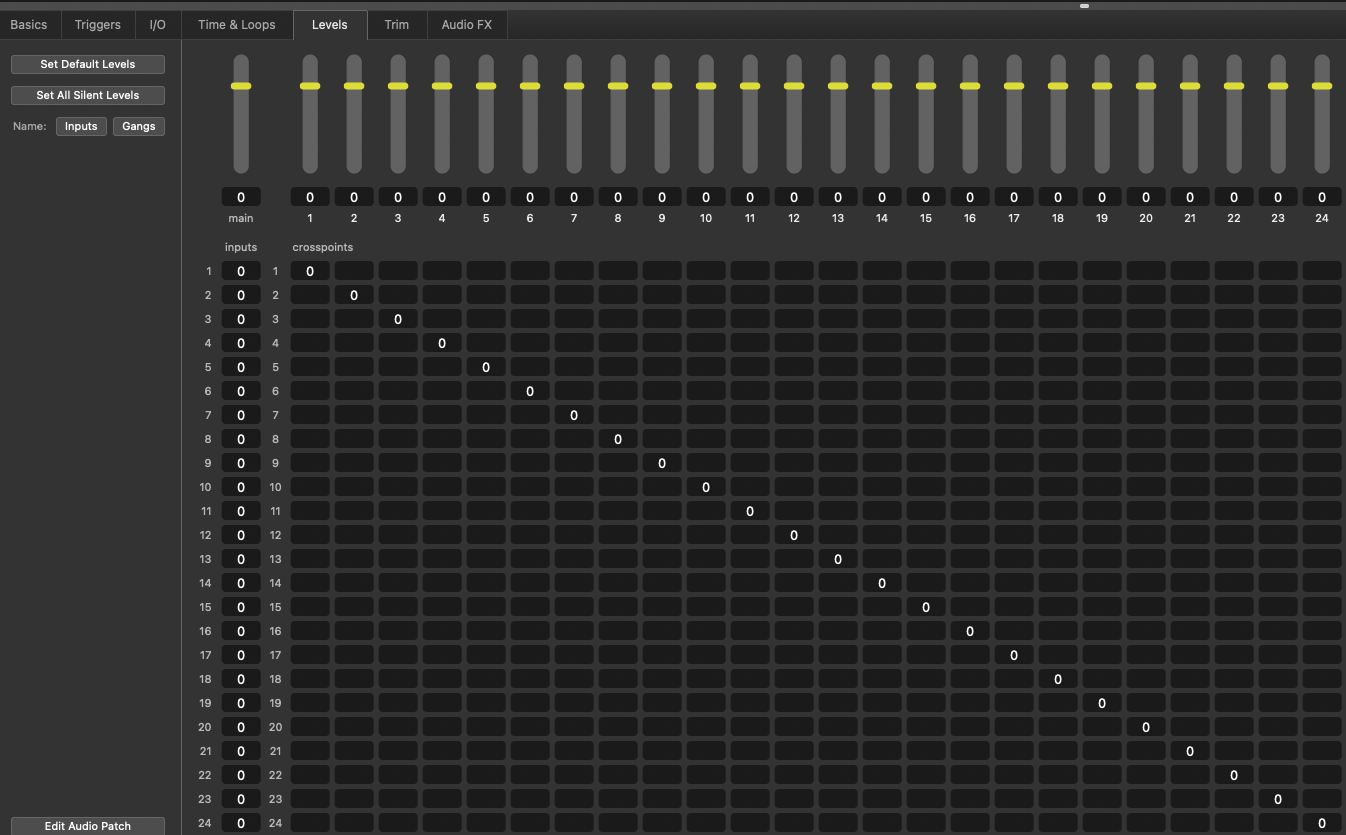
Since roughly 99.99 percent of shows using QLab are not likely to use such a configuration (although as a side note, this is basically exactly how the playback works for NBC’s live televised musicals), it’s probable that your workflow could be improved substantially by creating new default levels for Audio cues.
The examples in this chapter are programmed in QLab 5. Example downloads are provided for QLab 3, 4, and 5.
Setting Up The Workspace
In QLab 5, template levels and gangs are set in Workspace Settings → Templates → Cue Templates →Audio → Levels, and cue output names are set in Workspace Settings → Audio → Audio Outputs by clicking the Edit button to open the audio output patch editor. In QLab 5.3 and newer, each audio output patch can contain anywhere from 1 to 128 outputs.
In QLab 4, template levels and gangs are set in Workspace Settings → Cue Templates → Audio →Levels, and cue output names are set in Workspace Settings → Audio by clicking the Edit button to open the audio output patch editor.
In QLab 3, default levels and gangs are set in Workspace Settings → Audio Set Default Levels for New audio, and names are set by clicking Edit Patch to open the audio output patch editor.
We should begin by naming the cue outputs, so there is no confusion about which crosspoints we are setting.
Go to Workspace Settings → Audio → Audio Outputs and click the Edit button next to the patch you’re using. There, edit the cue output names in the Cue Outputs tab.
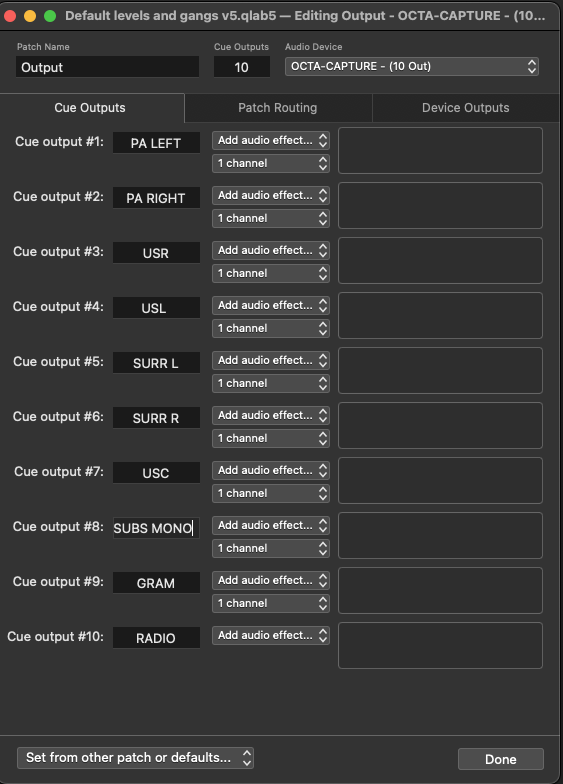
This will result in the names being shown below each slider in the Levels tab of the inspector.
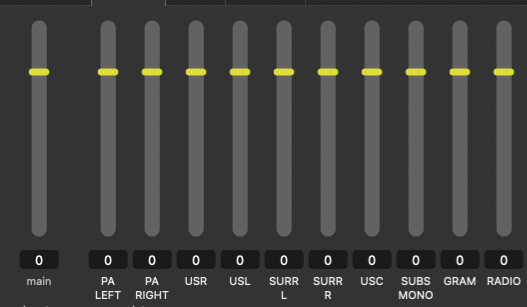
For the purposes of this example, we will assume that the bulk of our audio files have two channels. We will also assume that we want to manipulate levels primarily using the level sliders, only rarely altering crosspoint values.
Going back to our named channels, we have six outputs that are most likely going to be used as stereo pairs:
- PA LEFT and PA RIGHT
- USR and USL
- SURR L and SURR R
We also have four outputs that are going to be monaural:
- USC (upstage center)
- SUBS MONO
- GRAM (an onstage practical speaker)
- RADIO (another onstage practical)
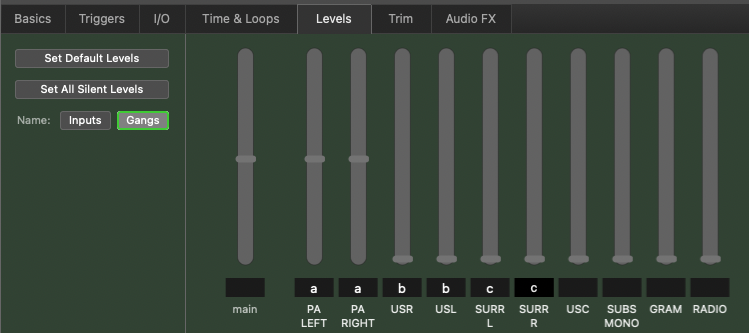
Given that most of our audio material is mixed as stereo (in this example), a useful set of default levels and crosspoints might look like this:
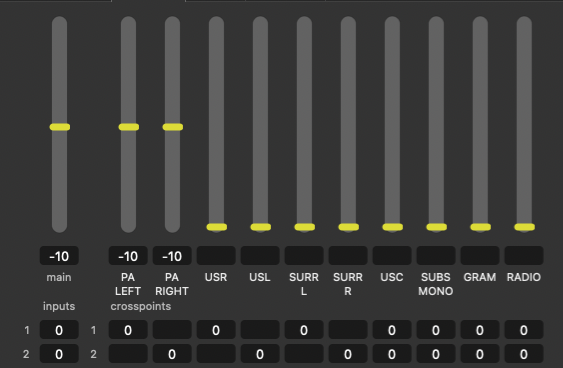
These levels are set in Workspace Template → Templates → Cue Templates by selecting Audio and then adjusting the levels in the Levels tab.
After making this change, when we drag an audio file into the workspace the new Audio cue will, by default, play from the main loudspeaker system (PA LEFT and PA RIGHT) at a reasonable volume. It also means that all the other sliders are immediately ready for use, and that sound can be sent to these outputs just by raising the slider levels. It also ensures that stereo audio files are premixed to mono for our four monaural feeds. (For simplicity, we have just set each crosspoint to 0 for the mono summing. If you are diligent you could use -6 so that the summed level isn’t louder than an output fed from a single crosspoint.)
It may also be useful to gang our three stereo cue outputs in pairs. This can also be achieved in the cue template by clicking Gangs and typing an identical string for each the crosspoints we wish to gang:
The example workspace shows the classic ‘non-diegetic’ to ‘diegetic’ audio curtain up sequence, otherwise known as “the one where the music starts front of house and crossfades to a record player or radio on stage.”
Here’s a screen recording of the sequence in a workspace with the defaults set as above:
Music in Demo video: “Stringed Disco” Kevin MacLeod (incompetech.com) Licensed under a Creative Commons Attribution 3.0 Unported License.
