Light cues allow you to set and save lighting commands which set levels for lighting parameters. Light cues behave similarly to Fade cue in that they have a specific duration and a curve shape which define how the cue's saved levels will be applied to the live lighting state over time. Light cues do not have a target; they can act upon one lighting instrument parameter, several, or every parameter for every light in your workspace.
When a Light cue is selected, the inspector shows the Basics tab and Triggers tab, used by all cues, as well as the following tabs:
The Levels tab shows the lighting commands contained by the cue.
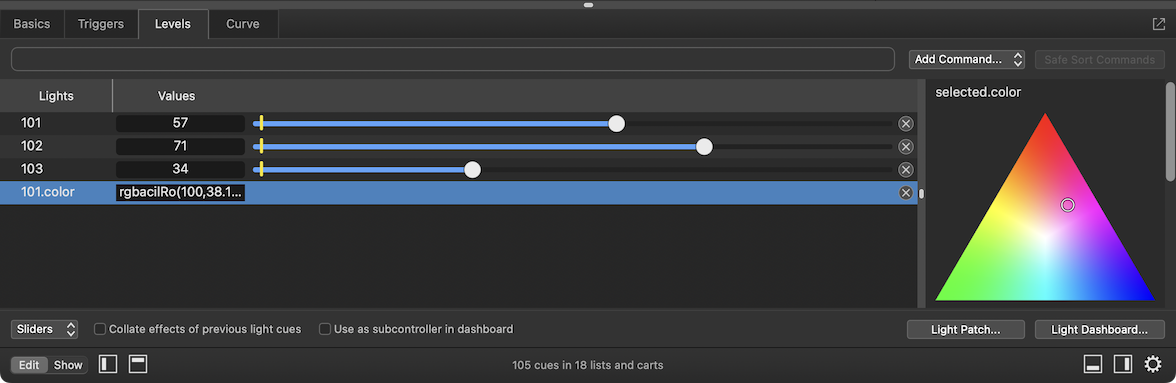
At the top of the Levels tab is the lighting command line. Lighting commands can be typed in to the command line to quickly add them to the current cue. You can learn more about lighting commands in the Lighting Command Language section of this documentation.
The Add Command pop-up menu contains an ordered list of all the instruments and light groups contained in the workspace. Selecting an instrument or light group will add a command for that instrument or light group to the cue. This is an alternative to the command line, and you can use whichever you prefer, or both. Instruments or light groups which already have commands in the cue will be greyed out.
The button sorts the light commands in the cue alphabetically, but since commands in a Light cue are interpreted in order from top to bottom, QLab considers whether moving the command would change the end result of the cue. If moving a particular command by sorting would change the result, that command is left un-sorted.
The commands contained by the Light cue are listed here in the order in which they were added to the cue, with the most recent addition at the bottom. You can view the cue's lighting commands as sliders, tiles, or text by using the pop-up menu at the bottom left of the command list.
In slider view, a yellow mark indicates the current value of each parameter. For example, in the screen shot above, instruments 101, 102, and 103 are all currently at 0.
Additive color, subtractive color, and pan/tilt virtual parameters do not display a slider since they represent a compound value of two or more parameters. When one of these virtual parameters is selected, the appropriate control appears on the right side of the command list.
Commands can be dragged up and down in the list to re-order them. You can change a command by typing values into the text fields or dragging the slider handles. Changes made in a Light cue will not be immediately reflected on stage; you need to run the cue in order to see those changes. In this way, editing a Light cue in the inspector is analogous to editing in "blind" on a traditional lighting console.
To edit "live", make your changes in the Light Dashboard.
You can remove a command from the cue by clicking on the on the right side of the command.
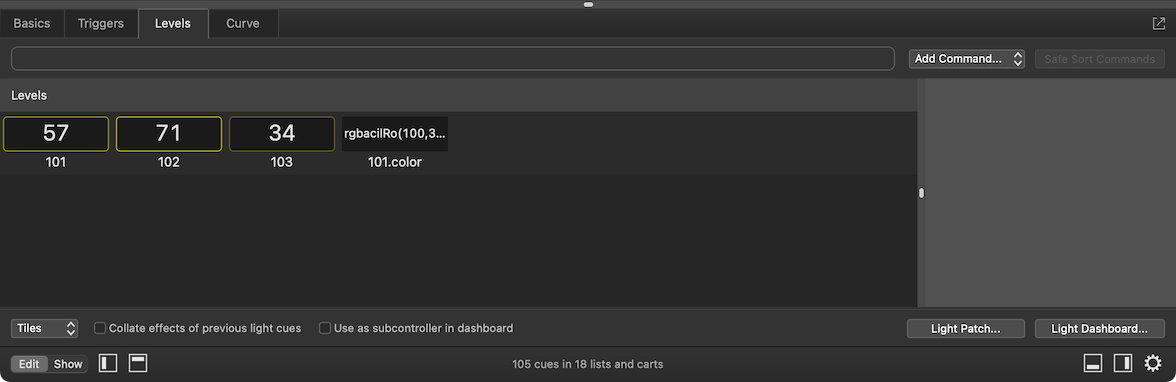
In tile view, a yellow outline reflects the level for each command; brighter for higher values.
Commands cannot be reordered in tile view. You can change a command by typing values into the text fields, or by clicking and dragging up or down on a tile.
Individual tiles cannot be selected; rows of tiles can be. When a row is selected, the appropriate controls appear on the right side of the command list.
You can delete a command from the cue in tile view by hovering your mouse over the tile, and clicking on the that appears.
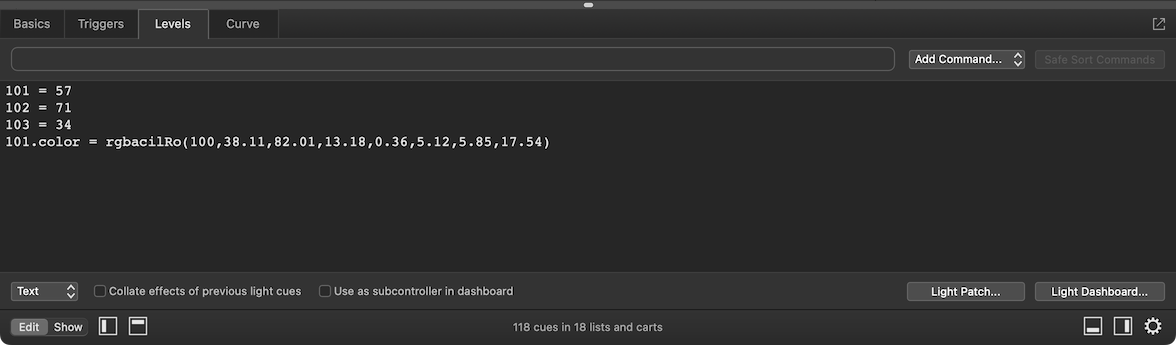
Text view gives you direct access to edit the light commands textually. You can delete a command from the cue in text view by selecting and deleting the text of that command, and reorder commands by copying and pasting.
Beneath the light command list are several controls.
The pop-up menu on the left allows you to choose amongst the slider, tile, or text view for the commands in this cue. Switching between these options doesn't change the cue itself, it simply changes the view.
When the box labeled Collate effects of previous light cues is checked, QLab will behave as though all prior Light cues in the same list have been run when running this Light cue. This will result in the exact same total look on stage regardless of which other cues have been run. Checking this box causes QLab's behavior to most closely resemble the behavior of a traditional lighting console.
When the box labeled Use as subcontroller in dashboard is checked, the cue becomes available to use as a subcontroller in the Light Dashboard. You can learn more about subcontrollers from the Subcontroller section of the Light Dashboard page of this manual.
The button opens the Light Patch tab of Workspace Settings → Light.
The button opens the Light Dashboard window.
The curve shape determines the rate at which the parameter or parameters recorded into the cue are adjusted over the course of the fade. The curve is drawn in yellow, overlaid on a grey grid. The curve on the left is used for levels which are increasing, and the curve on the right is used for levels which are decreasing.
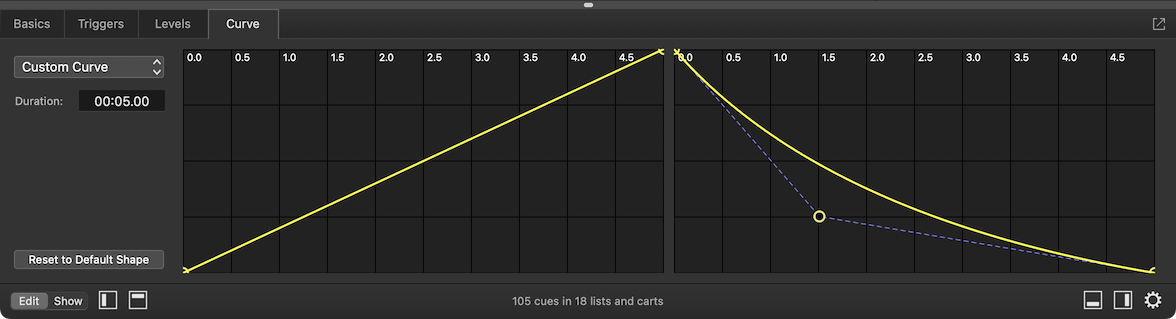
The pop-up menu at the top left of the tab allows you select one of four types of curves:
The Duration field lets you edit the duration of the cue. This is the same as editing the duration in the Basics tab or in the Duration column in the cue list.
The button resets the fade curve to its default state.
Light cues can become broken for the following reasons:
The cue contains at least one light command that does not conform to QLab's lighting command language, or perhaps includes a typo. Invalid light commands can only be viewed when the Levels tab is in text mode. Remove or correct the light command(s) in question to clear this error.
All light commands in the cue refer to instruments which are fully or partially unpatched. Add at least one light command for a patched instrument, or complete the patch for least one instrument to which the cue already refers to clear this error.
The cue contains one or more light commands that refers to an instrument whose definition is broken. Either remove the command(s), correct the definition(s), or use a different definition for the light(s) in question to clear this error.
The cue contains one or more light commands for lights that are patched via a USB DMX device that is disconnected. Either repatch the light(s) or reconnect the USB DMX device to clear this error.