The Audio Patch Editor
The Audio Patch Editor, which is available with a Pro Audio or Pro Bundle license, allows you to customize the routing of Cue Outputs to Device Outputs, and add audio effects to each. In this way, QLab can handle many of the tasks usually performed by a sound console or system processor.
To get to the Audio Patch Editor, go to Workspace Settings and choose Audio from the list on the left, then click the Edit button next to one of the eight audio patches.
The Audio Patch editor has three tabs, Cue Outputs, Device Routing, and Device Outputs. Above the tabs is a text field which lets you enter a custom name for the device patch. In the lower left corner of the window is a button labeled Reset to Defaults which will restore all controls and settings in the current audio patch to their defaults. In the lower right corner is a button labeled Done which commits the changes you’ve made, and closes the window.
Cue Outputs
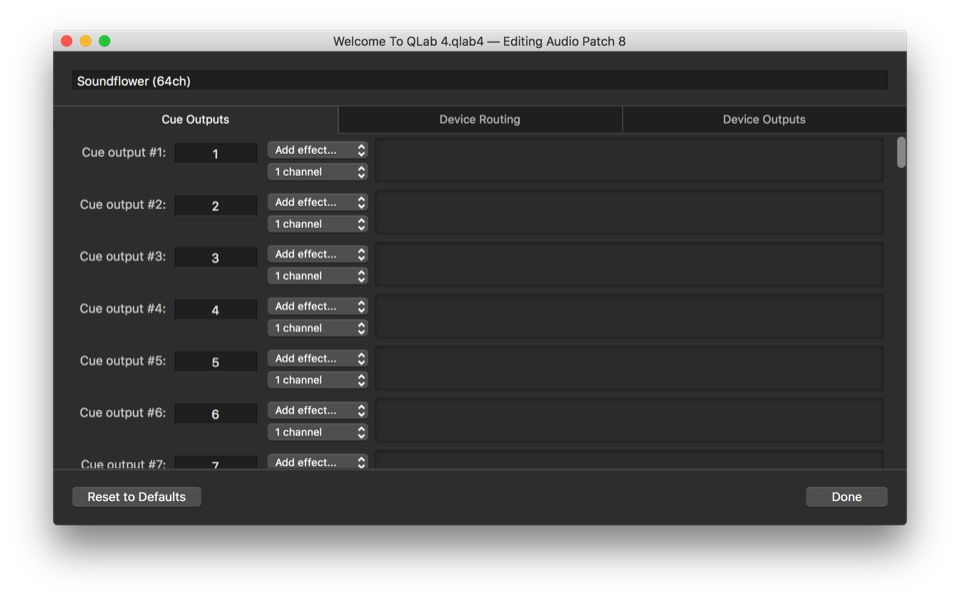
Each row in this tab represents one Cue Output, which are the columns in the matrix mixer in the Audio Levels tab of the inspector for Audio, Mic, Video, and Fade cues.
You can rename each cue output as needed by editing the text field which defaults to the number of the Cue Output. The text you enter will appear beneath the output sliders in the Audio Levels tab of the inspector. There’s not a lot of space there, so it’s best to use fairly brief names.
Next are two drop-down menus, which say Add effect… and 1 channel. The first drop-down menu allows you to choose an available AudioUnit effect to insert on the Cue Output. All AudioUnits installed on the Mac which appear to be compatible with QLab will be listed under the drop-down.
Some AudioUnits, notably Apple’s built in AUMatrixReverb, only work when they’re supplied with two channels of input, so for this reason the 1 channel drop-down can be used to gang a Cue Output with the following Cue Output. This ganging-together is only relevant to AudioUnits on Cue Outputs, and has no effect anywhere else in QLab.
AudioUnits inserted on Cue Outputs will appear in the area to the right of the drop-down menus. Effects are applied in order, left to right, and the number of effects per output is limited only by the processing power of your computer.
Device Routing
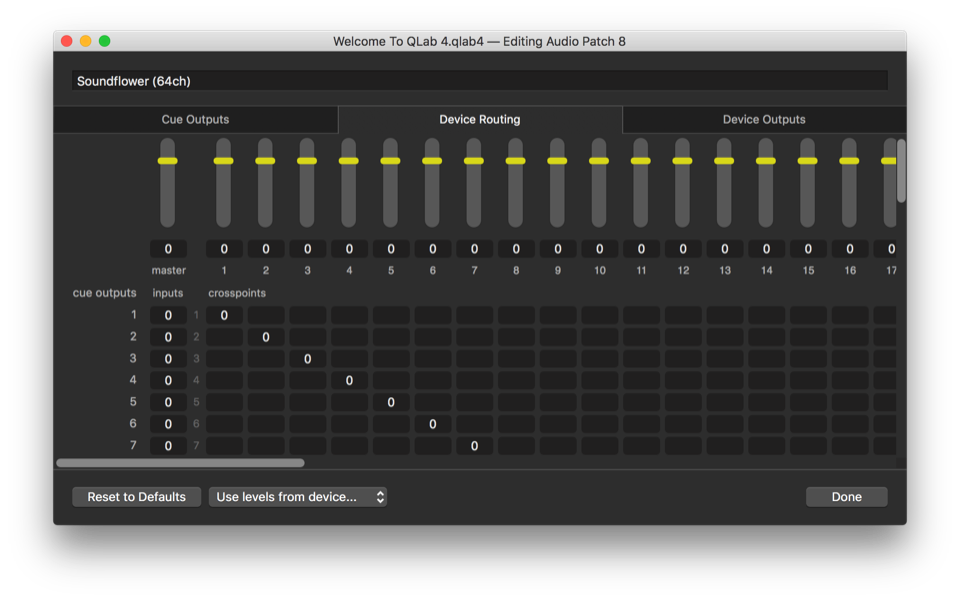
The matrix mixer in this tab allows you to do the actual routing of Cue Outputs to Device Outputs. Rows in the mixer represent Cue Outputs, and columns represent Device Outputs.
The overall volume of all audio output from your workspace can be adjusted using the master level control in the top left corner of this matrix.
Any Cue Output can be routed to any Device Output, or to more than one. You can, for example, route two different Cue Outputs to one Device Output, and use effects on only one of the Cue Outputs in order to effectively create an auxiliary effects send for that output.
Device Outputs
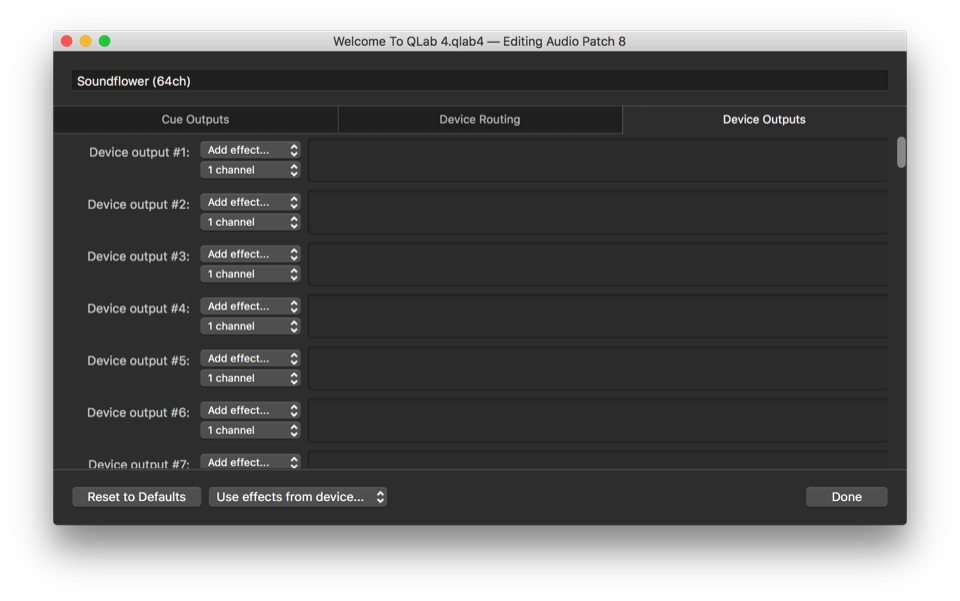
Each row in this tab represents one Device Output, which are the outputs made available by your audio device.
Device Outputs cannot be named in QLab, but other than that, the Device Outputs tab works precisely the same way as the Cue Outputs tab.
Still have a question?
Our support team is always happy to help.


