Video Cues
Video cues allow you to play videos and still images with precise control over timing, sizing and placement on screen, and levels and routing of embedded audio. Video cues require a target, which must be a video or image file on your computer, and a surface, which is a video output destination made up of one or more screens attached to your Mac (such as a monitor, LED wall, or projector).
For moving images, QLab can play files in any format supported by AVFoundation. We strongly recommend the following formats, listed in order of preference, for videos without transparency:
- ProRes 422 Proxy
- ProRes 422 LT
- PhotoJPG
- Hap*
For videos with transparency, also referred to as alpha channel support, we recommend:
- Hap Alpha*
- ProRes 4444
* Hap and Hap Alpha are terrific codecs created by the fine folks at VIDVOX. At the moment, the programming frameworks available to incorporate Hap support into QLab do not afford the very best performance that Hap offers. We hope to revise QLab’s Hap support in the near future.
Video cues can also play still images in all common formats. We recommend PNG and JPG. We do not recommend using PSD or PDF formats.
When a Video cue is selected, eight tabs will appear in the Inspector:
- Basics
- Triggers
- Displays & Geometry
- Time & Loops
- Audio Levels
- Audio Trim
- Audio Effects
- Video Effects
The Basics and Triggers tabs are the same for all cue types, and you can learn more about them from the page on the Inspector in the General section of this documentation.
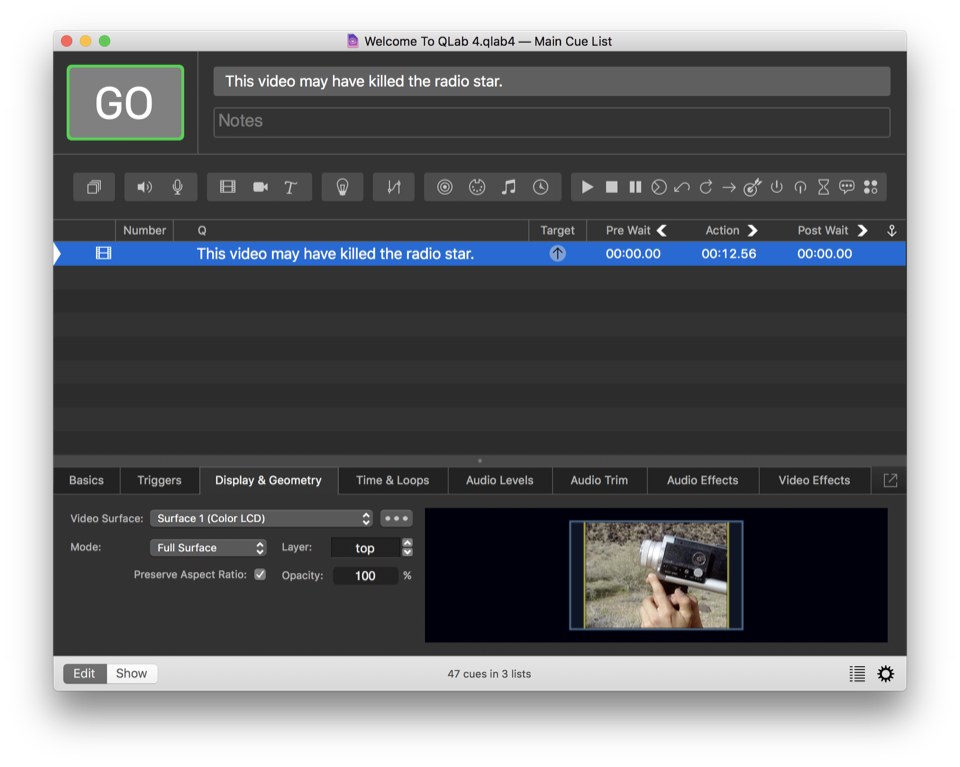
Display & Geometry
Video Surface. This drop-down menu will show a list of the surfaces defined in the workspace. Every Video cue must be assigned to exactly one surface. If you do not have a Pro Video or Pro Bundle license installed, Video cues will only play to the default video surface, which is the surface chosen in the Video cue’s cue template.
The ellipsis button is a shortcut to open the Surface Editor for the selected surface. You can learn more about surfaces from the page on the Surface Editor.
Mode. Select either Full Surface or Custom Geometry from the drop-down menu. Note that custom geometry is only available with a Pro Video or Pro Bundle license installed.
Layer. QLab handles layers differently from most media servers. Rather than thinking of layers as a container into which individual cues get placed, QLab treats layers as the order in which video cues stack up on top of each other. Therefore, multiple cues can be assigned to the same layer at the same time.
QLab has 1001 layers: top is closest to the viewer, then layer 999, then downwards to 1, then bottom. Any cues assigned to the top layer will play on top of all other currently running cues. Any cues assigned to the bottom layer will play beneath all other currently running cues. Cues assigned to the same layer as each other will stack in the order in which they are triggered. So, for example, if you have three cues assigned to layer 10, whichever cue is triggered last will appear on top of the other two, but any cue assigned to layer 11 will appear on top of all three cues on layer 10, regardless of the order in which those cues are triggered.
Opacity. Enter values from 0% to 100% to adjust the opacity of the cue.
Full Surface
Preserve Aspect Ratio. This checkbox is only available when Mode is set to Full Surface. When the box is checked, the video will be played as large as possible without altering its shape, and QLab will pad any remaining space on the surface with black. If the box is unchecked, the video will be stretched horizontally or vertically to fill every pixel of the surface.
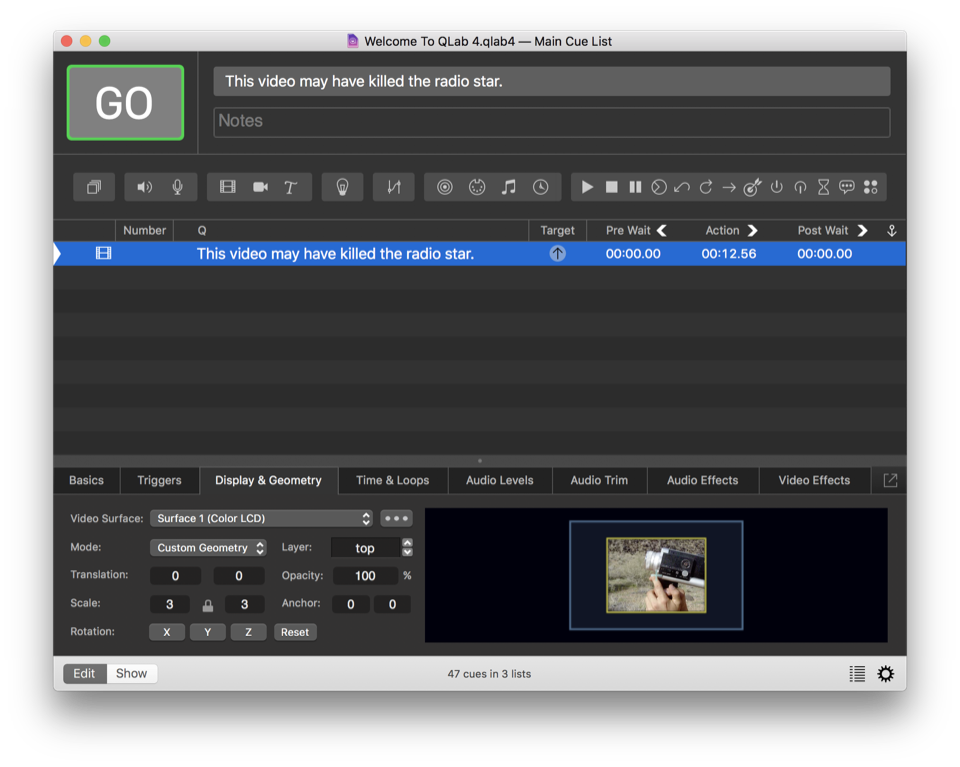
Custom Geometry
When Mode is set to Custom Geometry, more controls become available:
Translation. You can type in values to move the video along the X and Y axes, or click and drag the video within the preview thumbnail to the right of the controls to move it. Translation is measured in pixels relative to the center of the surface, so 0,0 is centered, negative values are down and left, and positive values are up and right.
Scale. You can type in values to enlarge or shrink the video, or scroll up and down on the preview thumbnail to the right of th controls. If the lock icon between the scale fields is closed, the aspect ratio of the video will be preserved while scaling. You can click the lock to open it and adjust the height and width independently.
Anchor. The anchor point is the point around which a video cue rotates, translates, and scales. The default anchor point is 0,0, which is the center of the image. You can type in values to move the anchor point, or click and drag the light blue cross in the preview thumbnail to the right of the controls.
Rotation. You can click and drag on the X, Y, or Z buttons to manipulate rotation around the desired axis, or click and type values into the text field that appears. You can start over by clicking the Reset button, which will only reset rotation and not any other attribute of the cue.
A Word About Quaternions
QLab uses quaternion math to handle rotation of Video cues in 3D space. The advantage to quaternions is that when fading a Video from one position to another, QLab will always produce smooth, natural motion. The tradeoff is that there is no useful way to numerically display the current rotational position of a cue. Therefore, when you adjust the rotation of a cue, you’ll see numbers in the pop-up which represent the degrees of single-axis rotation since you started this particular adjustment, not any sort of absolute measure.
Time & Loops
Time & Loops for Video cues operate the same as Time & Loops for Audio cues.
Audio Levels, Audio Trim, and Audio Effects
These three tabs allow you to control the audio associated with your Video cue. They operate the same as their corresponding tabs for Audio cues.
QLab can access all audio channels within the first audio track of your video. This can be confusing, since the words “channel” and “track” are often used interchangeably.
In the world of video files, one video can contain multiple tracks, and each track can contain up to sixteen channels. When a video is prepared for DVD production, the first track might represent the 5.1 surround mix, and thus contain six channels. The second track could be an alternate stereo mixdown, and thus contain two channels.
Since QLab can only access the first track of a video’s audio content, it’s important to keep these differences in mind when preparing your video files.
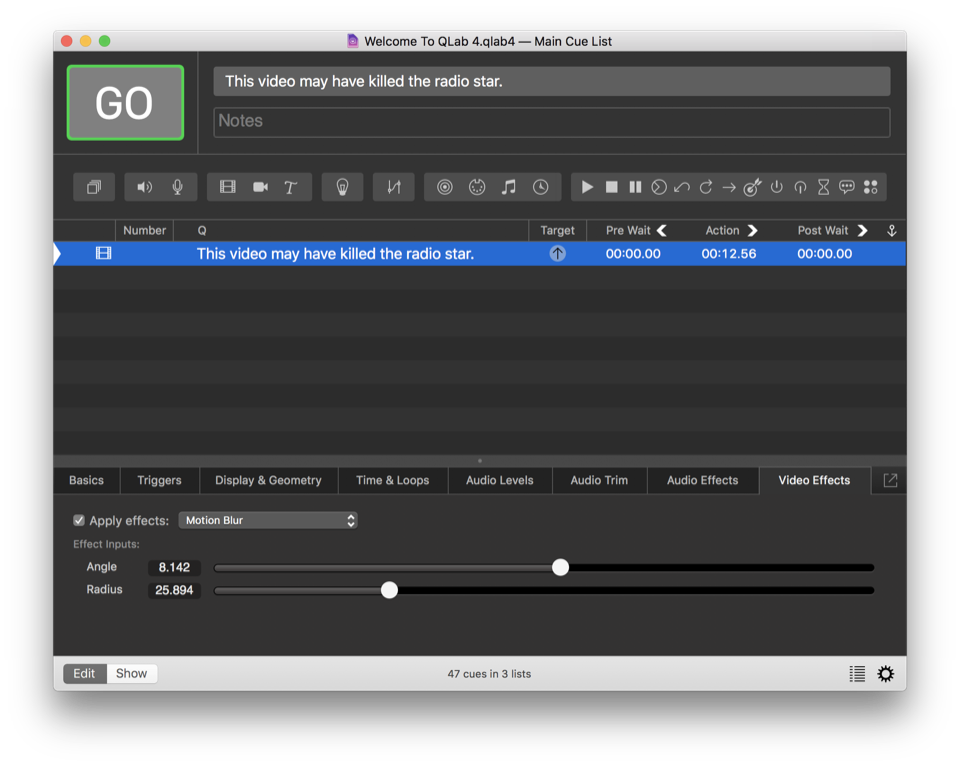
Video Effects
QLab gives you the ability to apply a wide range of live video effects to your Video cue. Please note that video effects can be extremely processor-intensive, and complicated effects have been known to bog down even very powerful Macs.
Only one video effect may be applied to a cue at a time.
Controls for each parameter of the effect will appear in the inspector; adjust each parameter individually using its appropriate control.
QLab comes with a variety of video effects pre-installed. You can also create your own effects using Quartz Composer. For a composition to be compatible with QLab, it must be an effect (which is one of several types of compositions that Quartz Composer can create) and it must publish an input named _protocolInput_Image which is where QLab will send video to the composition, and _protocolOutput_Image which is where QLab will receive the effected video from the composition.
To use your own effect, choose Custom Composition from the effects drop-down, and then either drag your effect into the area to the right of the drop-down, or double click on that area and choose your effect in the dialog box that opens.
Broken Cues
Video cues can become broken for the following reasons:
Invalid video file.
Either the file is missing or damaged, or it’s not one of the supported video file types.
No valid video surface assigned.
Assign a surface in the Display & Geometry tab of the inspector. You may also need to visit the Video section of Settings and create or adjust a surface to use with this cue.
There is a problem with this cue’s video surface.
Visit the Video section of Settings and create or adjust a surface to use with this cue.
A license is required to send video to anything other than the default surface.
You’ll need to either install a Pro Video or Pro Bundle license, or reassign this cue to the default surface for this workspace. The default surface is the surface chosen in the Video cue’s cue template.
A license is required to use custom geometry.
You’ll need to either install a Pro Video or Pro Bundle license, or set this cue’s mode to Full Screen in the Display & Geometry tab of the inspector.
A pro license is required to send video to a multi-screen surface.
You’ll need to either install a Pro Video or Pro Bundle license, or reassign this cue to a surface which doesn’t use multiple screens.
A pro license is required to send video to a partial screen.
You’ll need to either install a Pro Video or Pro Bundle license, or reassign this cue to a surface which doesn’t use partial screens.
A pro license is required to send video to a Blackmagic output device.
You’ll need to either install a Pro Video or Pro Bundle license, or reassign this cue to a surface which doesn’t use a Blackmagic output device.
A pro license is required to send video to Syphon output.
You’ll need to either install a Pro Video or Pro Bundle license, or reassign this cue to a surface which doesn’t use Syphon output.
A pro license is required to use video effects.
You’ll need to either install a Pro Video or Pro Bundle license, or remove the video effect from this cue.
Timecode triggers require a Pro license.
You’ll need to either install a Pro Audio or Pro Bundle license, or remove the timecode trigger from this cue.
Still have a question?
Our support team is always happy to help.


